Welcome to the Onshape forum! Ask questions and join in the discussions about everything Onshape.
First time visiting? Here are some places to start:- Looking for a certain topic? Check out the categories filter or use Search (upper right).
- Need support? Ask a question to our Community Support category.
- Please submit support tickets for bugs but you can request improvements in the Product Feedback category.
- Be respectful, on topic and if you see a problem, Flag it.
If you would like to contact our Community Manager personally, feel free to send a private message or an email.
How to make a part thinner

ali_e280
Member Posts: 10 ✭
Hi,
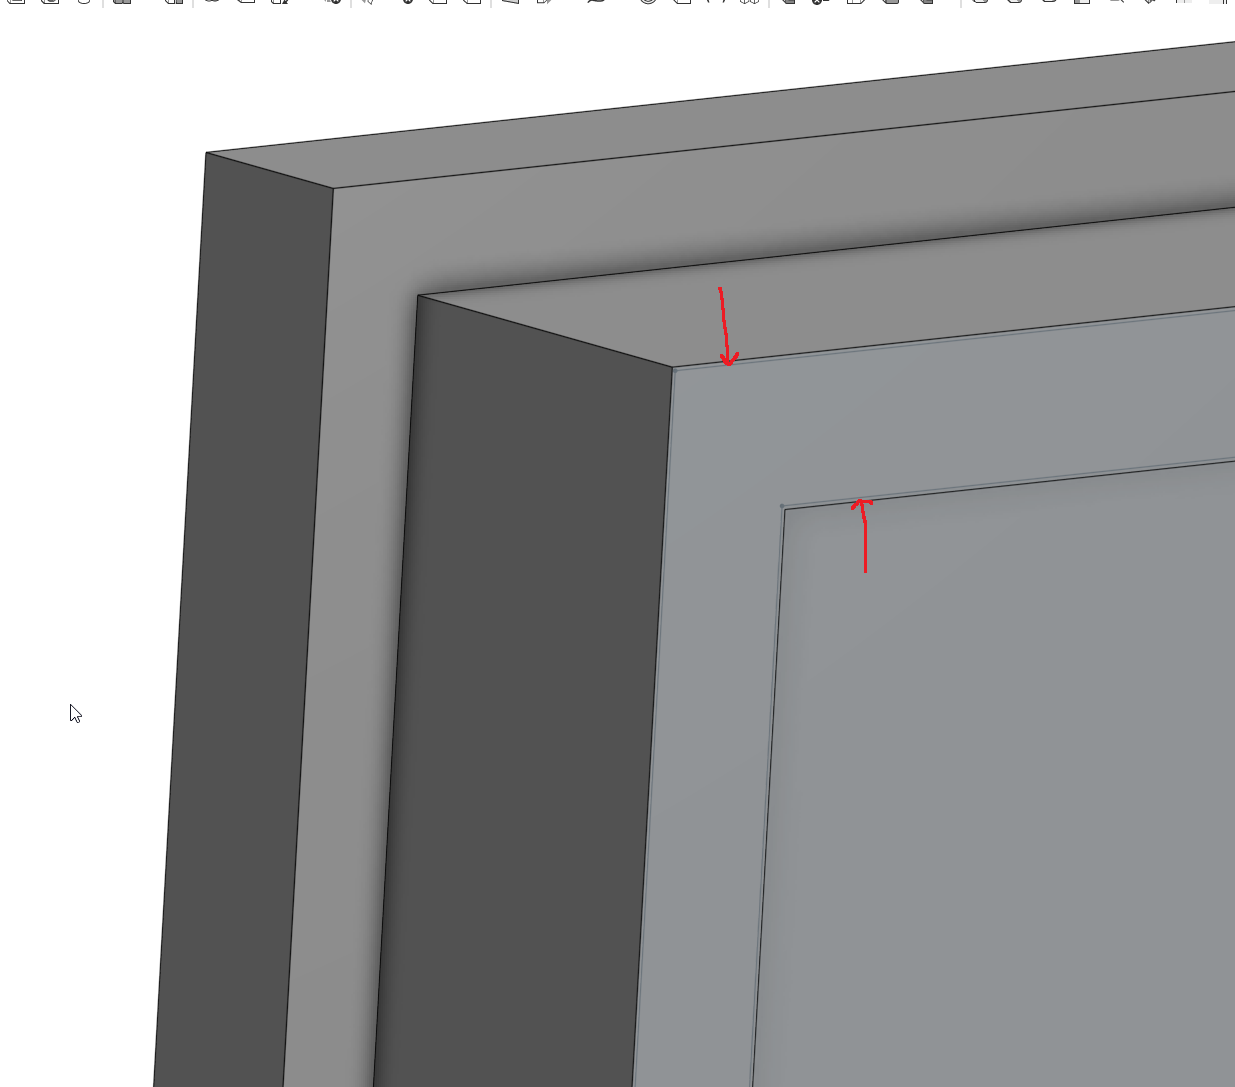
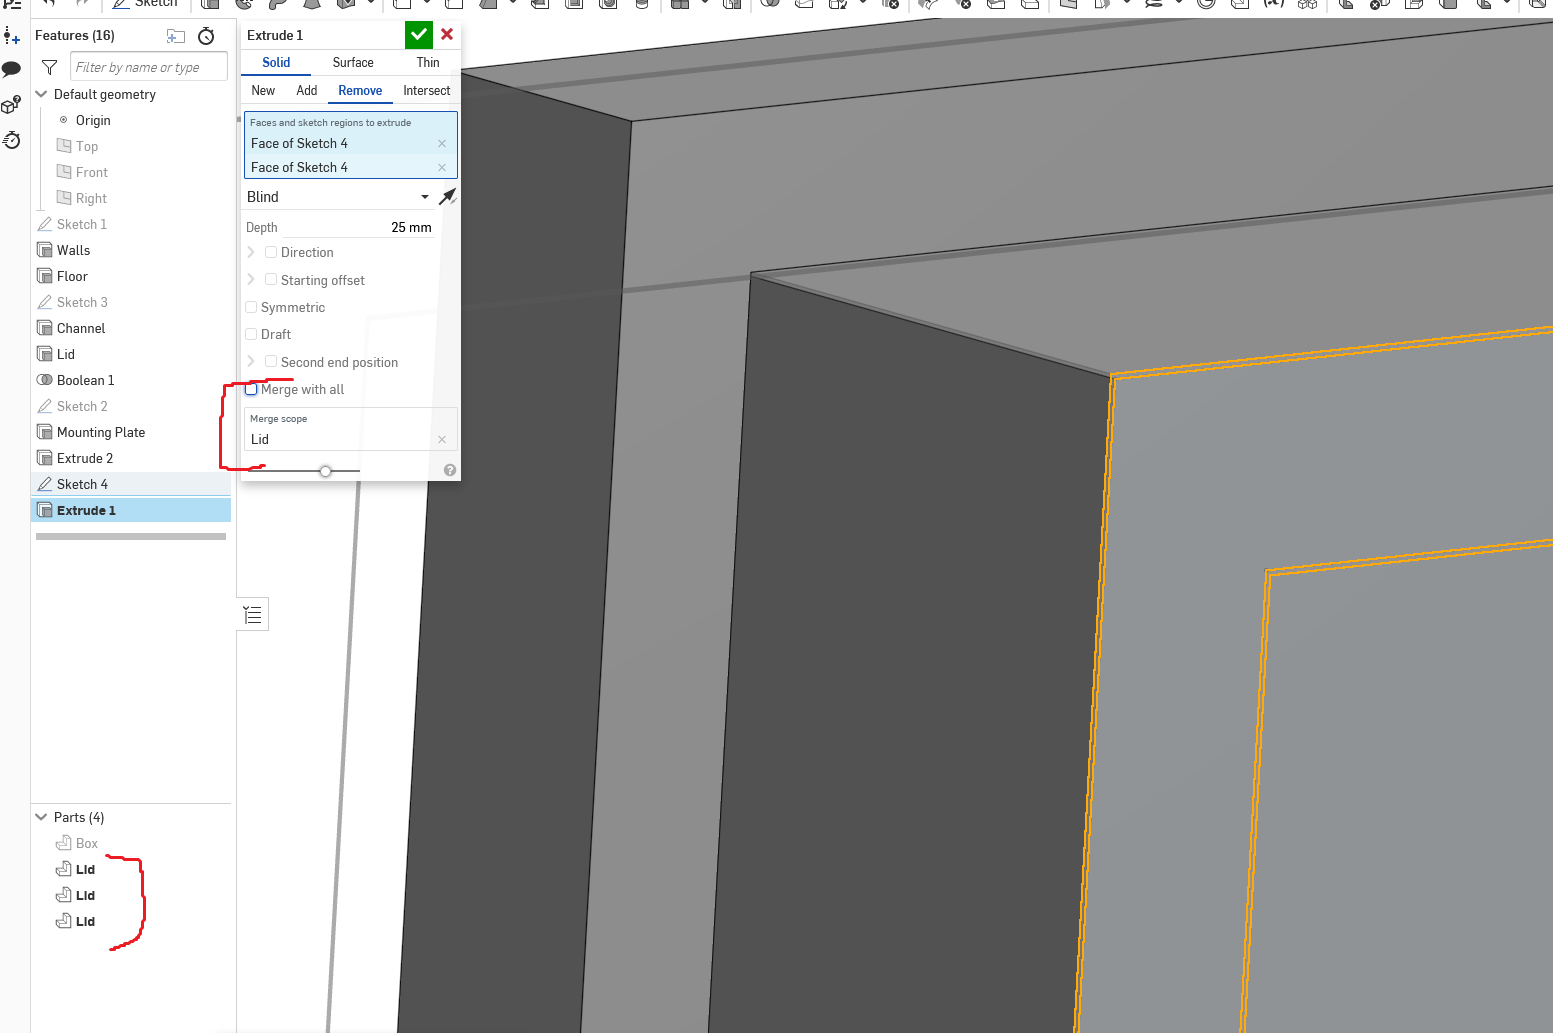
I created this part by using the boolean subtraction operation. This part, Lid, was the target and a different part was used as the tool. The fitment is slightly too tight and I need to make the marked extrusion slightly thinner. I don't know the best way to do this so I created two offset sketches and tried to use the extrude tool to shave the part. The extrusion works, but 2 additional parts are created regardless of whether "Merge with all" is selected.
1. Is there an elegant way to slightly shave parts?
2. Why does the extrusion remove create 2 additional parts?
0
Best Answer
-

2

Answers
-
Try the Move Face tool

If you can share your document someone can take a look2 -
Thank you. I will have to play with the Move Face tool. I don't think it was covered in the basic video tutorial.Do you know why the extrusion is creating multiple copies of the part?0
-
If you could share your document I could take a look0
-
It's the Lid that has the problem.
0 -
You are cutting right through the lid so it's creating disconnected parts. Not sure what you are trying to do / expected to happen with that cut...
If you want that part to be narrower you should just edit sketch3 and make it narrower... Or just use the "move face" as @GWS50 suggested (or add a clearance to your boolean)
0 -
eric_pesty said:You are cutting right through the lid so it's creating disconnected parts. Not sure what you are trying to do / expected to happen with that cut...
If you want that part to be narrower you should just edit sketch3 and make it narrower... Or just use the "move face" as @GWS50 suggested (or add a clearance to your boolean)I had selected up to next as the extrusion limit so I expected the cut to stop when it reaches the perpendicular surface. I think I know what I did wrong. I should have selected up to face, not up to next.Editing sketch 3 wouldn't work because the Boolean operation would just adjust automatically. You mentioned adding a clearance to the boolean, but how? That would be the perfect way to make the target cut slightly larger/smaller than the tool. I only see an Offset option in the Boolean tool. Is there a way to add a clearance value to the Boolean tool?0 -
2 -
Are you 3D printing this? If so, it's usually a good idea to incorporate a lead-in angle for a lid to a bottom. Also, I'd personally get rid of the full tongue and groove, and make it a half-lap. Below is a design common in injection molded boxes.
Here is the CAD if you want to copy the modeling technique:
https://cad.onshape.com/documents/1cb6823e7f9cd5a4abab5faa/v/b071110563b323ab063b8511/e/cadad55b3e2062df53f03c46

0 -
eric_pesty said:Thank you. I think this is exactly what I was looking for. Now I just have to play around with the faces to only offset the sides I want.
0 -
Have you tried move face tool?
0