Welcome to the Onshape forum! Ask questions and join in the discussions about everything Onshape.

First time visiting? Here are some places to start:
  1. Looking for a certain topic? Check out the categories filter or use Search (upper right).
  2. Need support? Ask a question to our Community Support category.
  3. Please submit support tickets for bugs but you can request improvements in the Product Feedback category.
  4. Be respectful, on topic and if you see a problem, Flag it.

If you would like to contact our Community Manager personally, feel free to send a private message or an email.

How to make a part thinner

ali_e280ali_e280 Member Posts: 10
Hi,
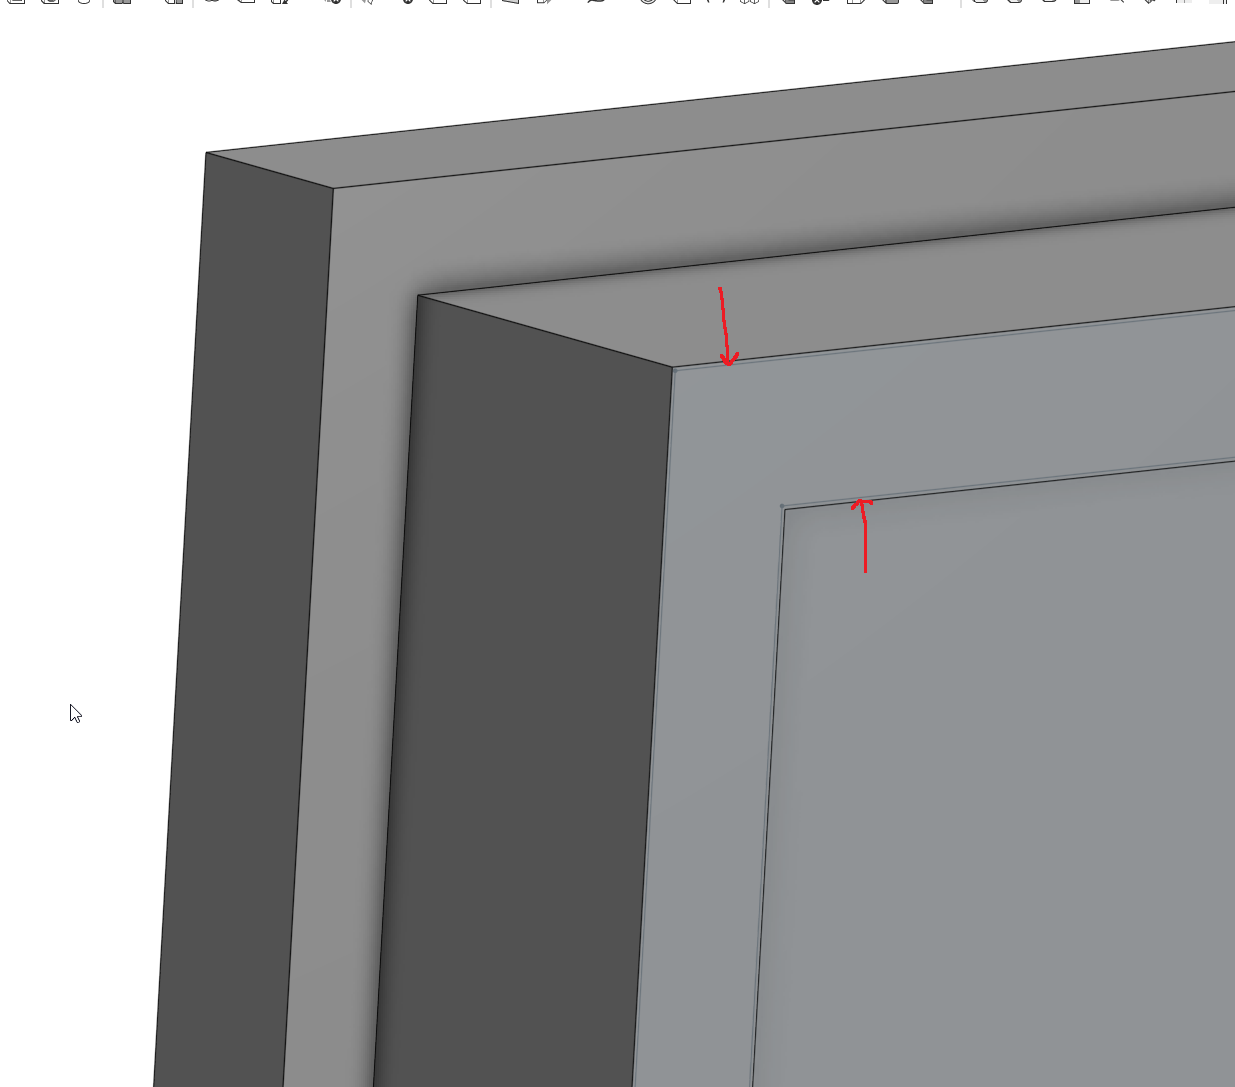
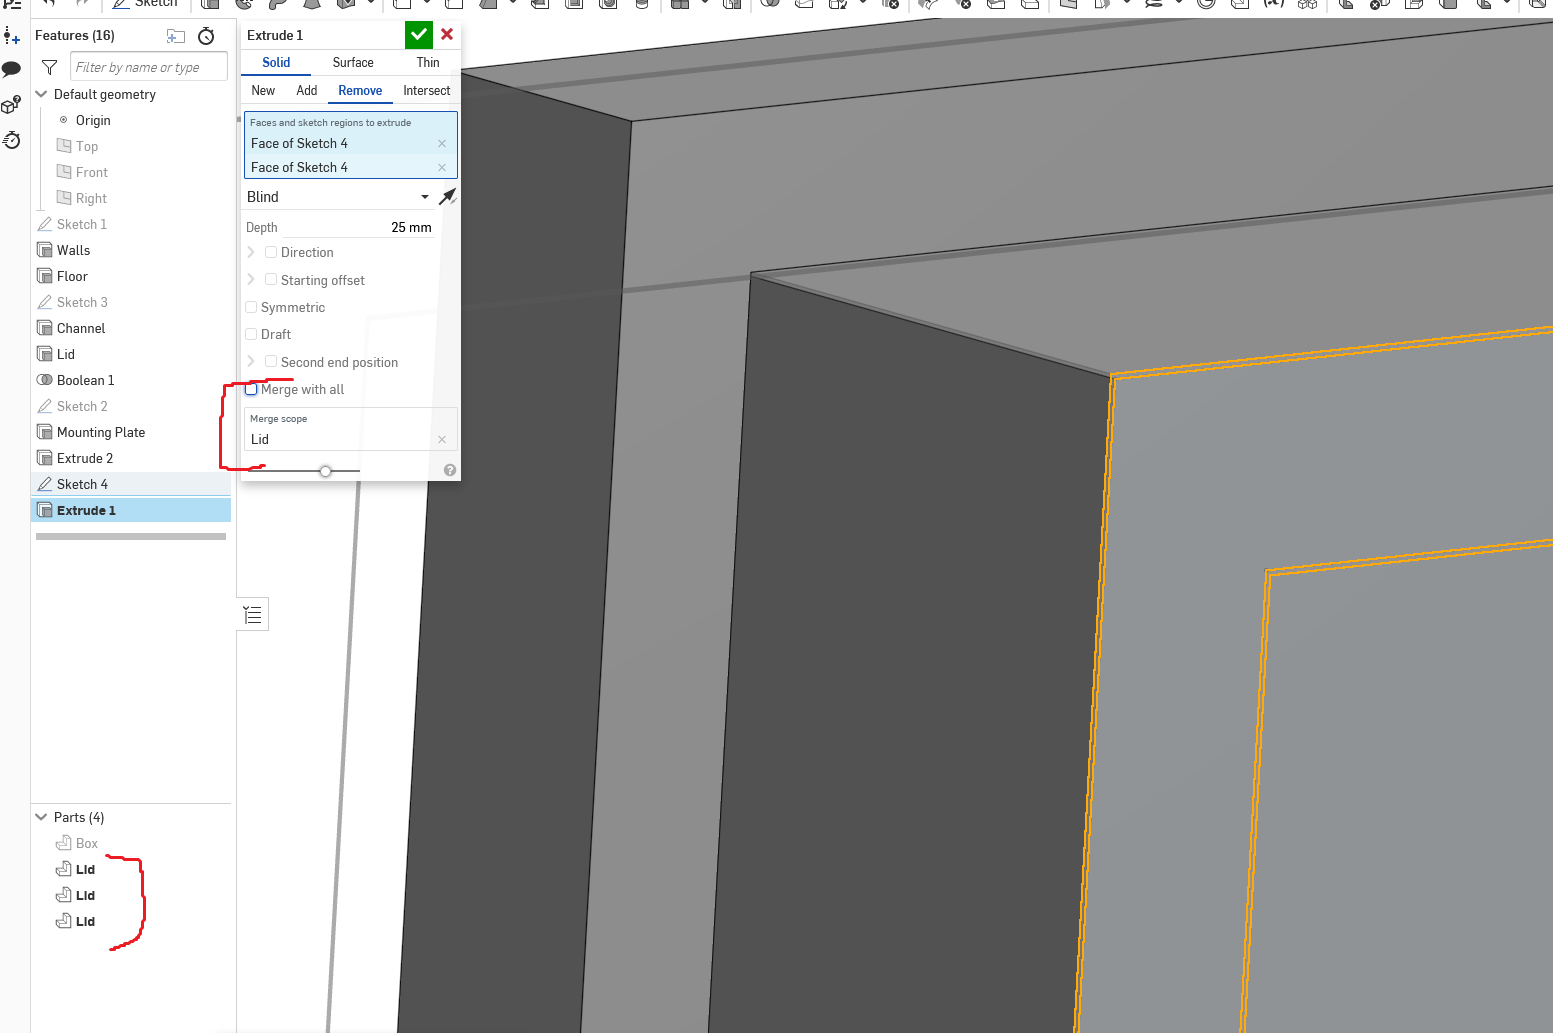
I created this part by using the boolean subtraction operation.  This part, Lid, was the target and a different part was used as the tool.  The fitment is slightly too tight and I need to make the marked extrusion slightly thinner.  I don't know the best way to do this so I created two offset sketches and tried to use the extrude tool to shave the part.  The extrusion works, but 2 additional parts are created regardless of whether "Merge with all" is selected.

1. Is there an elegant way to slightly shave parts?
2. Why does the extrusion remove create 2 additional parts?


Best Answer

Answers

  • GWS50GWS50 Member Posts: 443 PRO
    Try the Move Face tool


    If you can share your document someone can take a look
  • ali_e280ali_e280 Member Posts: 10
    Thank you. I will have to play with the Move Face tool.  I don't think it was covered in the basic video tutorial.

    Do you know why the extrusion is creating multiple copies of the part?
  • GWS50GWS50 Member Posts: 443 PRO
    If you could share your document I could take a look
  • eric_pestyeric_pesty Member Posts: 2,096 PRO
    edited March 2024
    You are cutting right through the lid so it's creating disconnected parts. Not sure what you are trying to do / expected to happen with that cut...

    If you want that part to be narrower you should just edit sketch3 and make it narrower... Or just use the "move face" as @GWS50 suggested (or add a clearance to your boolean)

  • ali_e280ali_e280 Member Posts: 10
    You are cutting right through the lid so it's creating disconnected parts. Not sure what you are trying to do / expected to happen with that cut...

    If you want that part to be narrower you should just edit sketch3 and make it narrower... Or just use the "move face" as @GWS50 suggested (or add a clearance to your boolean)


    I had selected up to next as the extrusion limit so I expected the cut to stop when it reaches the perpendicular surface.  I think I know what I did wrong.  I should have selected up to face, not up to next.

    Editing sketch 3 wouldn't work because the Boolean operation would just adjust automatically.  You mentioned adding a clearance to the boolean, but how?  That would be the perfect way to make the target cut slightly larger/smaller than the tool.  I only see an Offset option in the Boolean tool.  Is there a way to add a clearance value to the Boolean tool?
  • eric_pestyeric_pesty Member Posts: 2,096 PRO
    Answer ✓


  • nick_papageorge_dayjobnick_papageorge_dayjob Member, csevp Posts: 928 PRO
    edited March 2024
    Are you 3D printing this? If so, it's usually a good idea to incorporate a lead-in angle for a lid to a bottom. Also, I'd personally get rid of the full tongue and groove, and make it a half-lap. Below is a design common in injection molded boxes.

    Here is the CAD if you want to copy the modeling technique:
    https://cad.onshape.com/documents/1cb6823e7f9cd5a4abab5faa/v/b071110563b323ab063b8511/e/cadad55b3e2062df53f03c46


  • ali_e280ali_e280 Member Posts: 10


    Thank you.  I think this is exactly what I was looking for.  Now I just have to play around with the faces to only offset the sides I want.

Sign In or Register to comment.