Welcome to the Onshape forum! Ask questions and join in the discussions about everything Onshape.
First time visiting? Here are some places to start:- Looking for a certain topic? Check out the categories filter or use Search (upper right).
- Need support? Ask a question to our Community Support category.
- Please submit support tickets for bugs but you can request improvements in the Product Feedback category.
- Be respectful, on topic and if you see a problem, Flag it.
If you would like to contact our Community Manager personally, feel free to send a private message or an email.
Best Of
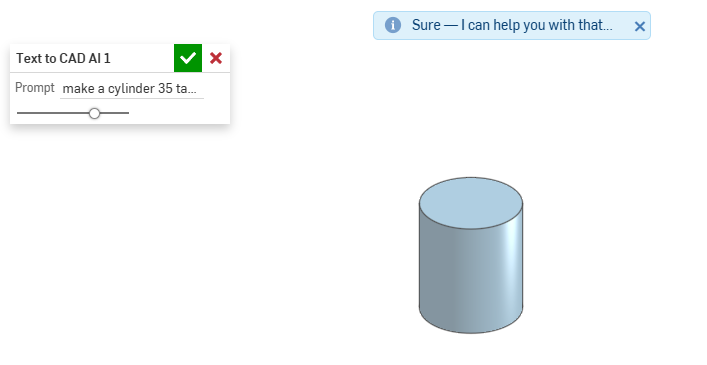
Re: New feature - Text to CAD... entirely within featurescript
Added some extra AI in just for you

Re: New feature - Text to CAD... entirely within featurescript
I was afraid of Onshape beating me to the punchline with actual AI.
Re: Motion Limits Bug(?): Reset & Apply Min/Max Limits
I think I see what you mean with the limit position, applying the limit position does only apply to one instance, but reset works for all. I would suggest submitting a ticket for that!
You might be able to leverage "named positions" depending on what your end goal is:

Re: New feature - Text to CAD... entirely within featurescript
It doesn't even have — in the results… How are we going to tell it it was made by AI?

Re: Custom Feature: Custom Font Text
There's an IR for single line fonts:
Here's a very very deep dive into the font I want to see available:
 S1mon
S1mon
Re: SET COLOUR, MASS, AND CUSTOM PROPERTY OF GEOMETRY CREATED BY FEATURE IN ONE GO
@mitchell_braun924 I would revisit my original feature code. Currently, my feature runs without any errors.

Re: Improvements to Onshape - March 13, 2026
The updates to the edit curve will be helpful, but I have already found that you can not deselect-selected points by simply selecting another point. To deselect the multipoint selection you either have to clear the control point indices in the selection box or deselect the points on the actual curve. Previously it would automatically deselect points when choosing another point and this made micro adjustments easier. It seems that this is only an issue when in XYZ with multipoint selection, as both UVN options do not allow for multipoint selection. I would love to have the option of turning multipoint selection on and off for XYZ, thoughts?

Re: New Onshape API Limits
@S1mon: You don't need to be an Enterprise user; the paid API plans are available for purchase for Standard and Professional users as well. and they'll get you sorted.
I would strongly recommend "taking ownership" of code that you're generating with any AI tool - be it client side code that's calling Onshape API or FeatureScript. You should know and fully understand what that code is doing since it is operating on your behalf with your Onshape account keys.
@Konst_Sh: Submitting an App in the Onshape App Store with the sole purpose of bypassing Onshape's API limits, or enabling end users to bypass those limits, will not get very far. This is documented here https://onshape-public.github.io/docs/app-store/ and in the API Agreement (shown on first login to the dev portal).

Re: Improvements to Onshape - February 20, 2026
🤨That's Excel for you…
Kinda spoiled with Onshape where things behave (mostly…) predictably and consistently!
Re: New feature - Text to CAD... entirely within featurescript
Couple weeks early for the April 1st posting there @Caden_Armstrong.
I do find the amount of AI CAD hype posting is getting ridiculous lately. The number of projects I've seen where people get excited to see a server blade melting to produce cylinders and cubes in vaguely correct locations but with zero consideration for manufacturability. AI has a long uphill road to climb before prompt to CAD is a viable product, and even if it ever gets there (and this is kind of true for most applications of AI) the foundations laid for such a product are likely better used creating deterministic and efficient tools rather than the AI being the product.
