Welcome to the Onshape forum! Ask questions and join in the discussions about everything Onshape.
First time visiting? Here are some places to start:- Looking for a certain topic? Check out the categories filter or use Search (upper right).
- Need support? Ask a question to our Community Support category.
- Please submit support tickets for bugs but you can request improvements in the Product Feedback category.
- Be respectful, on topic and if you see a problem, Flag it.
If you would like to contact our Community Manager personally, feel free to send a private message or an email.
Best Of
Re: Tabs & Slots
@mohamad_dawood I had the same barrier to entry when I made the transition from Solidworks and found the same issues with the existing tab and slot features that people had developed. Love that laser joint script, except it doesn't work on sheet metal parts which is disqualifying for my workflows. Also none of the public solutions work on curved edges. I worked with @Caden_Armstrong to custom develop a sheet metal version of tab and slot for our company, but there are some small things that don't work the same was as it does in Solidworks that I'm now going back and refactoring to get better stability and patterning features to make it work more like expected. Should be publishing it here in the next week or two when I'm done with the rewrite.

Re: Magic Mana Symbol
Behold the power of Onshape public document sharing:
https://cad.onshape.com/documents/c47efa2ae118b4975ba14c7b/w/4439ee777993528b7a24cb6d/e/e0dfb720969ffe7f992846a0
 jnewth
Re: How Can I Arbitrarily Union All Parts?
With query variables, released last week, you don't actually need a custom feature: https://cad.onshape.com/documents/1d6e0377cf0f750eff7459ce/w/1c7134042e9bafff5eb91889/e/7153a5bd1aeae6d9dbaf9635
 _anton
NEW Video series: Expressions in Onshape
Onshape does a good job at blurring the lines between CAD and code without being overwhelming for beginners. One way this happens is by allowing access to FeatureScript functions in any input field. In this series I'm covering pretty much everything I know about it from basic to advanced. Videos 1 and 2 are out now with another 4 or so on the way.
Part 1: Math and Units
Part 2: Number manipulation

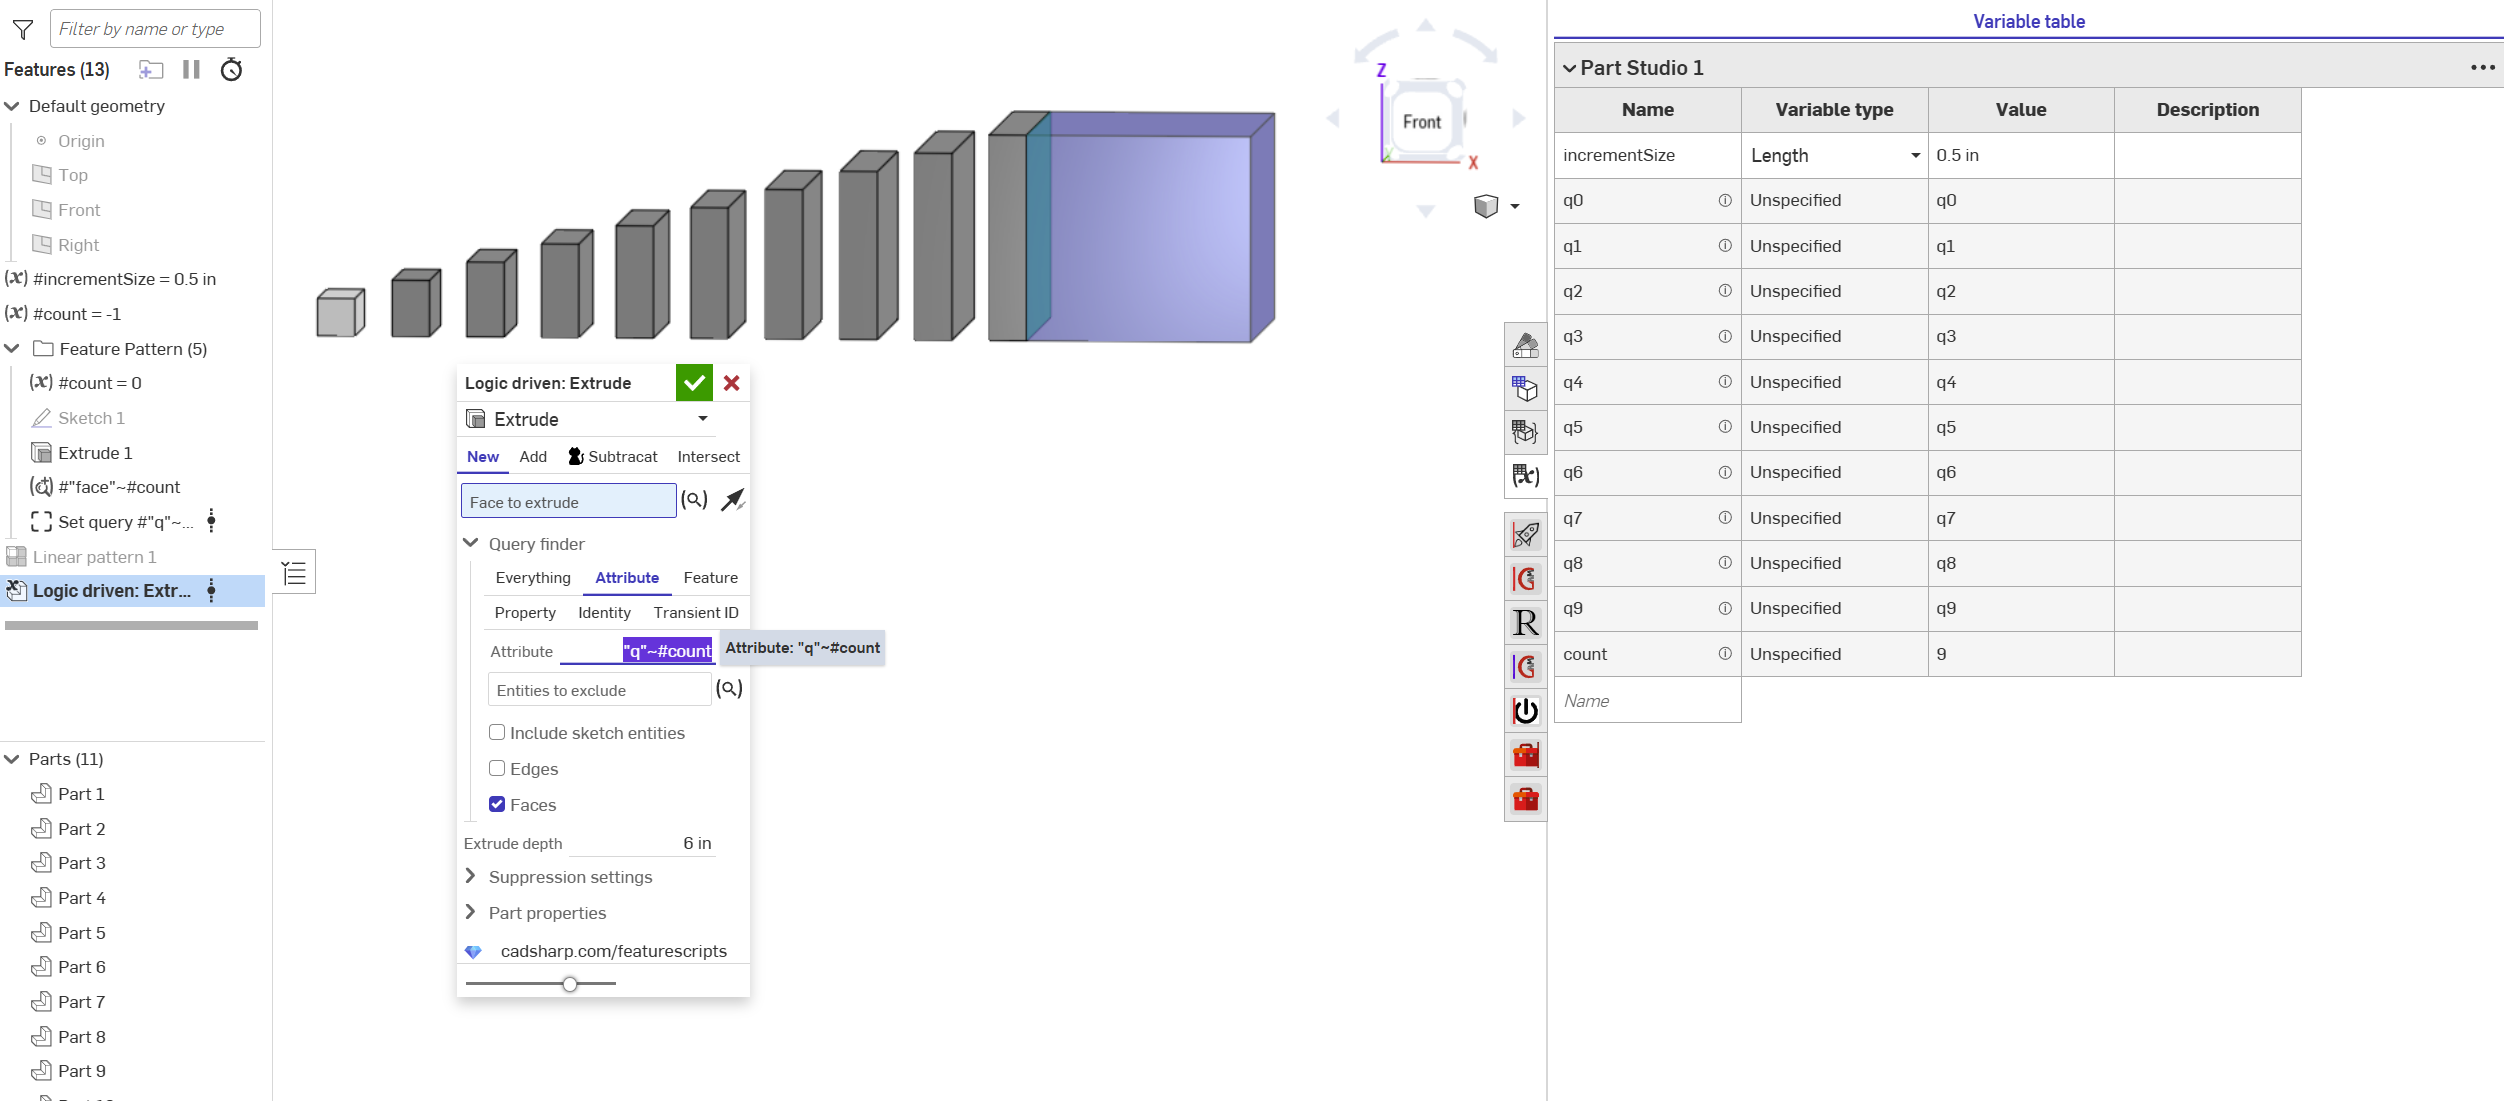
Re: Improvements to Onshape - August 29th, 2025
Ok, guess my Query Finder isn't deprecated just yet.
I've added an option called "Convert to Query Variable" to the
 Set Query Attribute feature. This will let us still use attributes and expressions but convert the results to a Query Variable. Not ideal as it takes extra steps but the functionality is there.
Query Variable Feedback:
- The implementation is beautiful, but doesn't work with my main use cases for it. I'm less worried about it cluttering up the tree than I am missing functionality.
- Doesn't allow expressions in the name field
- Isn't working in feature patterns
- When getting variables, I can't use an expression
These are some important points. If we can't use expressions, it really limits the amount of automation we can achieve.

Re: Remove tap drill size from hole callout on drawing
Just adding my voice to this in favor of making tap drill sizes optional in the hole callout. It seems like everyone has a different opinion on whether they want to include it or not; making it optional in the drawing would make everyone satisfied. For us, it's useful in some situations, and clutter in others. Our shop prefers drawings without them unless it's a special circumstance.
Re: I don't see the new "query variable" feature in existing documents
@eric_pesty that takes all the fun out of it though. How am I supposed to spike my team's anxiety now if I'm not required to throw weeks of their work in the trash temporarily?