Welcome to the Onshape forum! Ask questions and join in the discussions about everything Onshape.
First time visiting? Here are some places to start:- Looking for a certain topic? Check out the categories filter or use Search (upper right).
- Need support? Ask a question to our Community Support category.
- Please submit support tickets for bugs but you can request improvements in the Product Feedback category.
- Be respectful, on topic and if you see a problem, Flag it.
If you would like to contact our Community Manager personally, feel free to send a private message or an email.
Can someone provide me a step by step guide in developing a headphone stand

Need the size limits to be 256x256mm
Best Answers
-
Okay, now we have something to work with.
Start with a sketch like this:
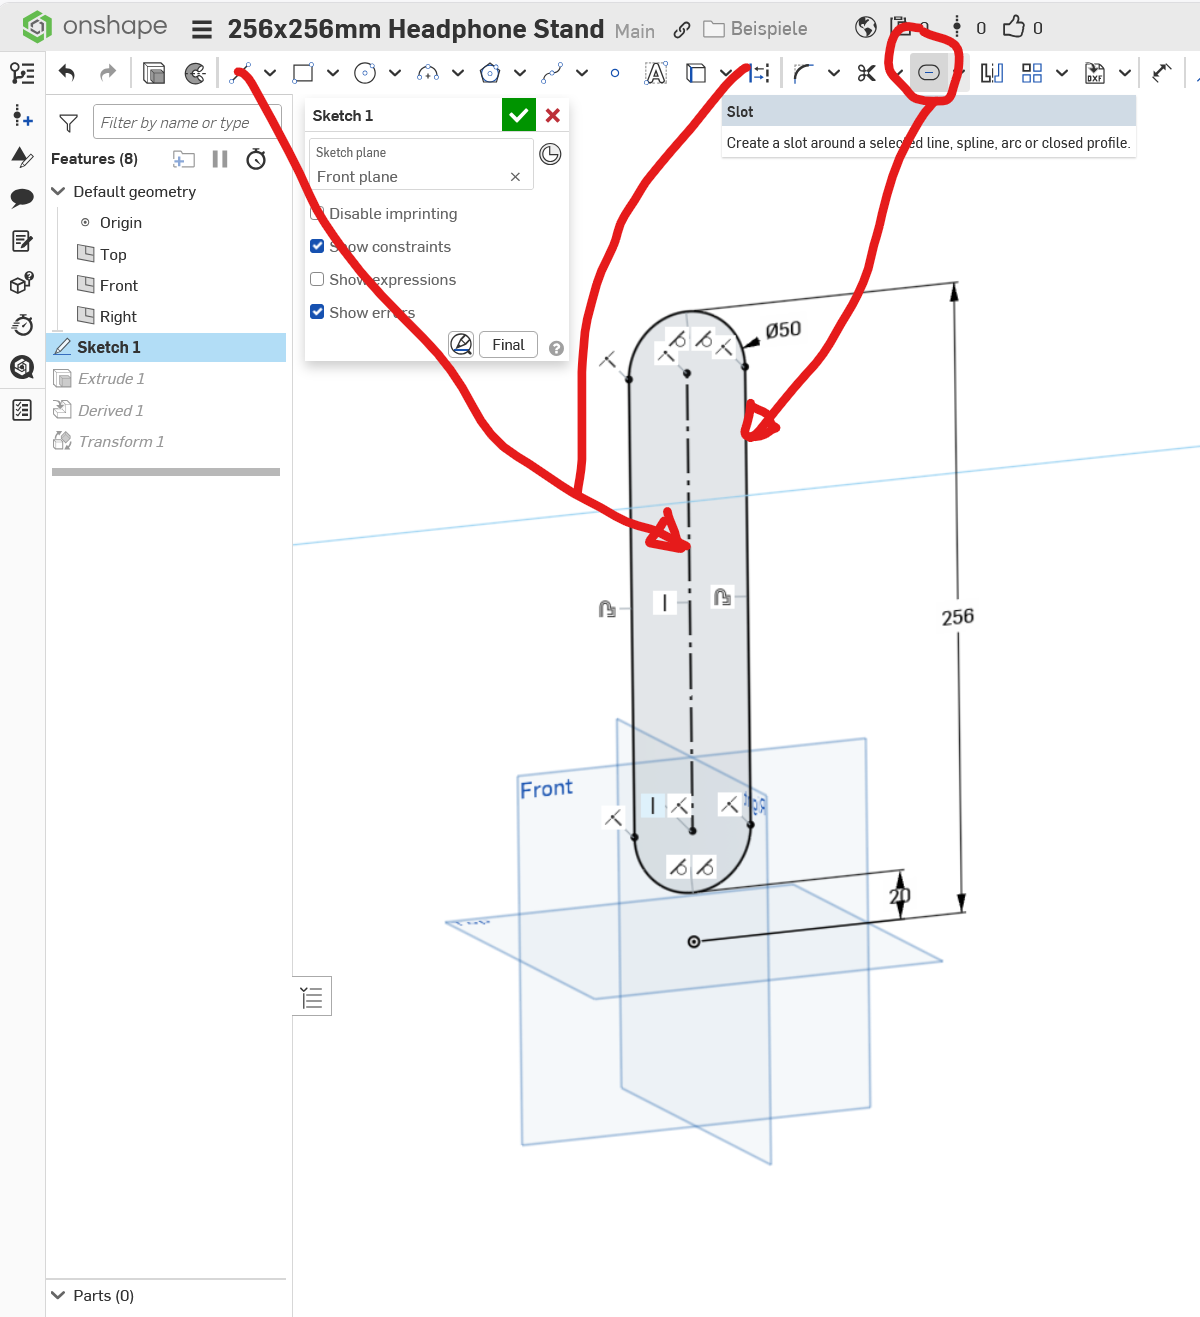
This will be the basic shape. Specify height and the room needed for the foot.
Then use the EXTRUDE feature with the THIN option on the Shetch:
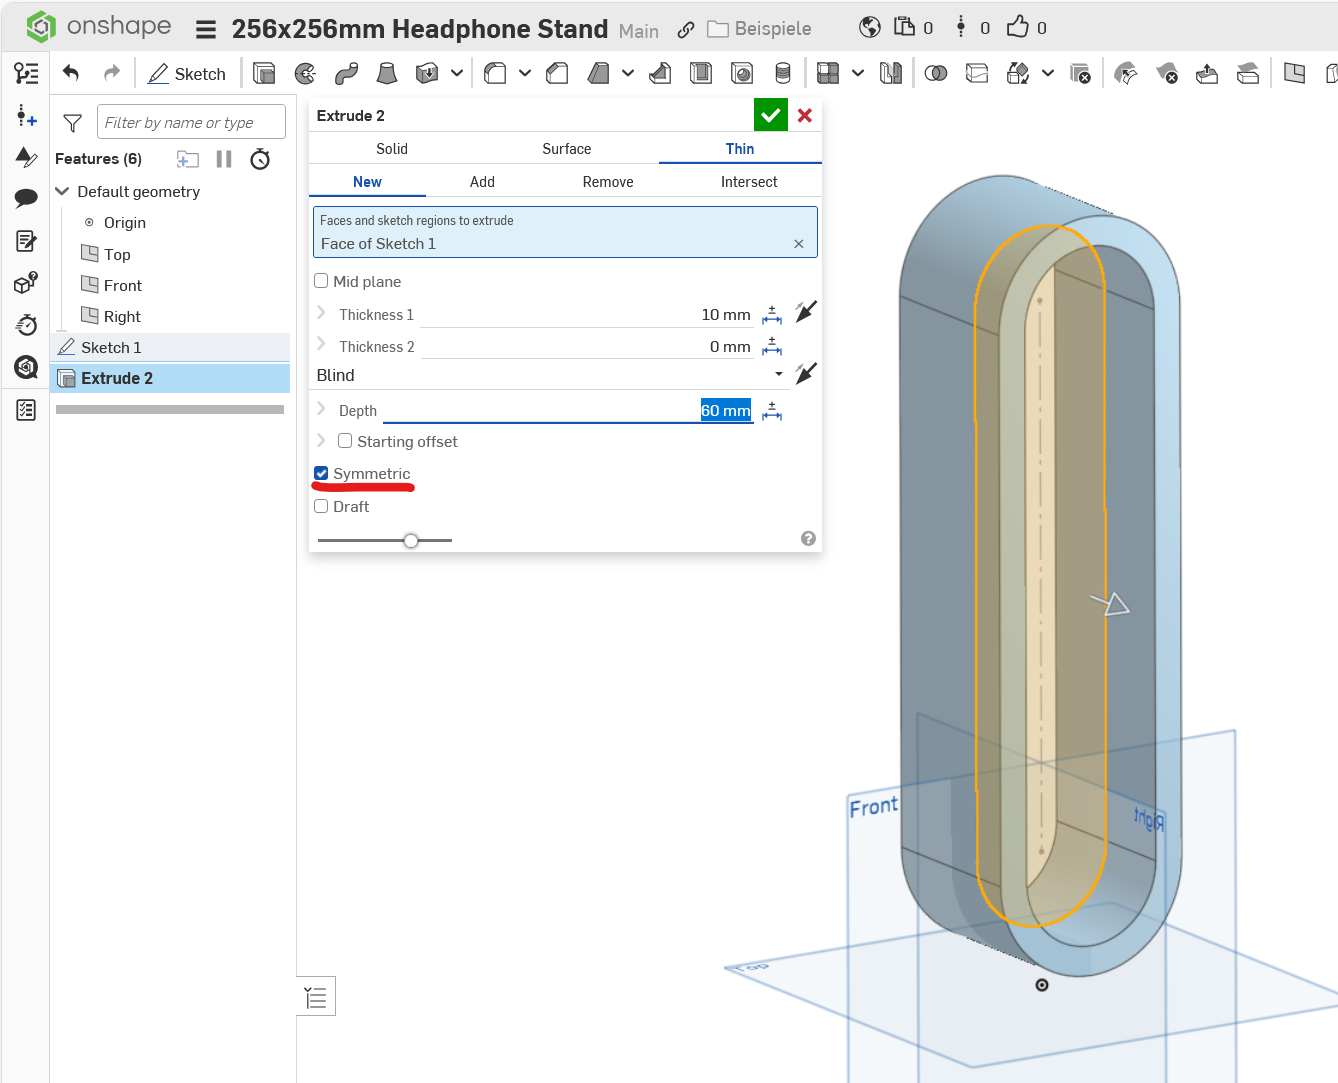
That does already look like the thing. Next, make a new sketch for the foot, on the same plane:
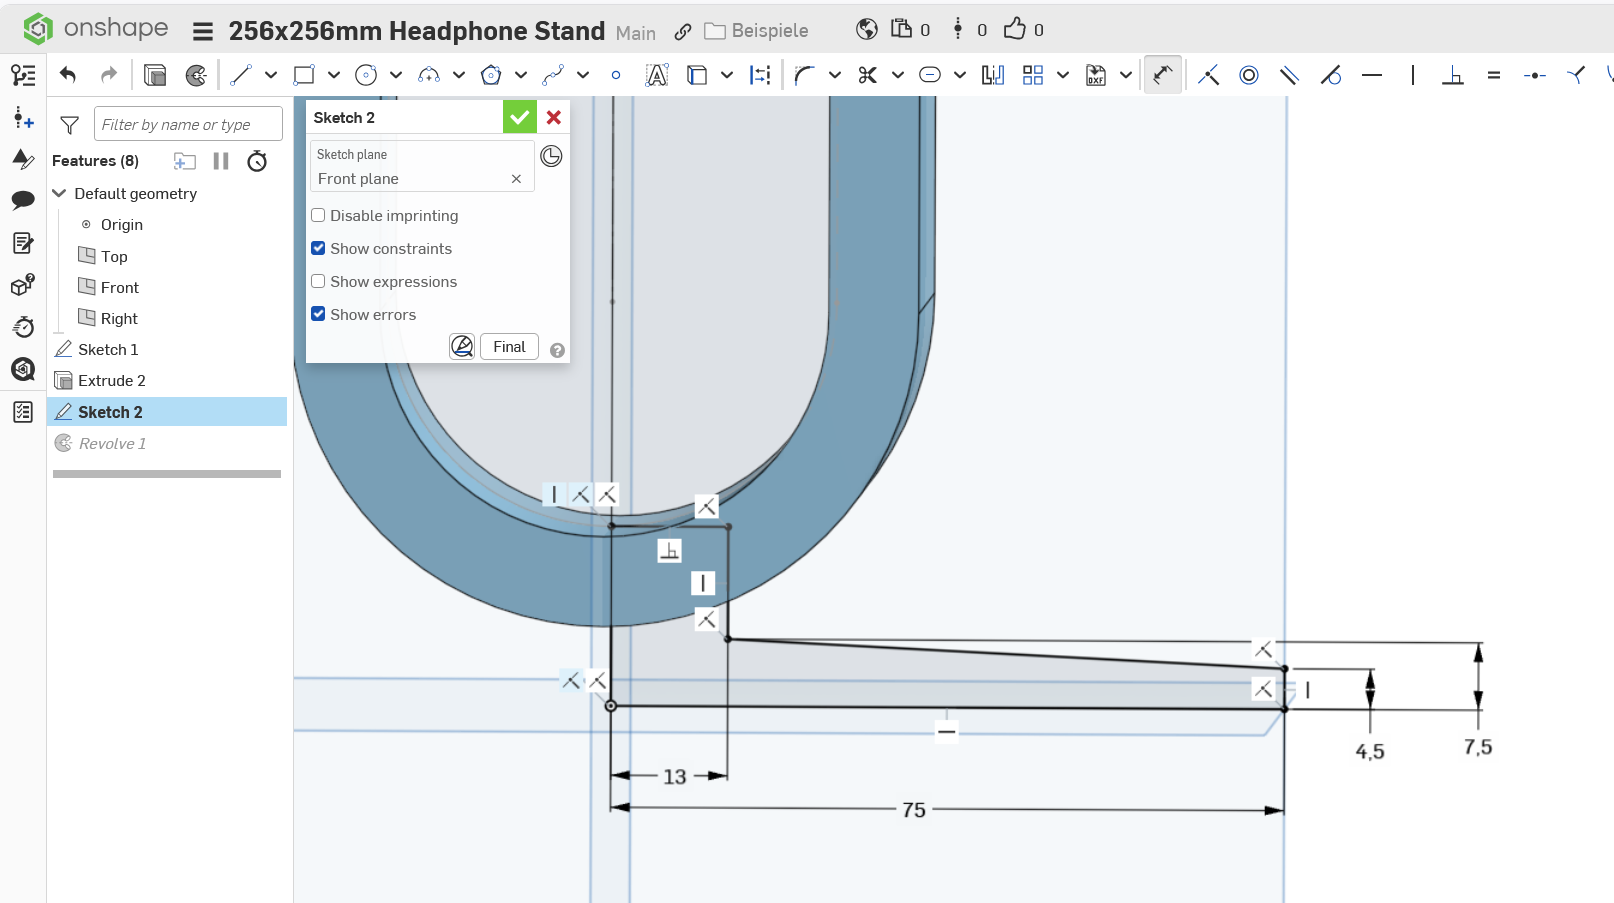
It might be a good idea to make the top point congruent with the inner face of the loop.
Then revolve the foot sketch around the center axis:
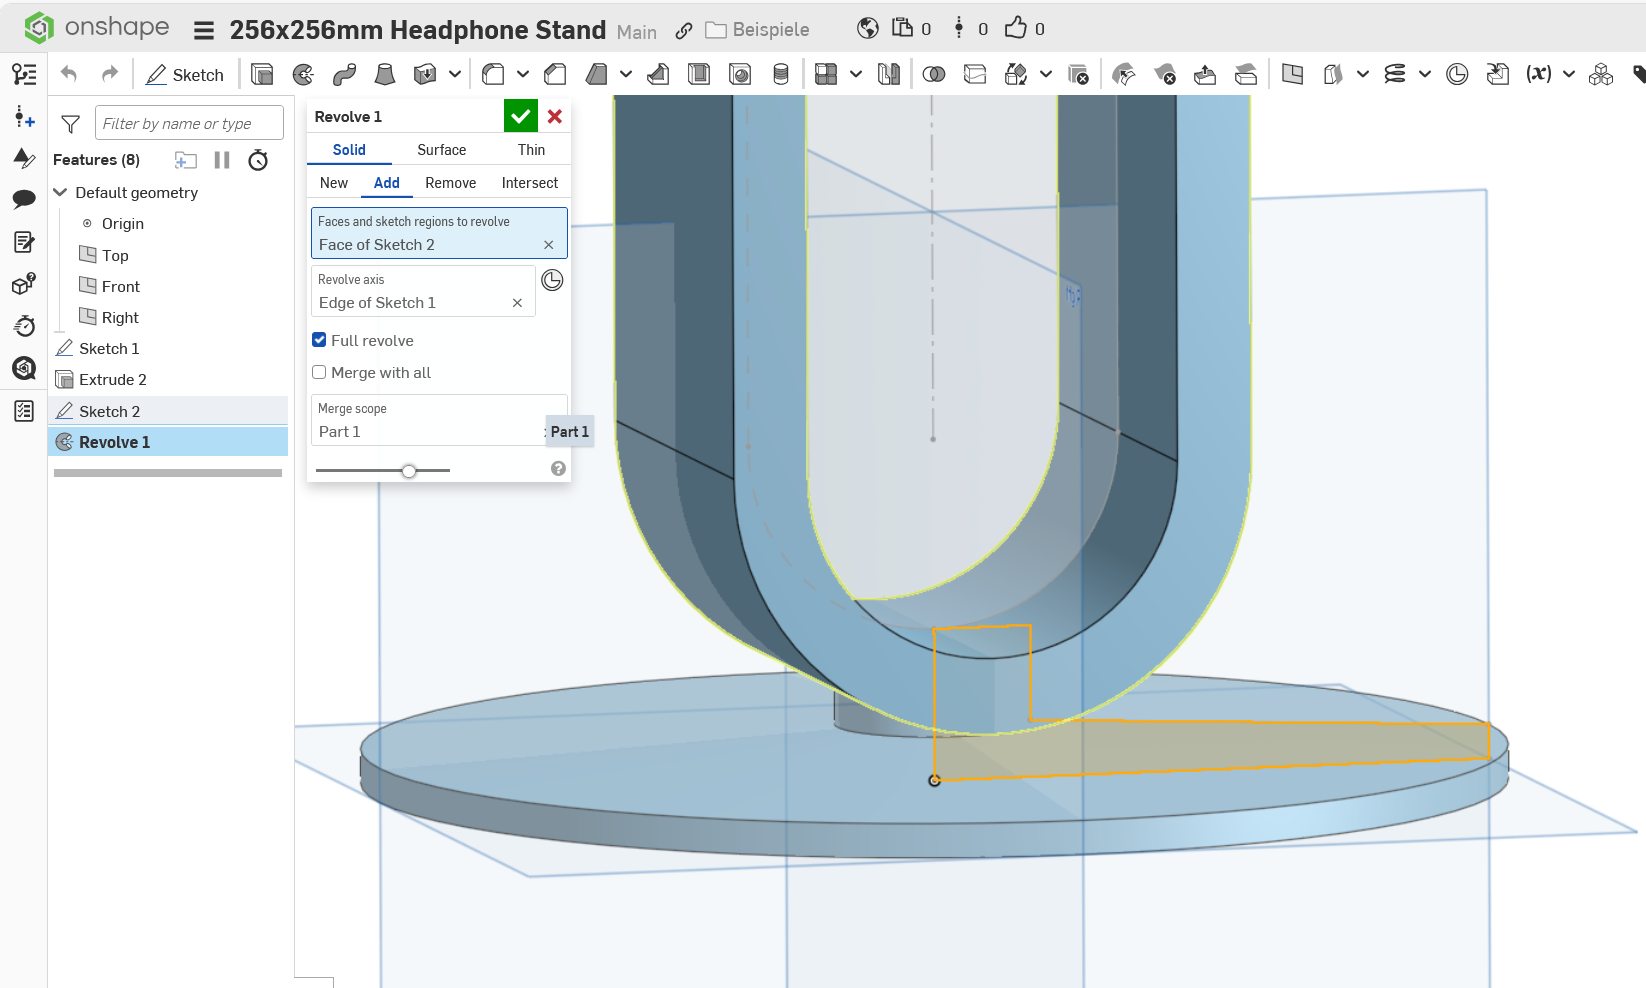
Next, take care for the recess that takes the headphone, make a sketch on the side plane:
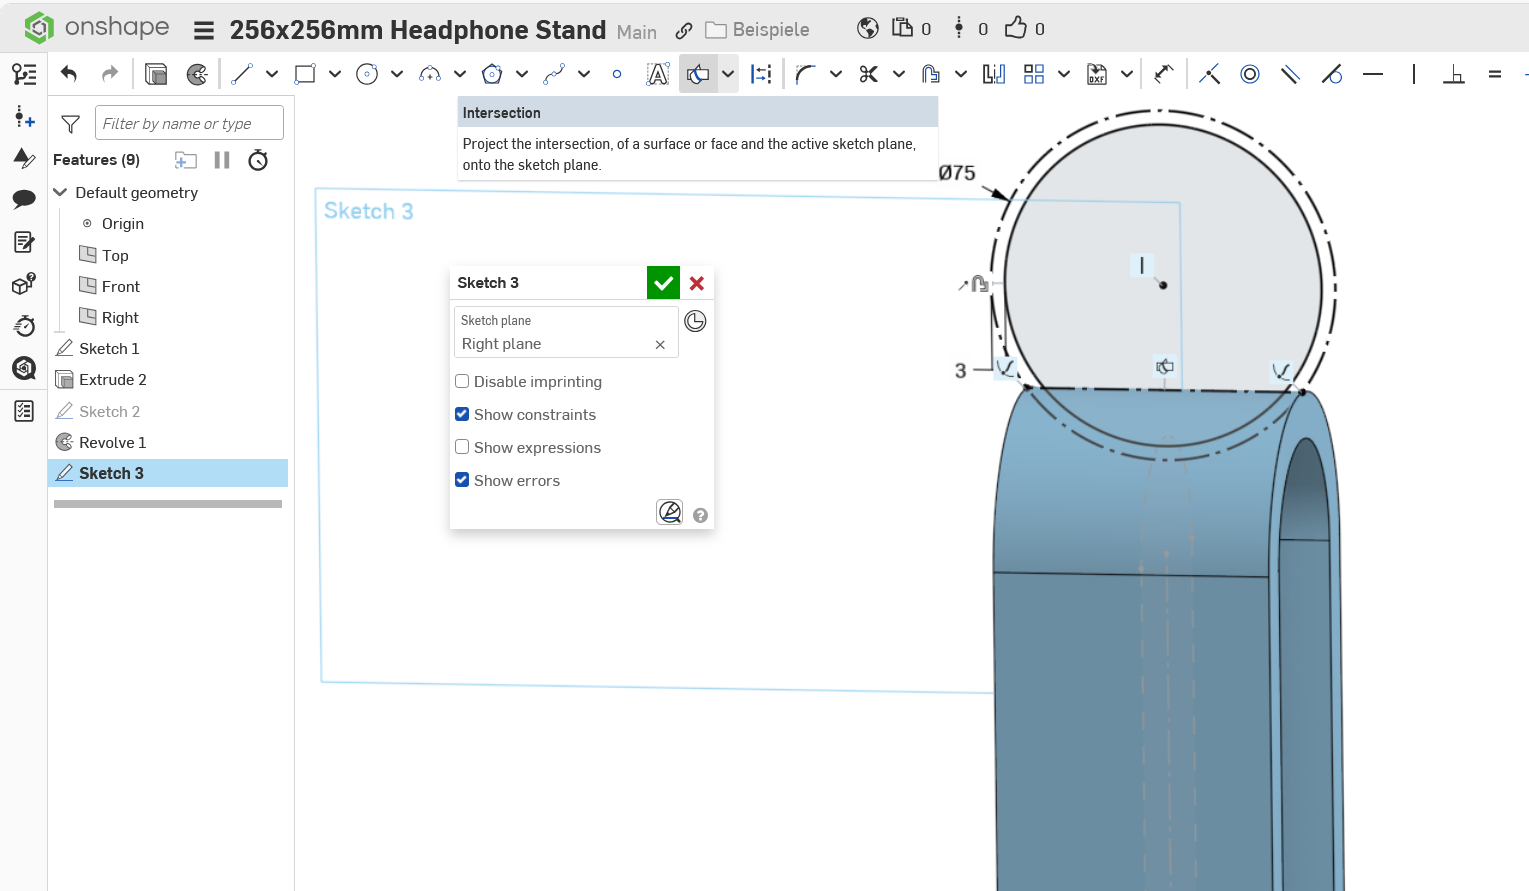
In this case, I used an intersetion line as a reference for the construction circle. The inner circle is done with the offset tool. This will lock the diameter to the width of the loop, for later edits.
Now, you need to make a cutout and the part that replaces the cut away material:
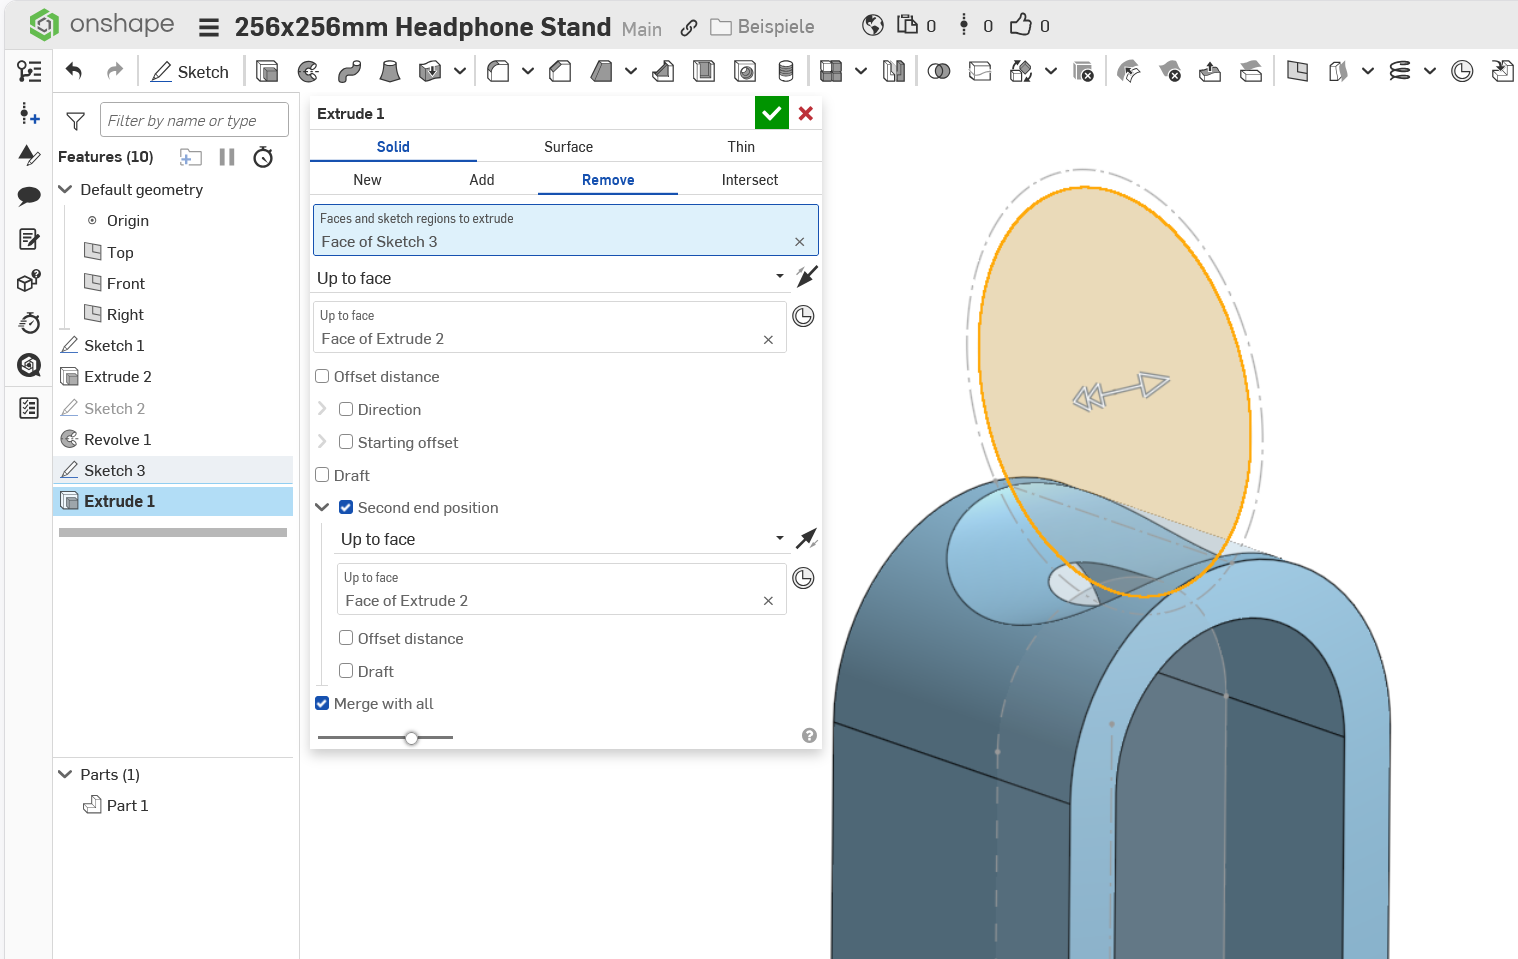
This can be done by REMOVE-EXTRUDING the sketch.
Then we need the part that closes the gap:
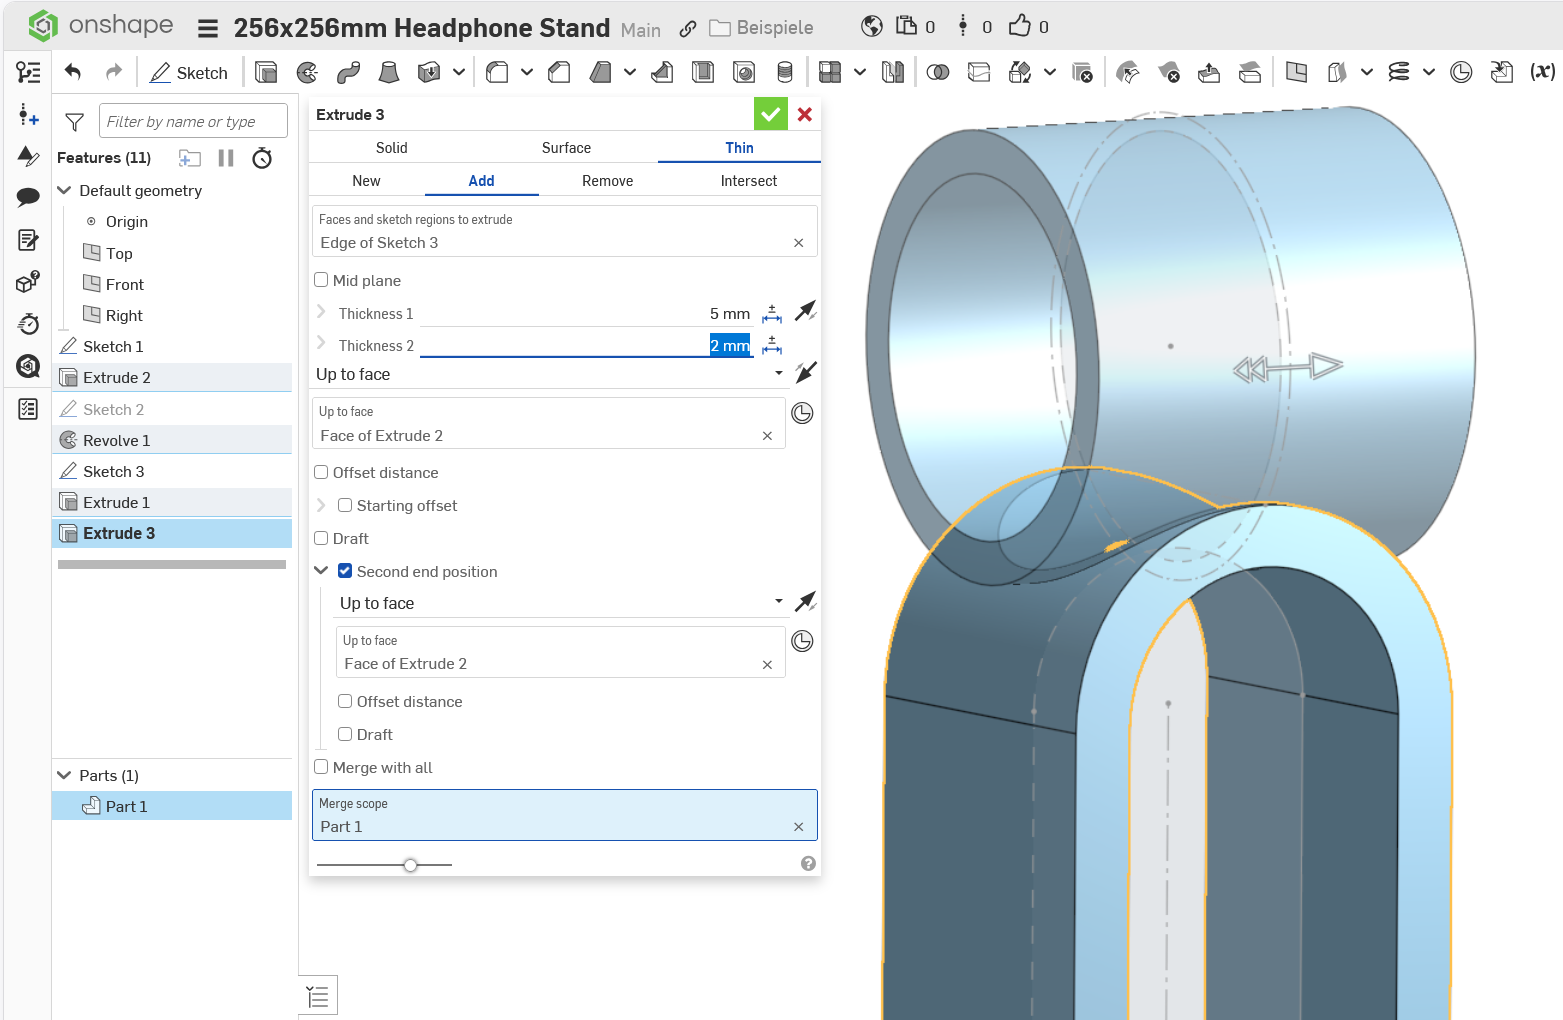
Here, a THIN EXTRUDE is used. limited to the outer faces of the loop. This creates the material needed, but too much, of course. We can gemove that faces we don't need:
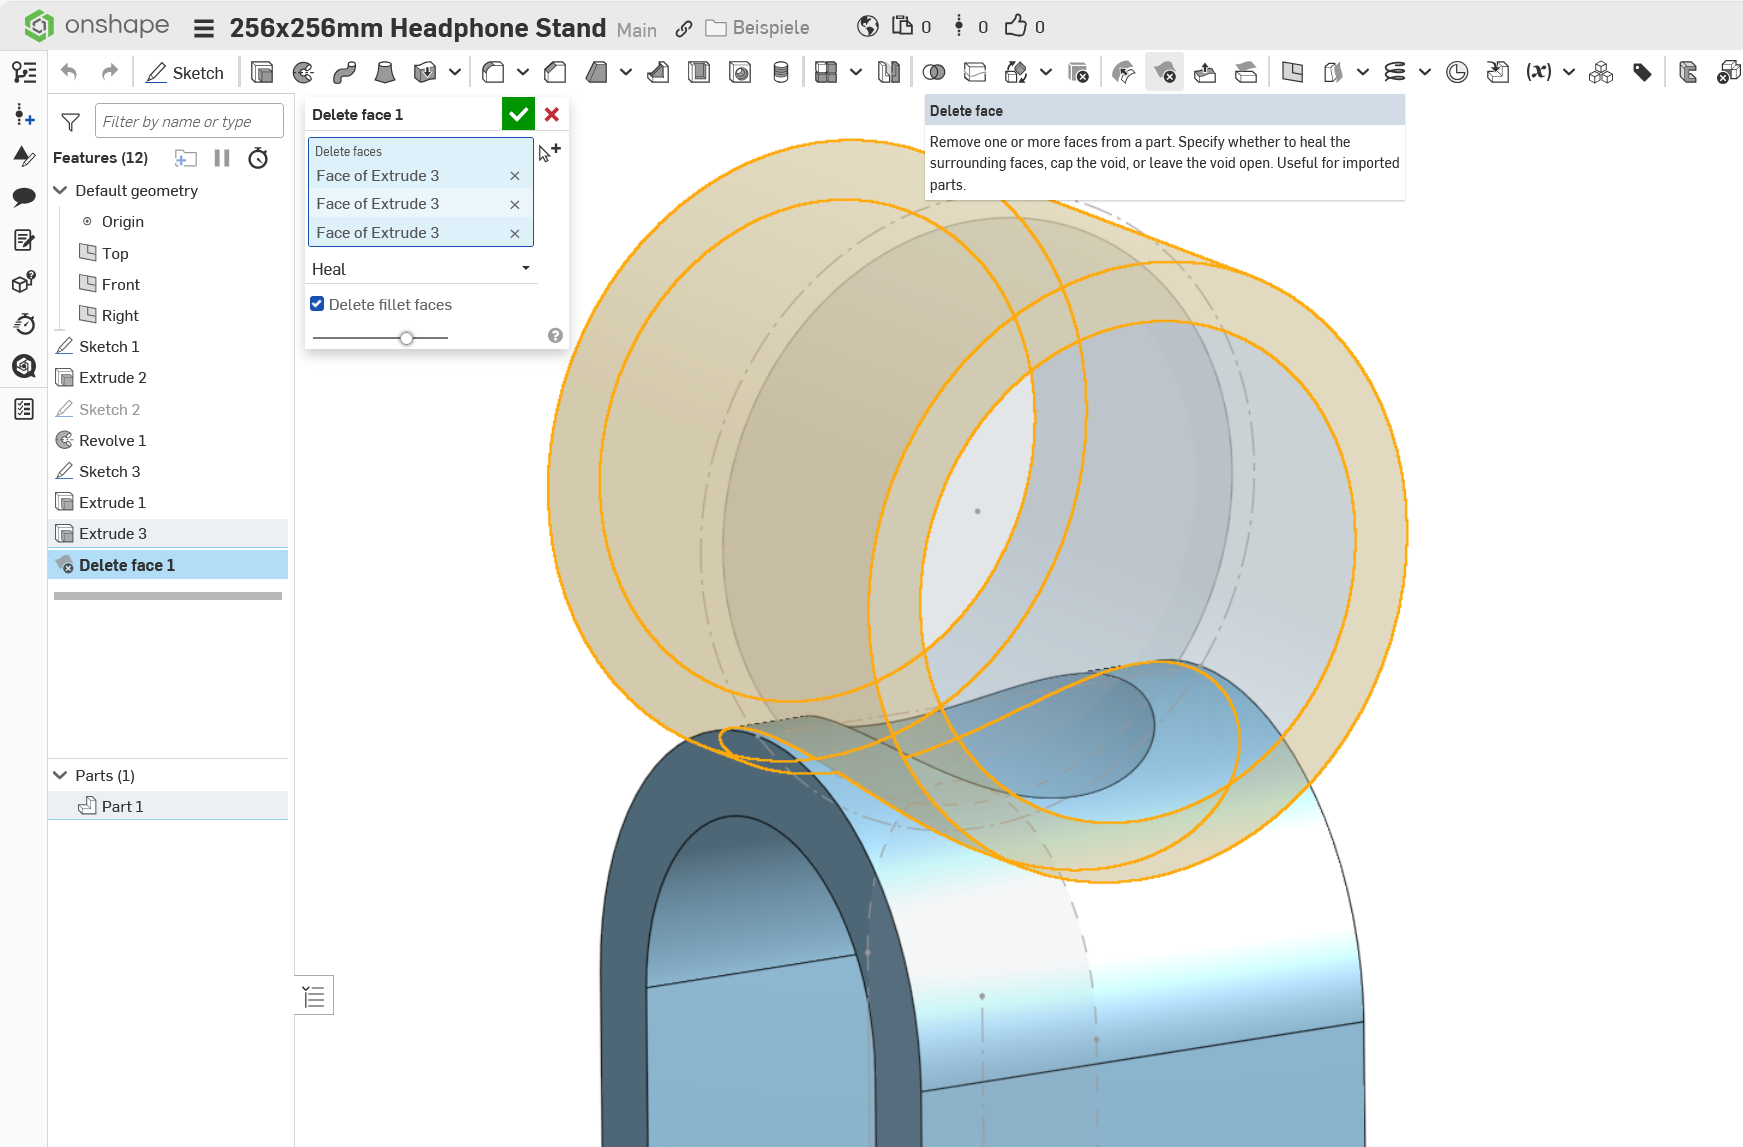
You could add a little chamfer all round for good measure.
Then, you can create an ASSEMBLY and hang your Headphone:
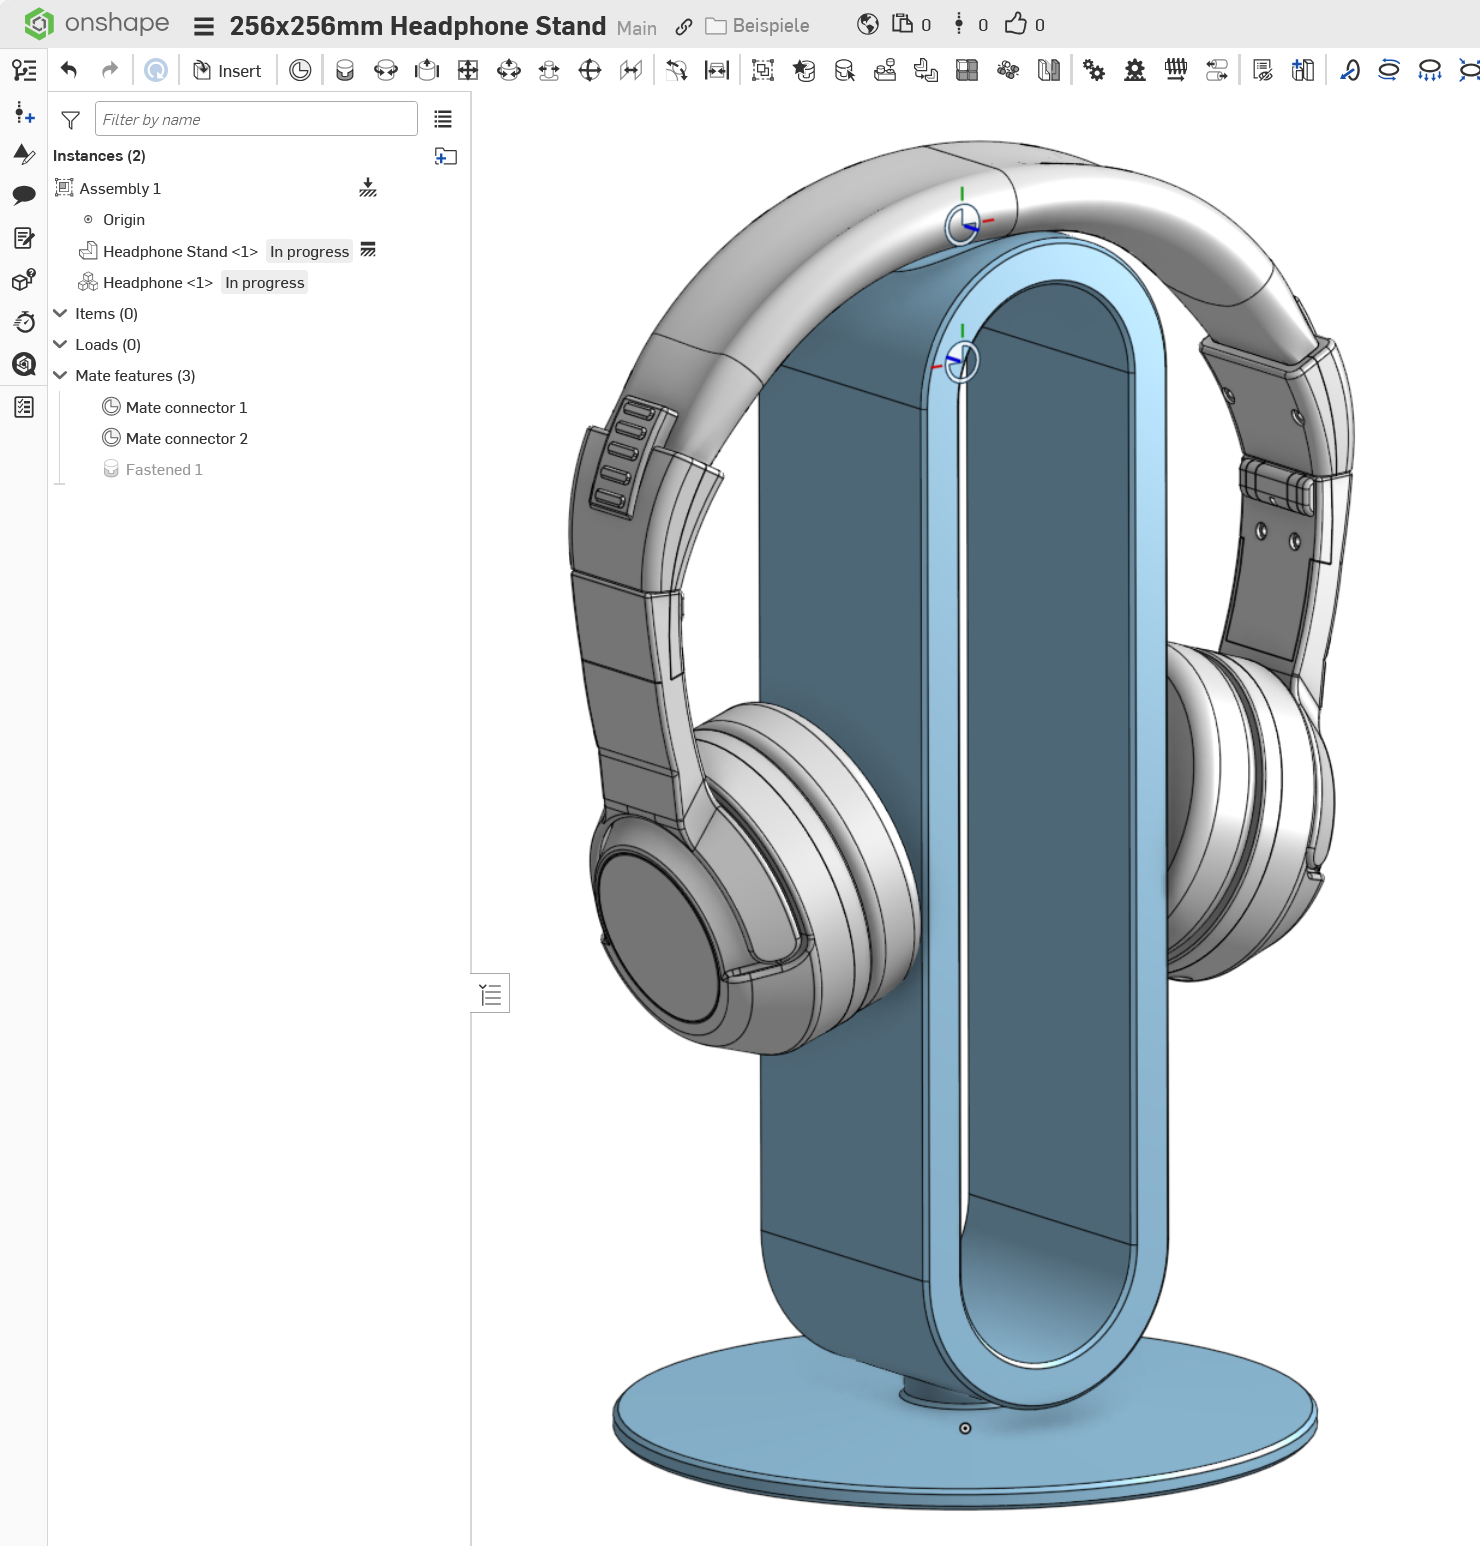
Have Fun!
2 -
0

Answers
-
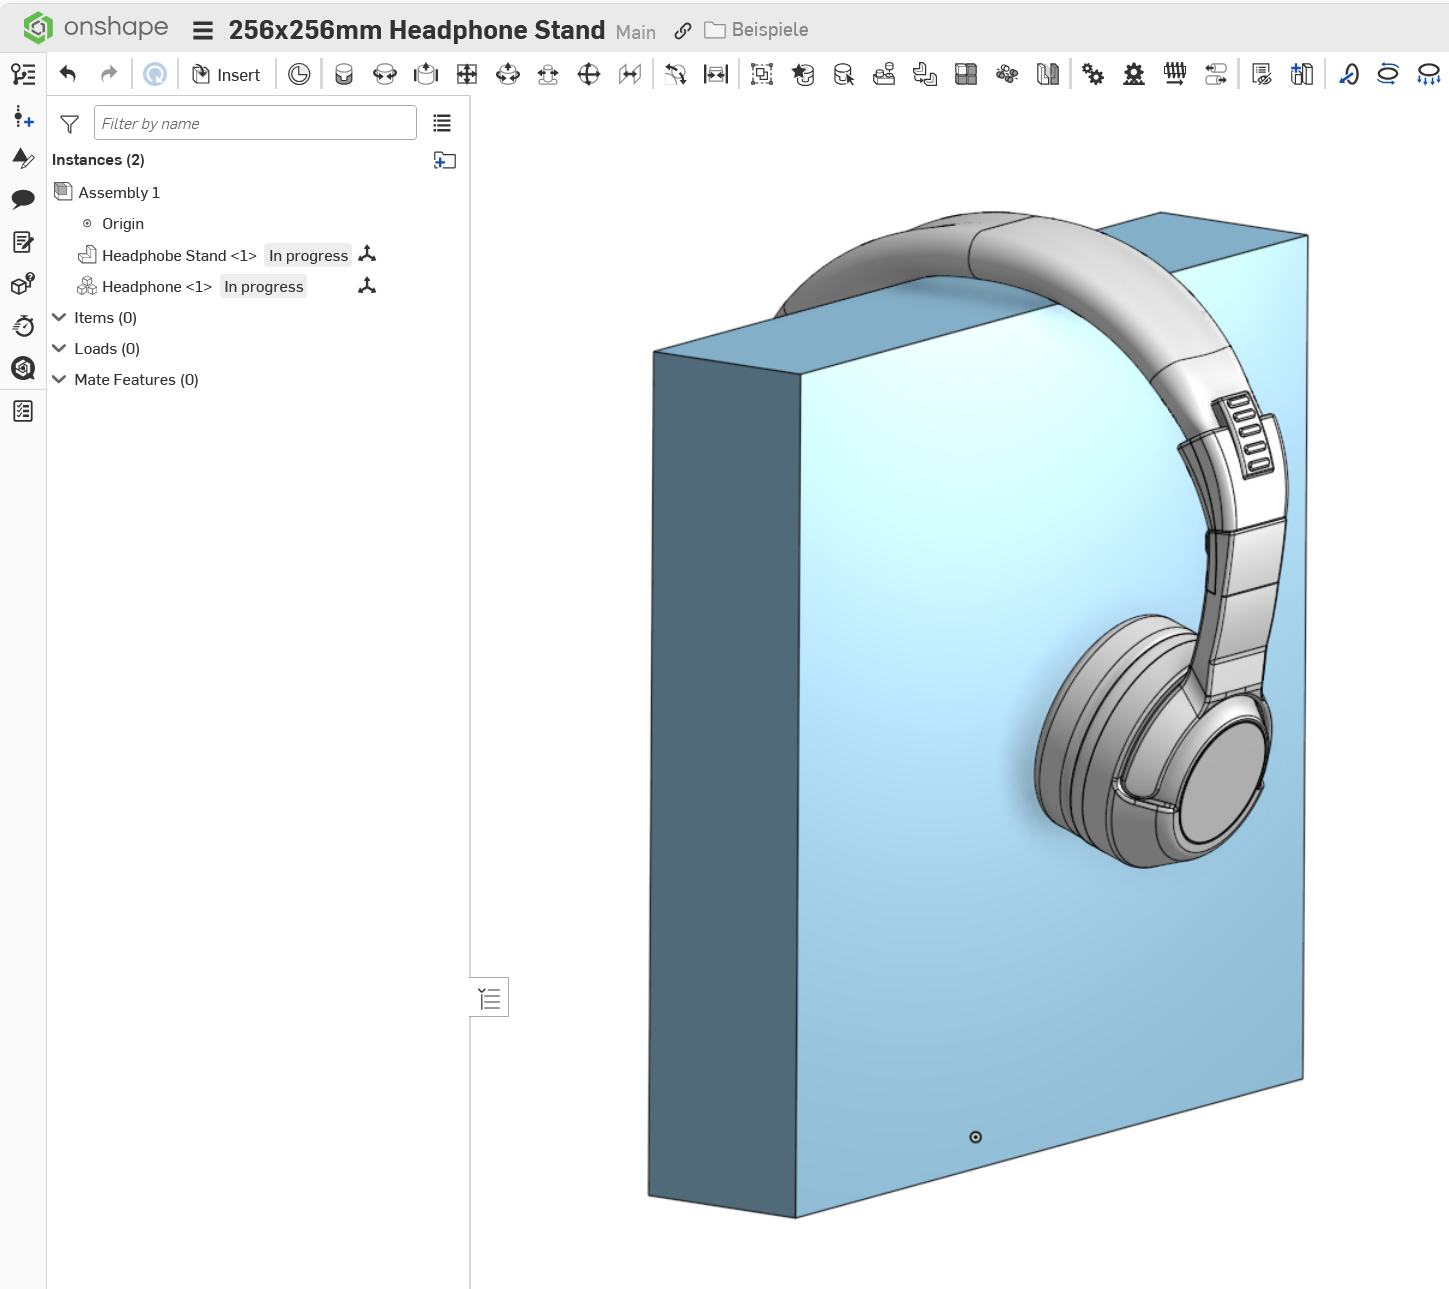
Sure. Here you go:
Create a sketch on the "Front" plane.
Draw a square and dimension it to 256 x 256mm
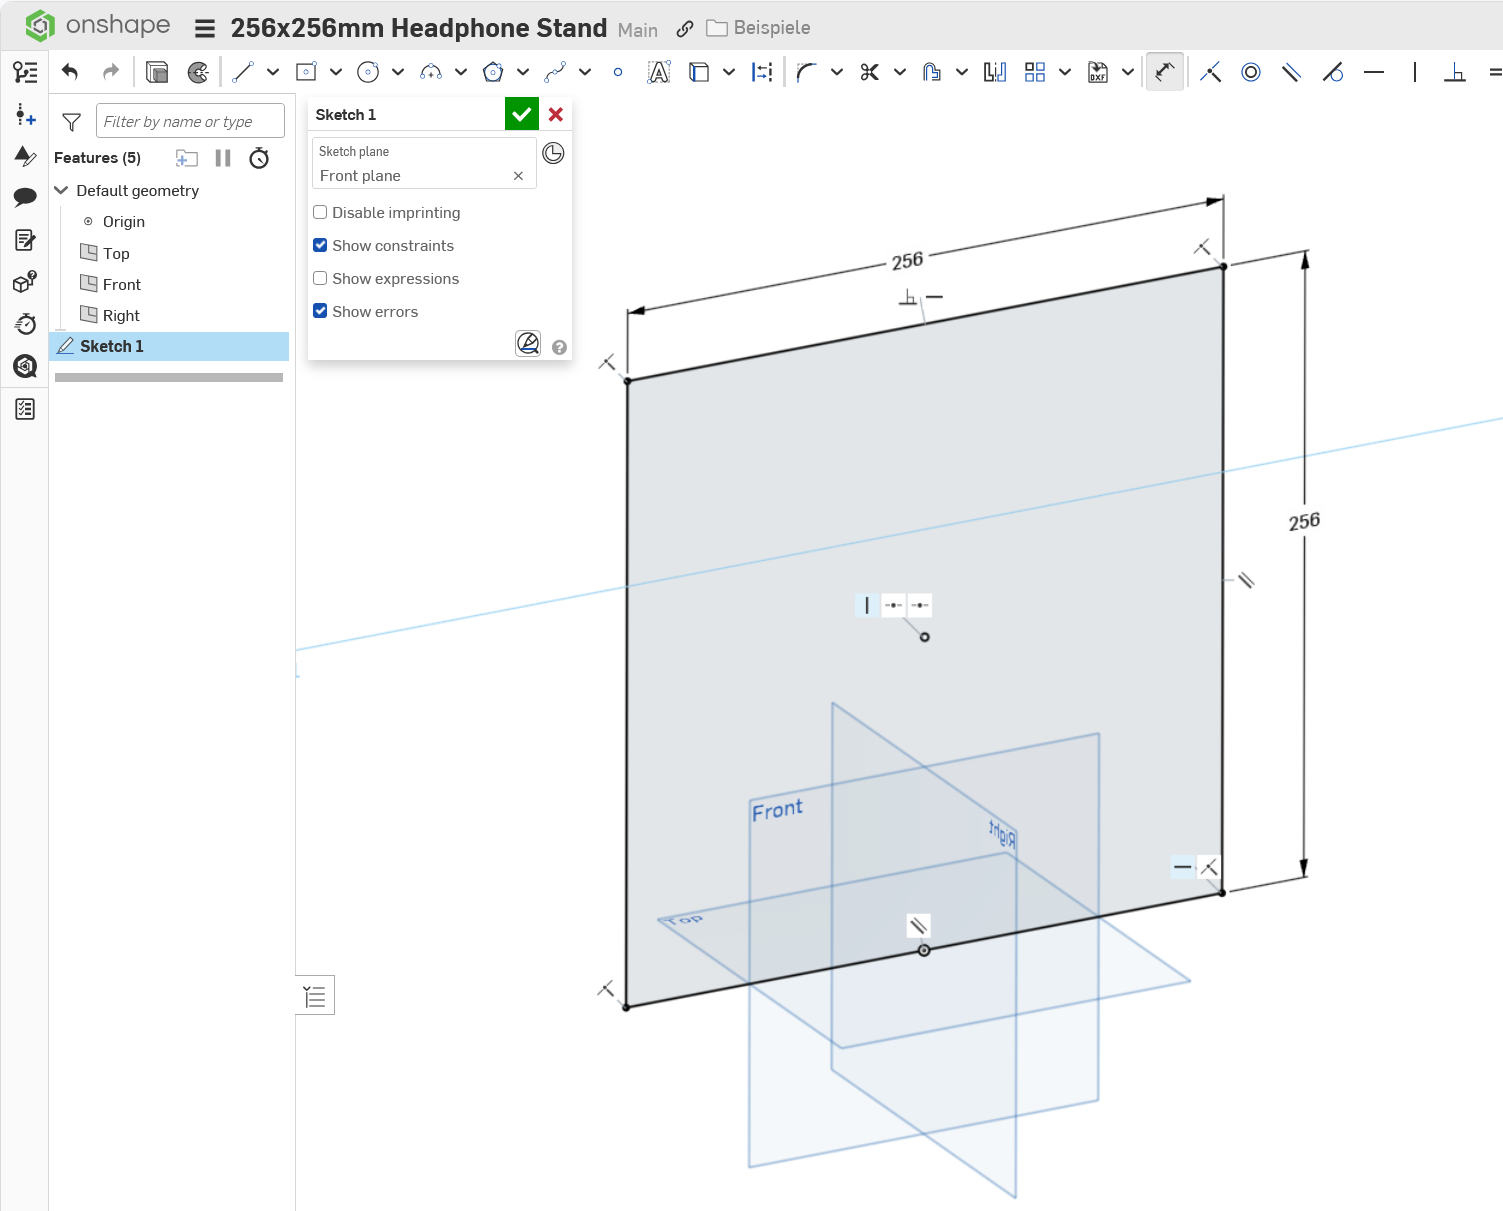
Extrude the square by 53mm, using the "symmetric" option
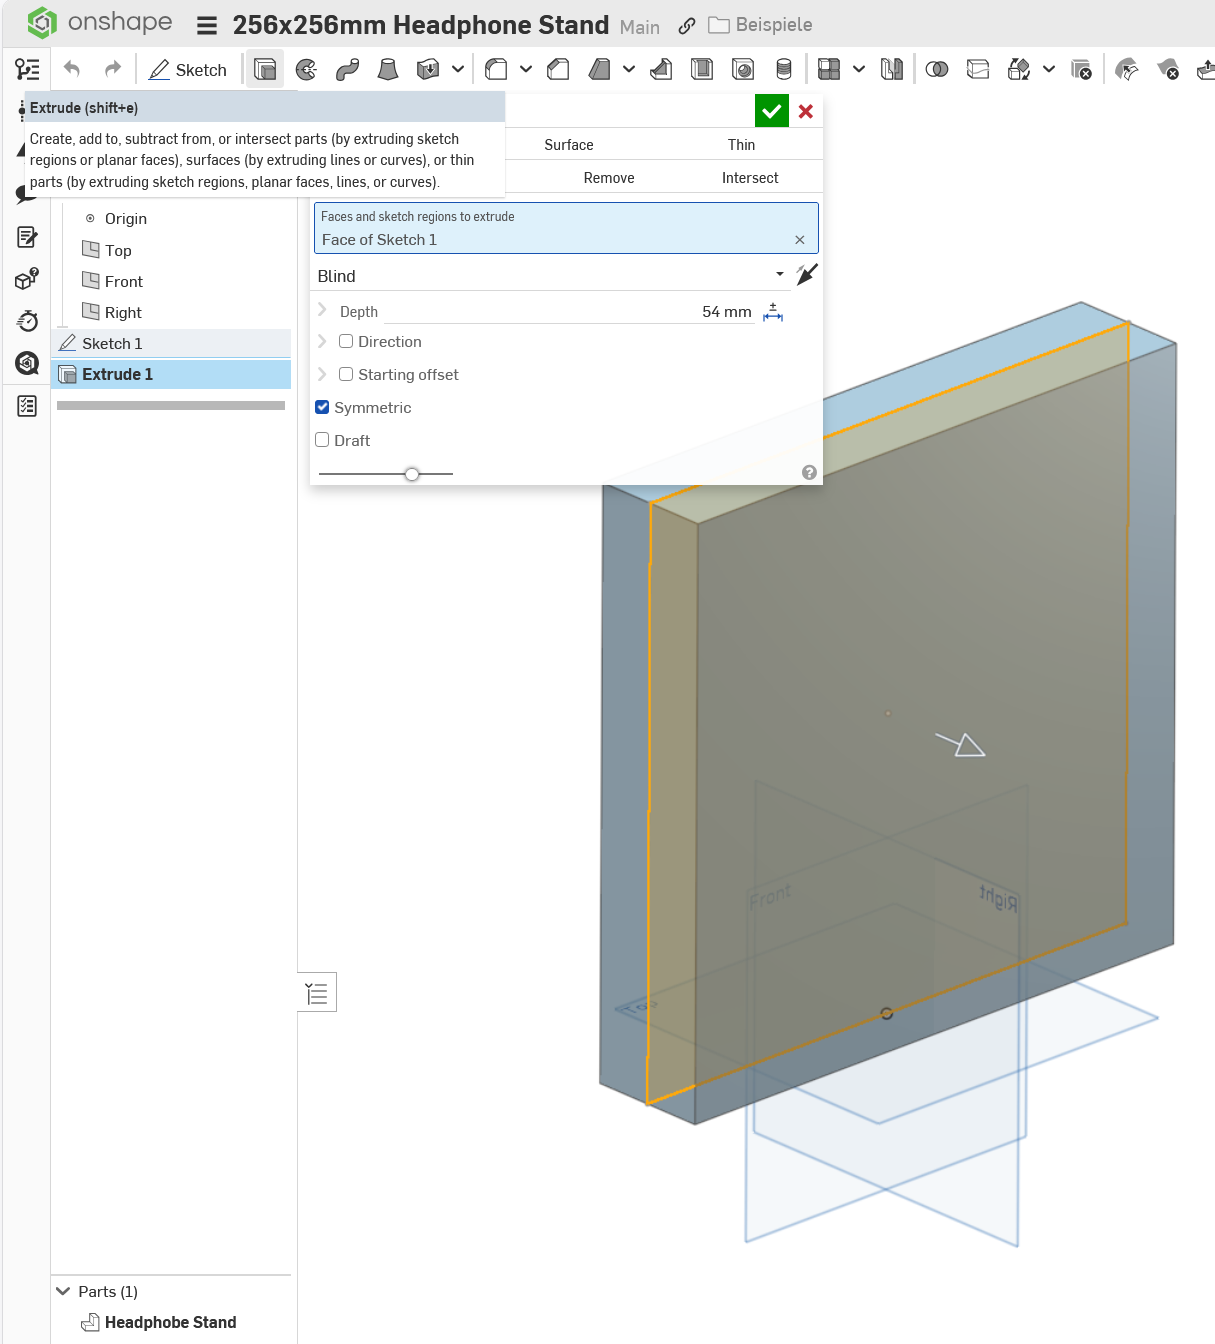
Name the resulting part "Headphone Stand"
Create an assembly.
Insert the Headphone Stand into the assembly.
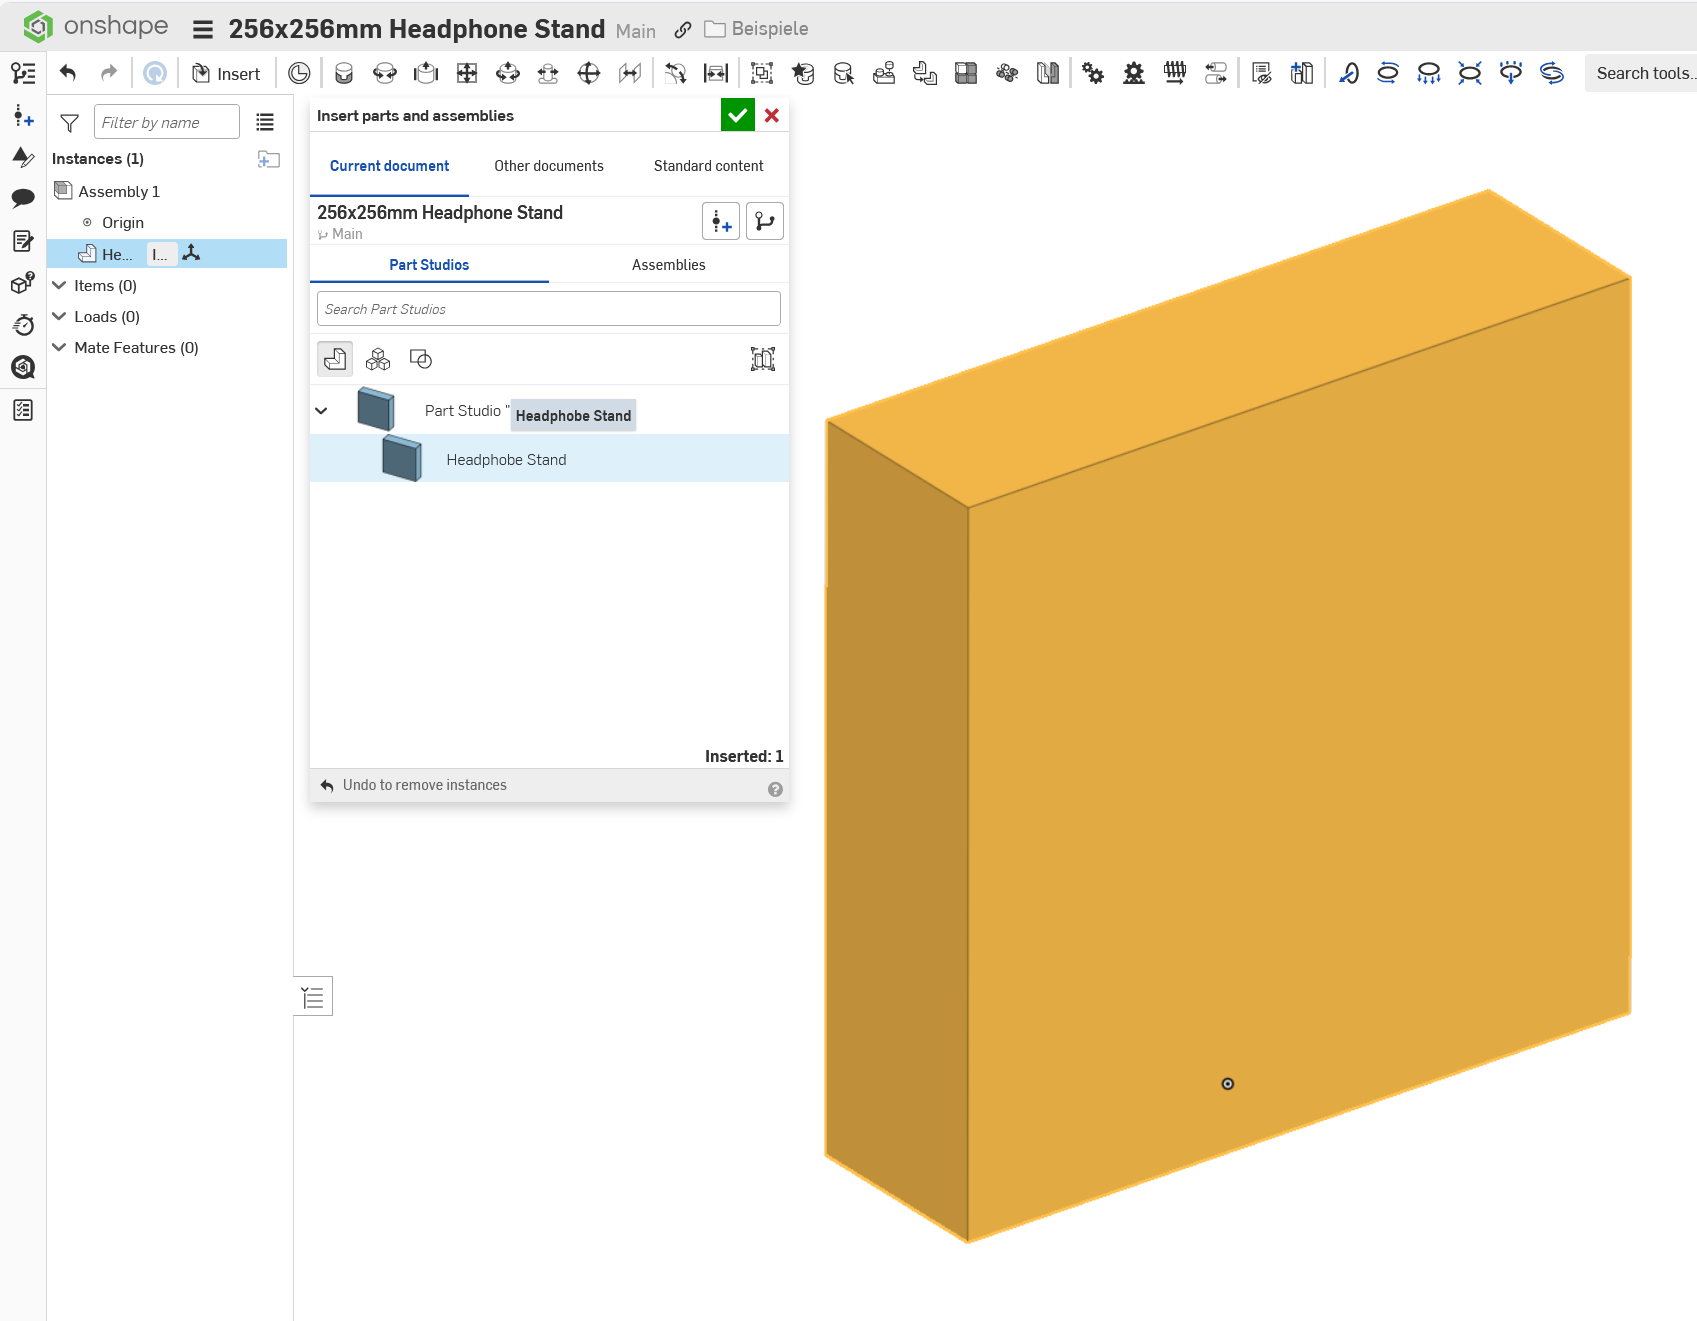
Hang your headphones.
 12
12 -
A very nice example of minimalist industrial design Martin!
But what I think Martin is implying is that the design criteria need to be more fully defined 😉
2 -
The best way for us to start is for you to do a hand sketch and take a photo. Then we can help walk you through some modeling strategies to create your idea.
Rather than leaving it open ended for the community to design and model it for you.
1 -
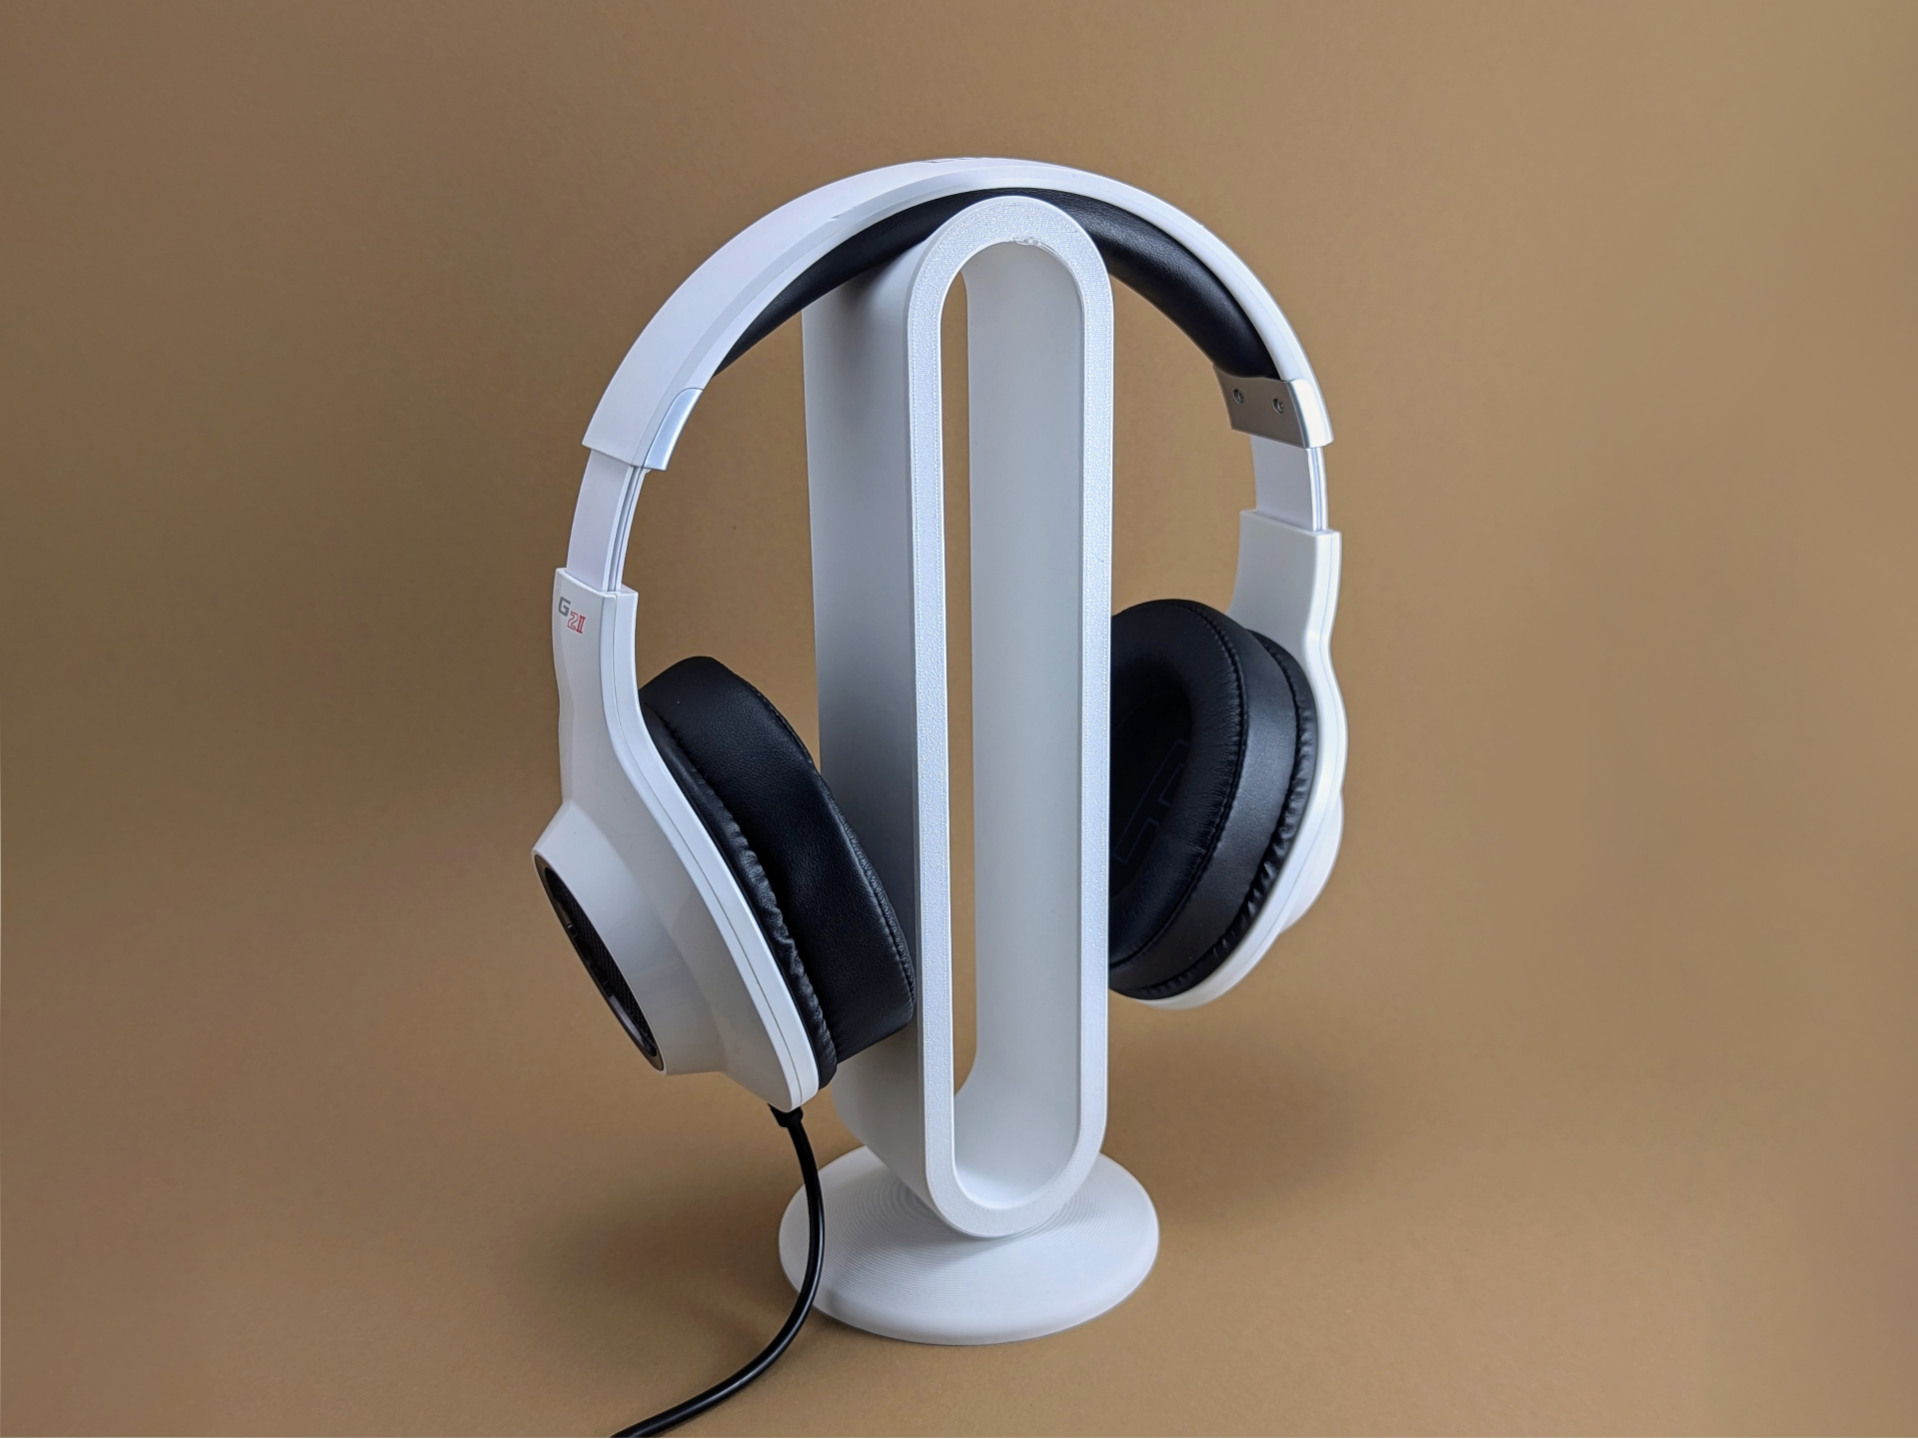
John, I was thinking something along the lines of the above photo
0 -
Okay, now we have something to work with.
Start with a sketch like this:
This will be the basic shape. Specify height and the room needed for the foot.
Then use the EXTRUDE feature with the THIN option on the Shetch:
That does already look like the thing. Next, make a new sketch for the foot, on the same plane:
It might be a good idea to make the top point congruent with the inner face of the loop.
Then revolve the foot sketch around the center axis:
Next, take care for the recess that takes the headphone, make a sketch on the side plane:
In this case, I used an intersetion line as a reference for the construction circle. The inner circle is done with the offset tool. This will lock the diameter to the width of the loop, for later edits.
Now, you need to make a cutout and the part that replaces the cut away material:
This can be done by REMOVE-EXTRUDING the sketch.
Then we need the part that closes the gap:
Here, a THIN EXTRUDE is used. limited to the outer faces of the loop. This creates the material needed, but too much, of course. We can gemove that faces we don't need:
You could add a little chamfer all round for good measure.
Then, you can create an ASSEMBLY and hang your Headphone:
Have Fun!
2 -
0
-
Yes thanks Martin, I was proud of the result only for my teenage son to say he didn't like it
Teenagers
He wanted a different design which I am currently working on.
0 -
This could make for great bonding experience if you have your son design the stand with you!
(that way he'll also learn that designing things is hard and he should appreciate that more)Ramon Yip | glassboard.com
1 -
Show him how to use Onshape. That'll teach him to think first and talk then. ;0)
I did that with my daughter and she decided to become an architect.
0


