Welcome to the Onshape forum! Ask questions and join in the discussions about everything Onshape.
First time visiting? Here are some places to start:- Looking for a certain topic? Check out the categories filter or use Search (upper right).
- Need support? Ask a question to our Community Support category.
- Please submit support tickets for bugs but you can request improvements in the Product Feedback category.
- Be respectful, on topic and if you see a problem, Flag it.
If you would like to contact our Community Manager personally, feel free to send a private message or an email.
Best Of
Re: Custom Feature: Tweep
Now if only there were a place for me to organize all of these scripts. I'm starting to lose track.
Re: 3Dconnexion space mouse has suddenly stopped working.
Giving Onshape "Local network access" permission in Chrome fixed it for me.
 JPM
JPM
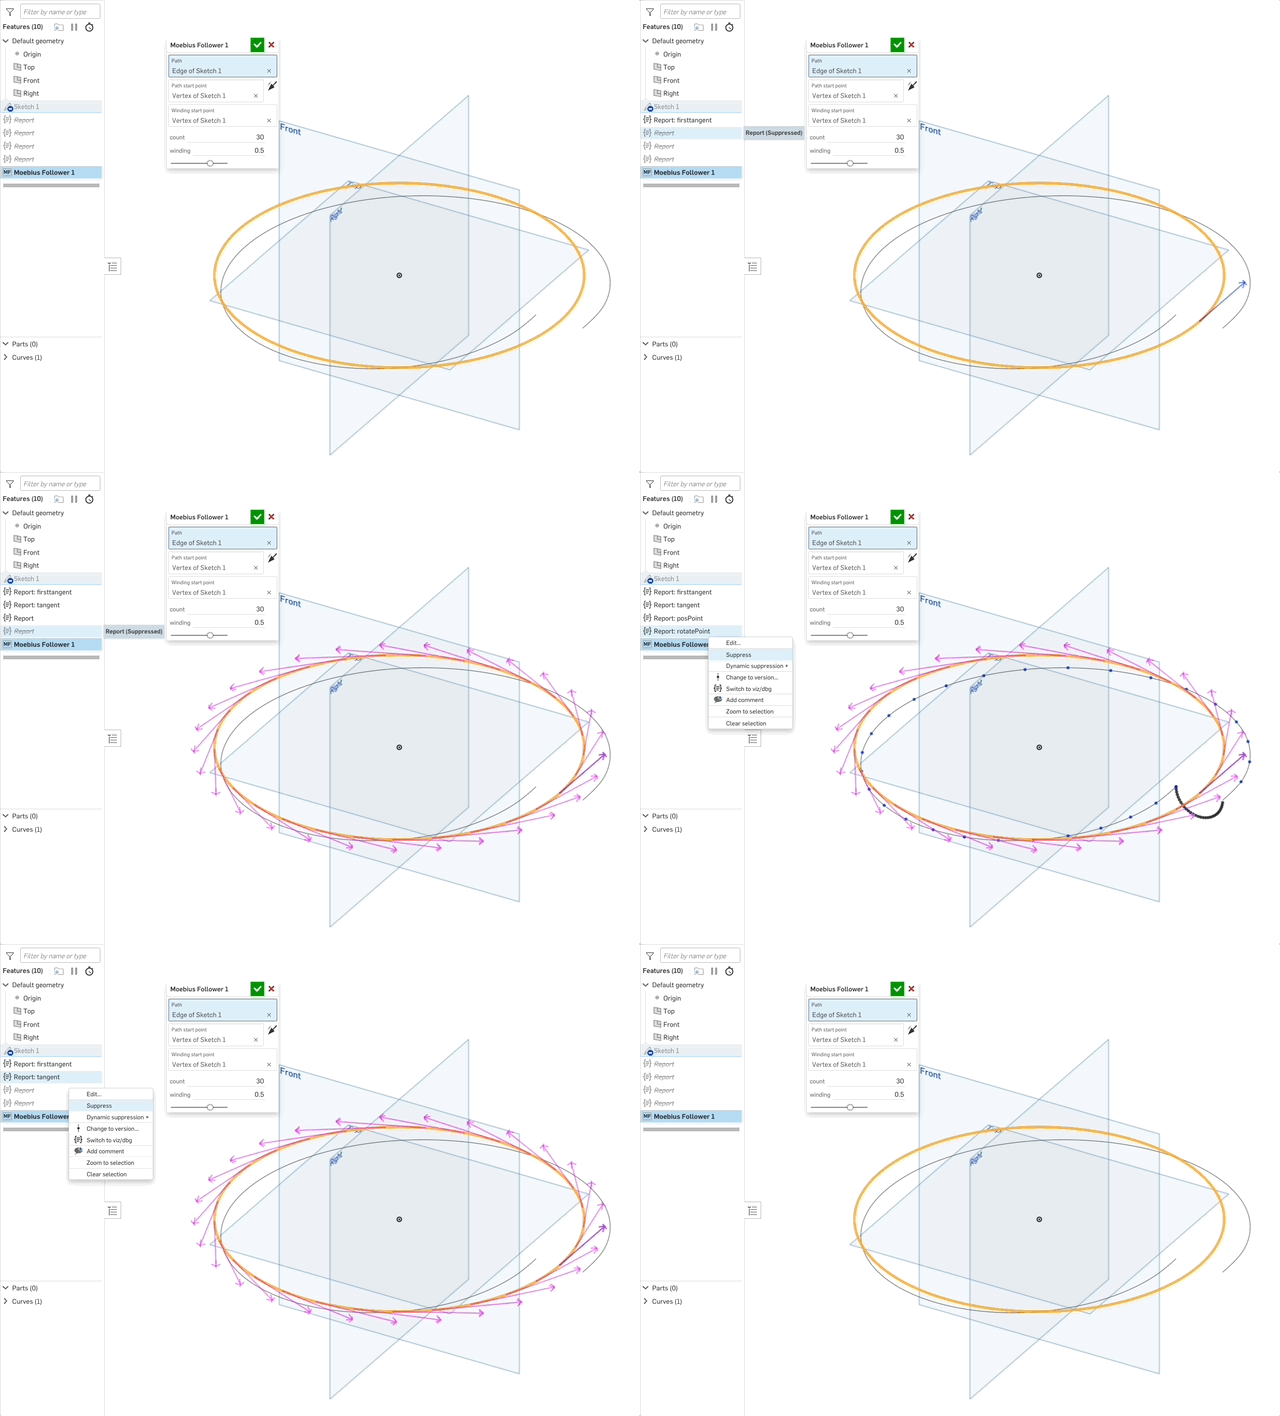
Use Report, viz(), and dbg() for conditional println and debug visualizations
Earlier this year I wrote a utility called "Report". The one-sentence description is "Conditional debug visualization and println controlled by feature and not by code".
Here's an intro video: https://www.youtube.com/watch?v=Eu7puEa8Oak
You can find the feature and functions here: https://cad.onshape.com/documents/e2576bfe13aaaabd67b0fe1d/v/4322f20d8f97ab12eeab937c/e/e954caf65d5d66b94f8bb90a
Here's how it works:
1. Import the feature Report in to your toolbar.
2. Import the functions dbg() and viz() in to your custom features.
3. When writing code, use dbg() instead of println and use viz() instead of adding debug entities through debug or addDebugEntities functions.
4. When your custom feature call viz() and dbg() functions instead of println() and debug(), the Report feature will enable the console printing and debug visualization for only the viz() and dbg() calls you want to activate, all controlled by keyword.
5. Suppress and unsuppress Report features to enable/disable visualization in your custom feature while your custom feature is being edited:
Note: This is very similar to another reporting tool I wrote a while back. I've renamed that tool "Log" as it's much more focused on mimicking logging tools like log4j but otherwise its behavior is unchanged. If that is a better match for your needs you can read about it here: https://forum.onshape.com/discussion/23476/featurescript-writers-stop-using-println-and-start-using-report-new-featurescript-announcement
Let me know what you think!
Also big thanks to my friend and colleague @Ethan_K for encouraging me to polish up and ship Report.
 jnewth
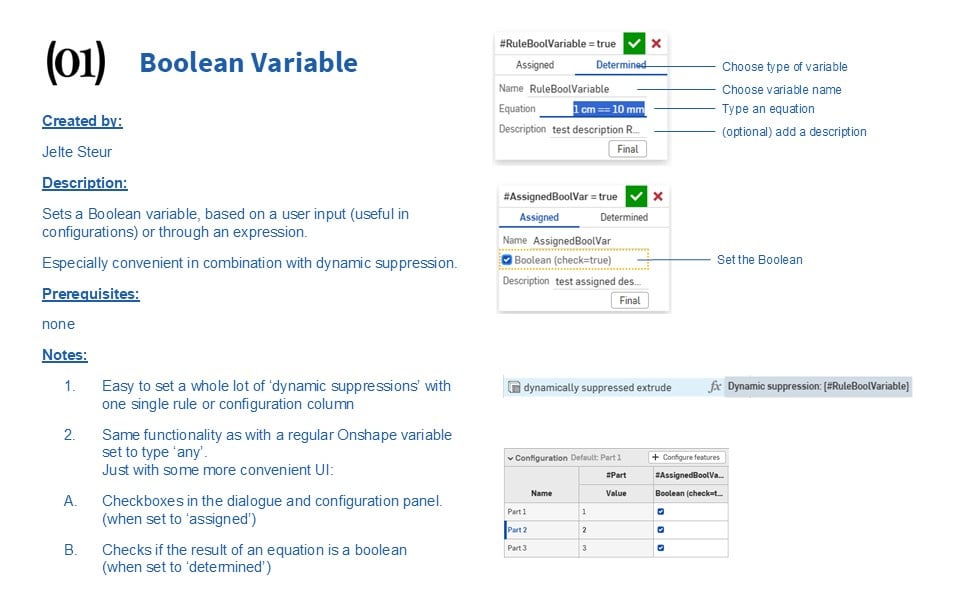
new custom feature: Boolean Variable
Happy winter solstice to everyone!
I was grouping some dynamic suppressions in a configurable document and creating a regular variable, setting it to 'any' and creating an equation, (or typing "true" manually.)
This bothered me, I figured this should be easier if I'm going to do this a lot.
so I created a dedicated:
Boolean Variable
Re: Custom Feature: Triad Transform
My dad always told me to be the CAD you want to see in the world. I thought that was a weird thing to tell your kid but I'm not a parent myself, so what do I know?
Re: How can we make Section Views awesome in Onshape?
Essential:
- Centroid
- Area
- Moment of inertia (2nd moment of area) about defined coordinate system
- Moment of inertia about principal axes and principal axes angle
- Polar moment of inertia
Nice to haves:
- Torsional Constant
- Shear Center
- Radius of gyration
Feature dependency arrows
One feature that I absolutely love from SolidWorks that doesn't totally exist in OnShape is the ability to easily view dependencies between features in feature tree.
I know that you can right click on a feature and select "Show dependencies…" and a separate dialogue pops up but this is somewhat time consuming and cumbersome.
Re: Every time I visit the onshape website I need to log in again. Is there a "remember me" option?
Password managers are the way to go. Either use the built in one in the browser, or get one with a browser extension. Then you just have to click the sign in button. I haven't typed my password in years. I don't even know them.
Or, just don't close your browser. Then it's more like you only log in once or twice a day. If you aren't using it enough to get completely logged out. Then you don't use it enough thoughout the day anyway, so maybe you only need to log in three times some days.. . Not a big deal.
You will never win an argument with a company about reducing thier security… just saying… I don't think they like playing Russian roulette with their life's work.
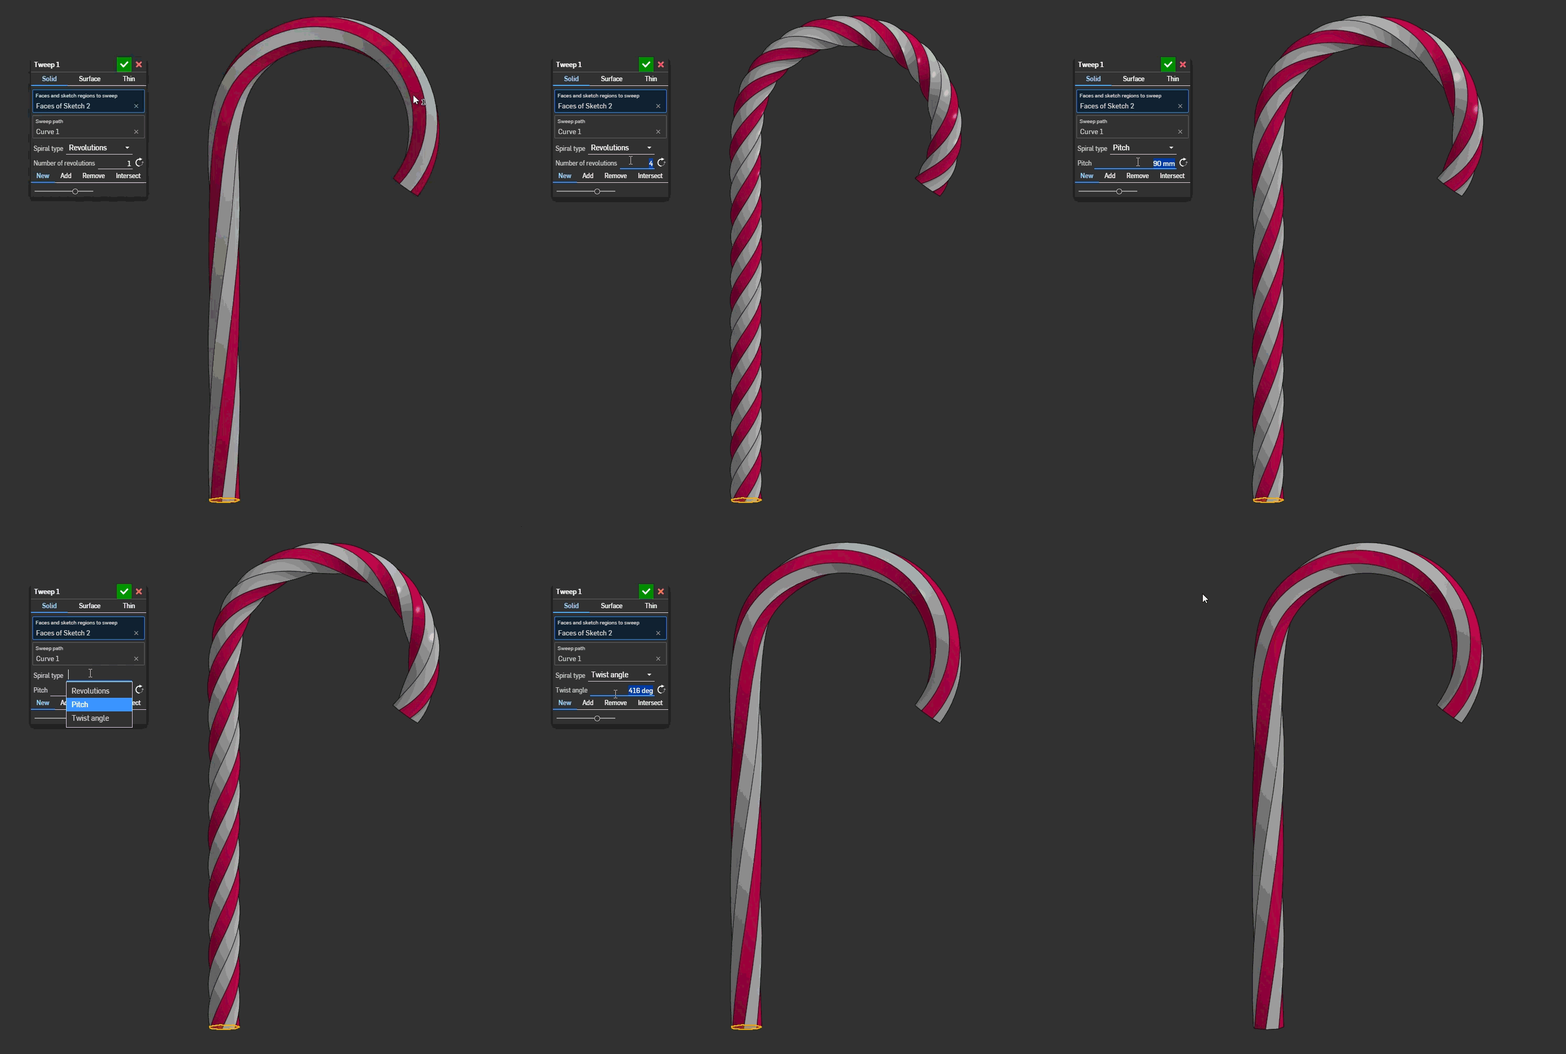
Custom Feature: Tweep
-Link to feature up front-
Look, standard sweeps are boring. They have no drama. They have no torque. They just follow the path like a good little obedient feature.
I got tired of it. So I made Tweep.
It’s a Sweep. It Twists. It’s Tweep.
Do you want your geometry to look like a churro that gave up on life? Do you need a wire that is fundamentally confused about its direction? Get it twisted.
Demo below. Merry Christmas.
Borrowed elements from @Konst_Sh 's spline expansion package which I expanded further for more flavors of 3d spiral control.


