Welcome to the Onshape forum! Ask questions and join in the discussions about everything Onshape.
First time visiting? Here are some places to start:- Looking for a certain topic? Check out the categories filter or use Search (upper right).
- Need support? Ask a question to our Community Support category.
- Please submit support tickets for bugs but you can request improvements in the Product Feedback category.
- Be respectful, on topic and if you see a problem, Flag it.
If you would like to contact our Community Manager personally, feel free to send a private message or an email.
Text use questions/issues/tricks.
 laird_broadfield
Member Posts: 42 ✭✭
laird_broadfield
Member Posts: 42 ✭✭
1) As you can see here, I'm looking at the back of the right plane -- text one and text two are on the right plane.

I want text two to be on the *Back* of the right plane, so that it appears correctly to the current viewer. I've tried fixing a corner of the text and dragging another corner to flip it (no); I've tried specifying the sketch plane while viewing from the desired perspective (no), etc. The only workaround I've found is to create a physical part (not just a plane) that has the surface I want, and then sketch on that, but that has downsides.
2) If I extrude text as a new part, I don't get a new part.

I get 67 new parts. That actually makes some sense -- but I can't figure out how to subsequently readily treat them as one part. (Tried boolean union, but they don't touch.) Even if that worked, subsequently editing the text causes a nightmare of lost and orphaned parts. Better way?
3) I figured out a way to emboss uniformly on a curved surface, but I'm curious if there's a better way.
Take ugly gray cylinder:

Sketch the lettering on a tanget (or tangent-ish) plane, and extrude to the part surface:

Translate (all 37) letter parts into the surface an appropriate distance:
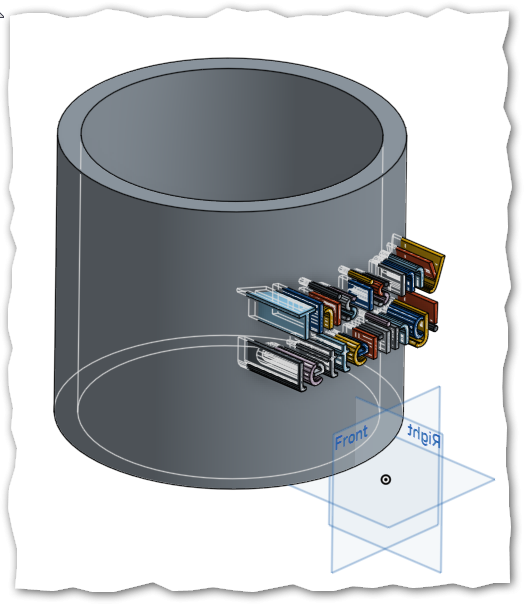
Subtract (all 37) letter parts from the main part:
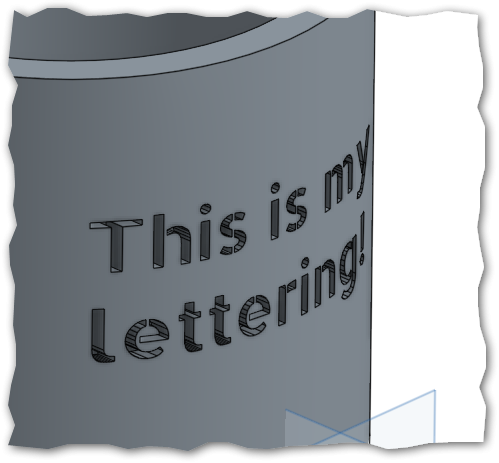
This might be obvious to the pros, but I had to figure it out; maybe this helps somebody. (At least, until there's curved surface sketching.) You'll get some distortion at the radical extents, but it's manageable.
Tagged:
0
Comments
(2): Onshape does not yet have a good way to work with lots of parts. (It should!) Until improvements come, careful use of box-select will reduce the tedium.
(3) That's a great illustration of how to do it. I'm sure it will help a lot of people.
Regarding (2) I think practically it is not possible to have multiple unattached solid bodies as one part. So, approach of Onshape is perfect.
Regarding (3) I would suggest one workaround as below.
Step-1 Extrude the text into the cylinder at maximum depth
Step-2 Create another cylinder as a new part inside first cylinder in such a way that it intersects all the parts created by text.
Step-3 Make Boolean subtract to remove the second cylinder from text part
Step-4 Again make Boolean subtract to remove text parts from first cylinder to get the text protruded along cylinder curve.