Welcome to the Onshape forum! Ask questions and join in the discussions about everything Onshape.
First time visiting? Here are some places to start:- Looking for a certain topic? Check out the categories filter or use Search (upper right).
- Need support? Ask a question to our Community Support category.
- Please submit support tickets for bugs but you can request improvements in the Product Feedback category.
- Be respectful, on topic and if you see a problem, Flag it.
If you would like to contact our Community Manager personally, feel free to send a private message or an email.
How to place start angle of helix?
 kevin_battenbough
Member Posts: 4 ✭
https://cad.onshape.com/documents/bee45b5a13d9da1d71e039ef/w/9502fb243c84e459ebb3fb59/e/c19b32372eb0d3687265565d
Hi Guys
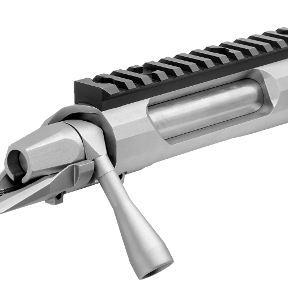
Im trying to design a rifle receiver with an improved extraction cam....and was wondering if there is a way I can snap the helix start to a point?...I can get close with playing around with the start angle but not exactly where I want it.
Please see attached ...Im trying to get the helix start point to the corner of the extruded cut square.
Thanks
Kev
Tagged:
0
Best Answer
-
 romeograham
Member, csevp Posts: 741 PRO
I don't know of a way to "snap" the start of the helix to a point, but you can get the measurement of the desired start position, and use that measurement as a variable to define the start position of the helix. That way, if you change the point (that you want the helix to start from), the helix will adjust.
First, (if you don't already have it) go get the excellent Custom Feature script Measure Value from here: https://cad.onshape.com/documents/77baa8153589a7fc5f289829/v/ceb4a03e4ac77173bf6d0074/e/181cb871f3008e6b885df46a
When you go to that link, click the + Custom Features link, and then select the FeatureScript to add it to your toolbar.
Then, make a sketch that helps you measure the angle from the X-axis (which is what the helix uses as 0):
The vertex of the two lines is coincident with the origin, and horizontal line is set to Horizontal (parallel to the X-axis). The angled line has a coincident constraint to the vertex at the corner of your opening:
Exit that sketch.
Now, open the Measure Value custom feature,
Choose Angle from the measure type drop down, and select the two lines in your last sketch. I had to select Flip angle to get the correct reading of 110.051deg:
Put a useful name in the Name field (this will become your #variable name in the next step). I used Start.
Next, define your helix as before, but in the Start Angle box, type #Start (or #whateveryourvariablenameis). Variables will autocomplete whether you type the # or not...just start typing and Onshape will autocomplete variables, constants, etc. Select your variable name and accept the feature:
The Measure Value feature is creating a variable for you to use in features later in the Feature List. You'll find that if you edit your hole size (your Sketch 4) the measured angle will update, and therefore your helix start angle will also update:

Here's a link to the updated document too: https://cad.onshape.com/documents/63a8e7ecf6839d71f0b4a775/v/7fb277daec058d493064f818/e/2a06a64a92c77941930b95a7
Hope that helps!
Romeo
6
Answers
First, (if you don't already have it) go get the excellent Custom Feature script Measure Value from here: https://cad.onshape.com/documents/77baa8153589a7fc5f289829/v/ceb4a03e4ac77173bf6d0074/e/181cb871f3008e6b885df46a
When you go to that link, click the + Custom Features link, and then select the FeatureScript to add it to your toolbar.
Then, make a sketch that helps you measure the angle from the X-axis (which is what the helix uses as 0):
The vertex of the two lines is coincident with the origin, and horizontal line is set to Horizontal (parallel to the X-axis). The angled line has a coincident constraint to the vertex at the corner of your opening:
Exit that sketch.
Now, open the Measure Value custom feature,
Choose Angle from the measure type drop down, and select the two lines in your last sketch. I had to select Flip angle to get the correct reading of 110.051deg:
Put a useful name in the Name field (this will become your #variable name in the next step). I used Start.
Next, define your helix as before, but in the Start Angle box, type #Start (or #whateveryourvariablenameis). Variables will autocomplete whether you type the # or not...just start typing and Onshape will autocomplete variables, constants, etc. Select your variable name and accept the feature:
The Measure Value feature is creating a variable for you to use in features later in the Feature List. You'll find that if you edit your hole size (your Sketch 4) the measured angle will update, and therefore your helix start angle will also update:
Here's a link to the updated document too: https://cad.onshape.com/documents/63a8e7ecf6839d71f0b4a775/v/7fb277daec058d493064f818/e/2a06a64a92c77941930b95a7
Hope that helps!
Romeo
Many thanks
Kev