Welcome to the Onshape forum! Ask questions and join in the discussions about everything Onshape.
First time visiting? Here are some places to start:- Looking for a certain topic? Check out the categories filter or use Search (upper right).
- Need support? Ask a question to our Community Support category.
- Please submit support tickets for bugs but you can request improvements in the Product Feedback category.
- Be respectful, on topic and if you see a problem, Flag it.
If you would like to contact our Community Manager personally, feel free to send a private message or an email.
Using Mate Connectors
I'm so frustrated with mate connectors. I find the tutorials and explanations that I've found completely counter intuitive and overly simply. I feel like mate connectors are totally predicated on having all your parts in one design studio. Is this correct? If so - I guess I will just model everything in one partstudio which I find hard to organize and overly complex.
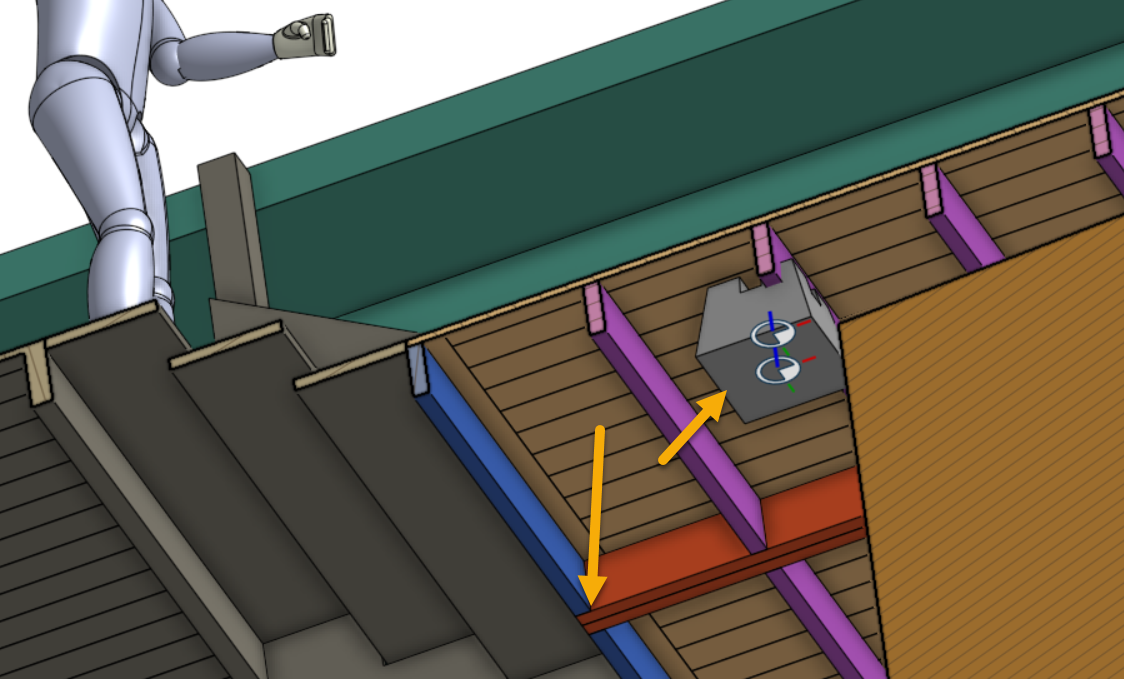
I am trying to mate a concrete footing to the ground and center it over my deck beam. I want the footing to be related to both the ground and centered over the main deck beam. Usually I would use coincident mate to align to the ground and a center plane to align with the center of the deck beam.
If there is a way to mate these together without one part studio I would like to know how I should approach.
https://cad.onshape.com/documents/ca6790362fc53c7971e108fb/w/855c164f03d0136dd0f97358/e/d55ad60546c660fe71ee307d


Mechanical Engineer | PE
Blue Origin by Day
CAD Enthusiast at Night
Blue Origin by Day
CAD Enthusiast at Night
0

Comments
All of this is in contrast to other systems where you would have to build up multiple constraints between two components (such as aligning two circular holes and then making the faces coincident). In Onshape, those steps would be combined into one mate.
I usually use mates like fasten, slider, cylindrical, etc... but sometimes I find that 2 or 3 planar mates are what I need instead. It all depends on your understanding of the concepts and what the particular situation calls for.
I got your point.
If you want to use a specific location on assemblies, you can create a Mate connector on your own. Catia has something like that, called publications. For some companies, they only can create engineering connections (mates) using publications (mate connectors), this option can be enabled on system options.
For Onshape, Mate connector creation and usage is optional.
You can see below that I created two mate connectors on this part studio. They are associated with my skeleton sketches.
These components are grouped in a subassembly. I'm not using these mate connectors here
I used these mate connector in a different assembly. It helped me to create only one mate for fixing this subassembly on Base assembly. I created a fixed mate and connected two "connectors".
I hope that these images and this model can help you to get more ideas on mate connectors usage.
https://cad.onshape.com/documents/d20824155b8ae7dbb812ade7/w/c8841e86e9c39ce881824ce8/e/396d6539555b3b1a5514dee0
Some colleagues here mentioned that you can combine multiple mates types. It works nicely for some applications, but I wish I could provide you more explanations about Mate connectors feature.
Regards,
First of all, It is needed a sketch that contains a point
A new Mate connector is associated to this sketch point and an edge as a reference.
Observe that the main axis (blue) is up and will be aligned to the concrete part on assembly.
As the fine step, we are able to create a fastened mated using two mate connectors.
https://cad.onshape.com/documents/03e1e0c548d038d92f787ef7/w/3c674ea3acacb9592f0bcb09/e/14ce9408c474d146713b8d4e