Welcome to the Onshape forum! Ask questions and join in the discussions about everything Onshape.
First time visiting? Here are some places to start:- Looking for a certain topic? Check out the categories filter or use Search (upper right).
- Need support? Ask a question to our Community Support category.
- Please submit support tickets for bugs but you can request improvements in the Product Feedback category.
- Be respectful, on topic and if you see a problem, Flag it.
If you would like to contact our Community Manager personally, feel free to send a private message or an email.
Component Created In a Specific Orientation In Part Studio Changes in Assembly
 rod_muirhead943
Member Posts: 96 EDU
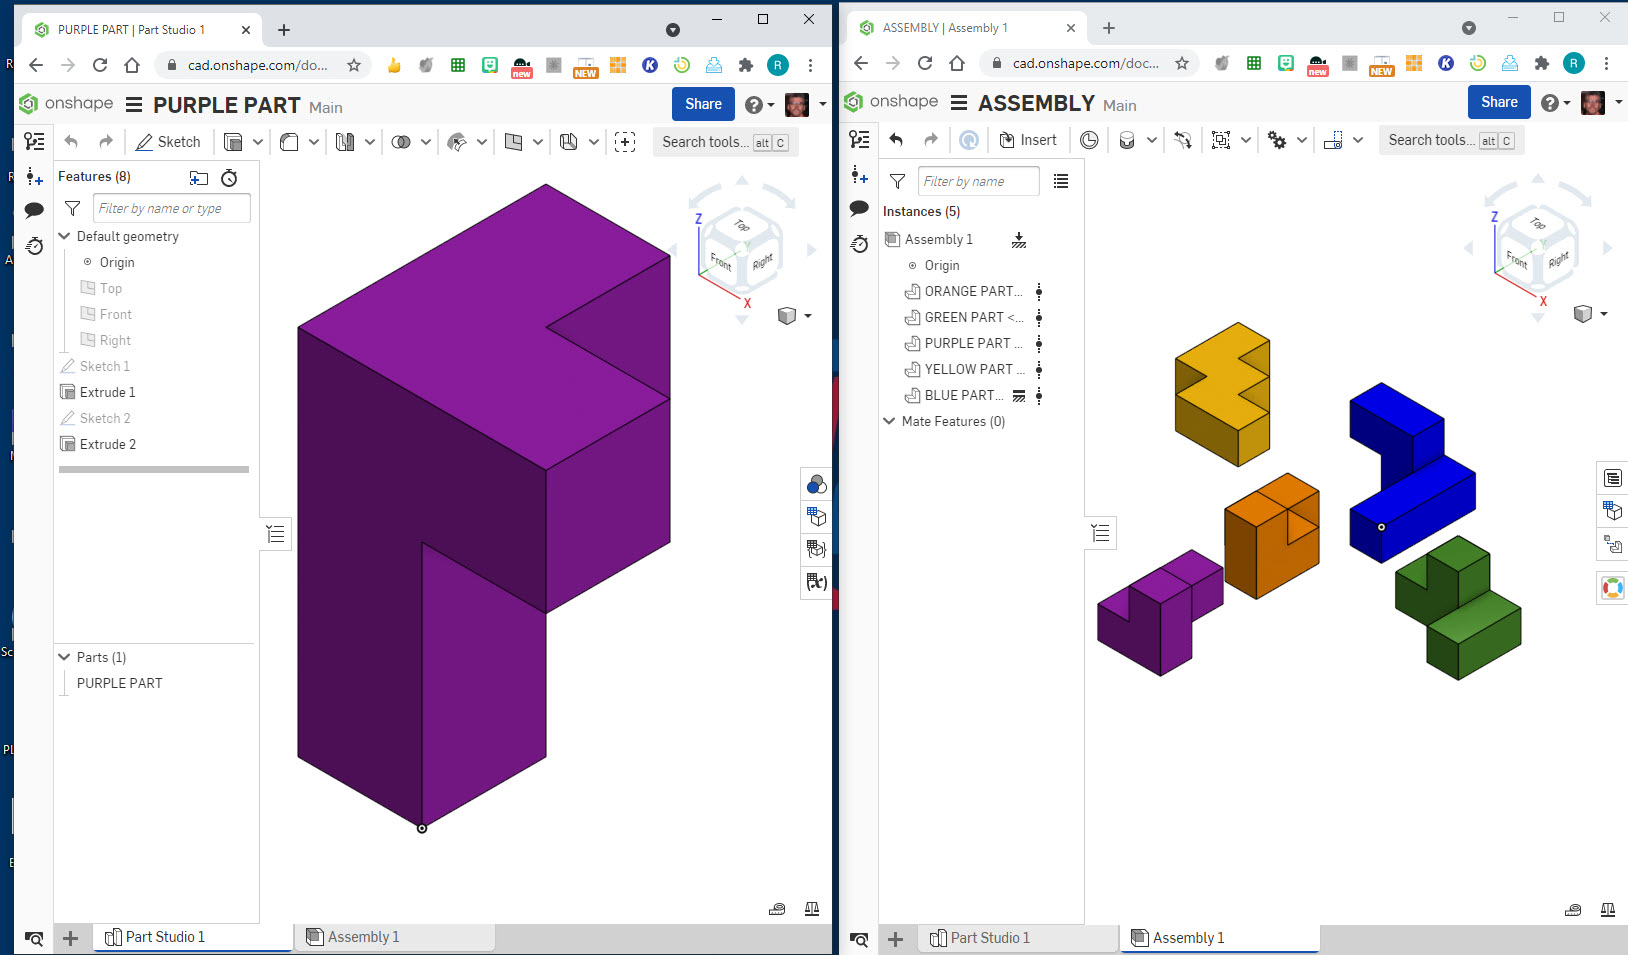
Component is created specifically in a position in an orientation in the part studio in assembly position to greatly reduce the time and number of manipulations (movements) for assembly. Why does OS change the part orientation in the assembly causing more time and manipulations for this simple assembly? Autodesk Inventor does not change the part orientation when brought into assembly (Plus) in ADI there are really nice feature commands such as "Free Rotation" of an individual component which greatly aids in assembly. To me it is very difficult / almost impossible to rotate a component into the correct assembly position in OS
Included is the component as it is built in the part studio position (TFR), and the incorrect position in assembly that OS changed when I inserted the purple component. Why did OS change the orientation? This creates more time and assembly steps.
Working smarter not harder is building individual components in assembly position / orientation, so that assembly time is reduced and goes smooth and quick. I like OS, but I miss feature commands from other systems. .
.
Included is the component as it is built in the part studio position (TFR), and the incorrect position in assembly that OS changed when I inserted the purple component. Why did OS change the orientation? This creates more time and assembly steps.
Working smarter not harder is building individual components in assembly position / orientation, so that assembly time is reduced and goes smooth and quick. I like OS, but I miss feature commands from other systems.
 .
. 0
Comments
Also, if your parts are all going to be fixed relative to each other, you can use a single "fastened" mate to mate each part. You shouldn't need lots of steps or features to mate these parts together, just one mate per part. Also, if you're using these mates, there is no need to reposition the parts prior to mating the parts together.
Mating Basics - Onshape Learning Center