Welcome to the Onshape forum! Ask questions and join in the discussions about everything Onshape.
First time visiting? Here are some places to start:- Looking for a certain topic? Check out the categories filter or use Search (upper right).
- Need support? Ask a question to our Community Support category.
- Please submit support tickets for bugs but you can request improvements in the Product Feedback category.
- Be respectful, on topic and if you see a problem, Flag it.
If you would like to contact our Community Manager personally, feel free to send a private message or an email.
3D Spline and sweep used to cut out a part
 heiko_schindler
Member Posts: 5 ✭
Hey community,
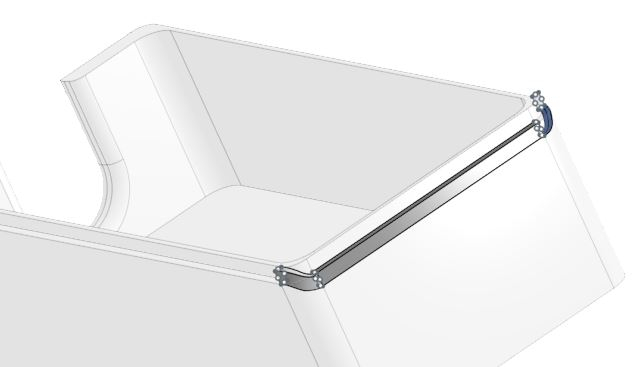
I I'm gently a little confused about the functionality and the results of using one (or more) 3D spline(s) and the loft or sweep function to cut out a radius chamfer which is needed to fit a cap.
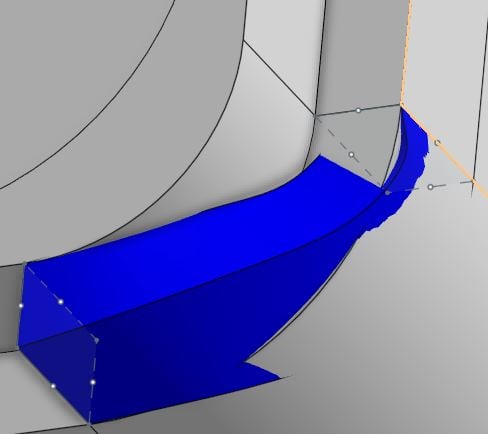
I tried a much ways ways, but no one is really beauty and the firm one. Why is the new solid twisted and how can I get a smooth fit to the initial body?
Somebody any suggestions, please?
The complete Model (also have a look to the assembly) con be found here.


Thx a lot, hoping for the hot hint...
Heiko
I I'm gently a little confused about the functionality and the results of using one (or more) 3D spline(s) and the loft or sweep function to cut out a radius chamfer which is needed to fit a cap.
I tried a much ways ways, but no one is really beauty and the firm one. Why is the new solid twisted and how can I get a smooth fit to the initial body?
Somebody any suggestions, please?
The complete Model (also have a look to the assembly) con be found here.


Thx a lot, hoping for the hot hint...
Heiko
0
Best Answers
-
 John_P_Desilets
Onshape Employees, csevp Posts: 270
  @heiko_schindler Take a look at this workflow.
Document
I split several faces of the part using sketch curves and the split face feature. After the faces were split, I used the delete face feature to remove those faces.
Next, I used the ruled surface feature to build out the lower surface.
A lofted surface was used to rebuild the wall of the part.
Last, I added a fill surface to both sides to close the remaining gaps.

It might be easier to model only half and mirror as a final operation. This will reduce the number of features. Hope this helps!
1 -
 John_P_Desilets
Onshape Employees, csevp Posts: 270
  Here is a revised workflow that shaves the feature list down a bit but still uses surfaces. Same document, different part studio.
***EDIT*** @S1mon I tried one more attempt. After splitting the faces, I moved the faces inward .6mm and that seemed to work out nicely. No surfacing needed.
2
Answers
Document
I split several faces of the part using sketch curves and the split face feature. After the faces were split, I used the delete face feature to remove those faces.
Next, I used the ruled surface feature to build out the lower surface.
A lofted surface was used to rebuild the wall of the part.
Last, I added a fill surface to both sides to close the remaining gaps.
It might be easier to model only half and mirror as a final operation. This will reduce the number of features. Hope this helps!
https://cad.onshape.com/documents/99c16d1b979ac42c42a791e9/w/1f0b3d916db5db368252ba07/e/4109c3823fc8b787575ee018
Simon Gatrall | Product Development Specialist | Open For Work
Hmmm. Replace face is not behaving the way I would like. I'd probably end up redoing this quite differently to fix this. Here's just the surfaces, and you can see that they're tangent:
Then after the replace face, the edge moves 0.035mm for no good reason. The dihedral angle is ~0.1-0.3 degrees which no one would see in reality, but I'd probably fix this anyway, just because.
Simon Gatrall | Product Development Specialist | Open For Work
***EDIT*** @S1mon I tried one more attempt. After splitting the faces, I moved the faces inward .6mm and that seemed to work out nicely. No surfacing needed.
thank you very much for you great job, little complicated I think for a, like I mean, not so unusual requirement.
I found another way to fix my special case, but this is also not really the best way maybe...
Nevertheless, in yours the is still this curious torque at the curve where the surface is not orthogonal to the main surface of the body. I don't understand why, because the 3D-spline has no parameter (and really no matter) to spin in one destination.
If somebody can explain this, make my day....
If you are max. motivated you can found my simple solution here.
greets and a pretty nice sunday
Heiko