Welcome to the Onshape forum! Ask questions and join in the discussions about everything Onshape.
First time visiting? Here are some places to start:- Looking for a certain topic? Check out the categories filter or use Search (upper right).
- Need support? Ask a question to our Community Support category.
- Please submit support tickets for bugs but you can request improvements in the Product Feedback category.
- Be respectful, on topic and if you see a problem, Flag it.
If you would like to contact our Community Manager personally, feel free to send a private message or an email.
How do I use an imported part to remove material?
 steven_wild286
Member Posts: 6 ✭
Hi, I've only used Onshape a few times, and I think I've tackled something too hard.
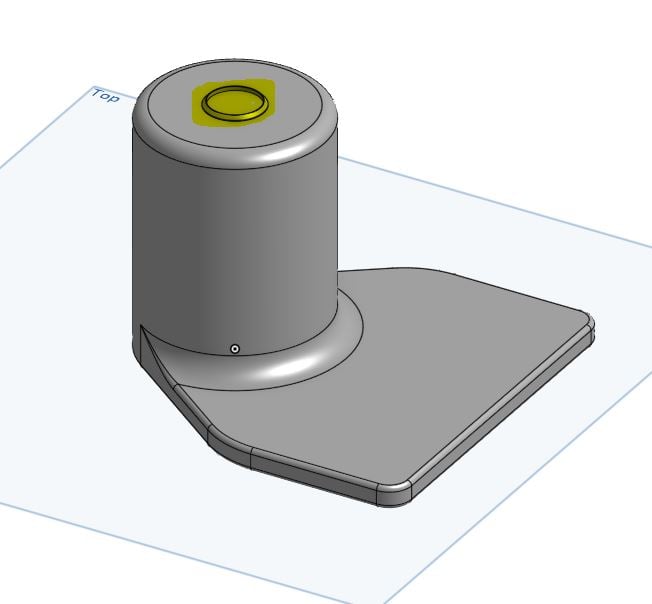
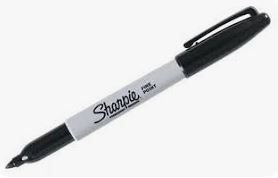
I'm trying to design a holder for a sharpie marker. I work in a laboratory where we often have to uncap and use a sharpie one-handed. My idea is to have a holder with a sharpie-shaped hole, and a flange that fits tightly under a piece of lab equipment to hold it in place. The following image shows what I've designed so far.


To start off, I downloaded a .step file of a sharpie marker/cap from Printables. Then I imported it into Onshape, deleted all the Parts except the cap, and drew my sketch and extruded around the cap. The end of the cap Part is highlighted yellow in the image above.
However, it appears that the extrusion has filled in the inside of the cap. Is there any way that I can set the cap part to "remove"? Actually, I don't want to remove the shape of the entire cap, just the hollow bit inside the cap, where the sharpie marker clips in.
I'm sure I've done this completely the wrong way. I'm looking forward to any advice that can point me in the right direction.
Here is the link to my file:
Thanks
0
Best Answers
-
 MichaelPascoe
Member Posts: 2,772 PRO
Boolean subtract will be perfect for this. I'll take a look and see what's going on in your model.
Looks like Extrude 1 needs to be set to "New" instead of "Add". This will let you create a new part instead of merging it with the Sharpie lid.
Then, you will need to simplify the lid so that it can easily be subtracted from the main part. Try using Fill, Enclose, and Boolean to fill the void in the Sharpie lid. Then use a sketch, and extrude the outlined shape of the lid clip.
Learn more about the Gospel of Christ ( Here )
CADSharp - We make custom features and integrated Onshape apps! Learn How to FeatureScript Here 🔴0 -
 MichaelPascoe
Member Posts: 2,772 PRO
Here you go, try something like this:
https://cad.onshape.com/documents/72bdca11d26db0d278d9feb6/w/e0ab02a8da41a323de6fcb28/e/bf5b048e62cf1a3cc41893e7?renderMode=0&uiState=64778b644273044ff7662d9f
Learn more about the Gospel of Christ ( Here )
CADSharp - We make custom features and integrated Onshape apps! Learn How to FeatureScript Here 🔴0
Answers
Boolean subtract will be perfect for this. I'll take a look and see what's going on in your model.
Looks like Extrude 1 needs to be set to "New" instead of "Add". This will let you create a new part instead of merging it with the Sharpie lid.
Then, you will need to simplify the lid so that it can easily be subtracted from the main part. Try using Fill, Enclose, and Boolean to fill the void in the Sharpie lid. Then use a sketch, and extrude the outlined shape of the lid clip.
Learn more about the Gospel of Christ ( Here )
CADSharp - We make custom features and integrated Onshape apps! Learn How to FeatureScript Here 🔴
Here you go, try something like this:
https://cad.onshape.com/documents/72bdca11d26db0d278d9feb6/w/e0ab02a8da41a323de6fcb28/e/bf5b048e62cf1a3cc41893e7?renderMode=0&uiState=64778b644273044ff7662d9f
Learn more about the Gospel of Christ ( Here )
CADSharp - We make custom features and integrated Onshape apps! Learn How to FeatureScript Here 🔴
@steven_wild286, sure. Here is the full un-edited video instead of the gif:
Learn more about the Gospel of Christ ( Here )
CADSharp - We make custom features and integrated Onshape apps! Learn How to FeatureScript Here 🔴
Robert's approach is usually the best for learning from other peoples Onshape documents. Once you become more familiar with Onshape, it will be easier for you to look at a feature tree and see what is going on.
In case no one has shared this with you yet, the Onshape Learning Pathways at the Learning Center are where it's at! If you complete those, you will be fluent in Onshape.
Learn more about the Gospel of Christ ( Here )
CADSharp - We make custom features and integrated Onshape apps! Learn How to FeatureScript Here 🔴