Welcome to the Onshape forum! Ask questions and join in the discussions about everything Onshape.
First time visiting? Here are some places to start:- Looking for a certain topic? Check out the categories filter or use Search (upper right).
- Need support? Ask a question to our Community Support category.
- Please submit support tickets for bugs but you can request improvements in the Product Feedback category.
- Be respectful, on topic and if you see a problem, Flag it.
If you would like to contact our Community Manager personally, feel free to send a private message or an email.
Need a little help splitting and mirroring
 StillMaker
Member Posts: 26 EDU
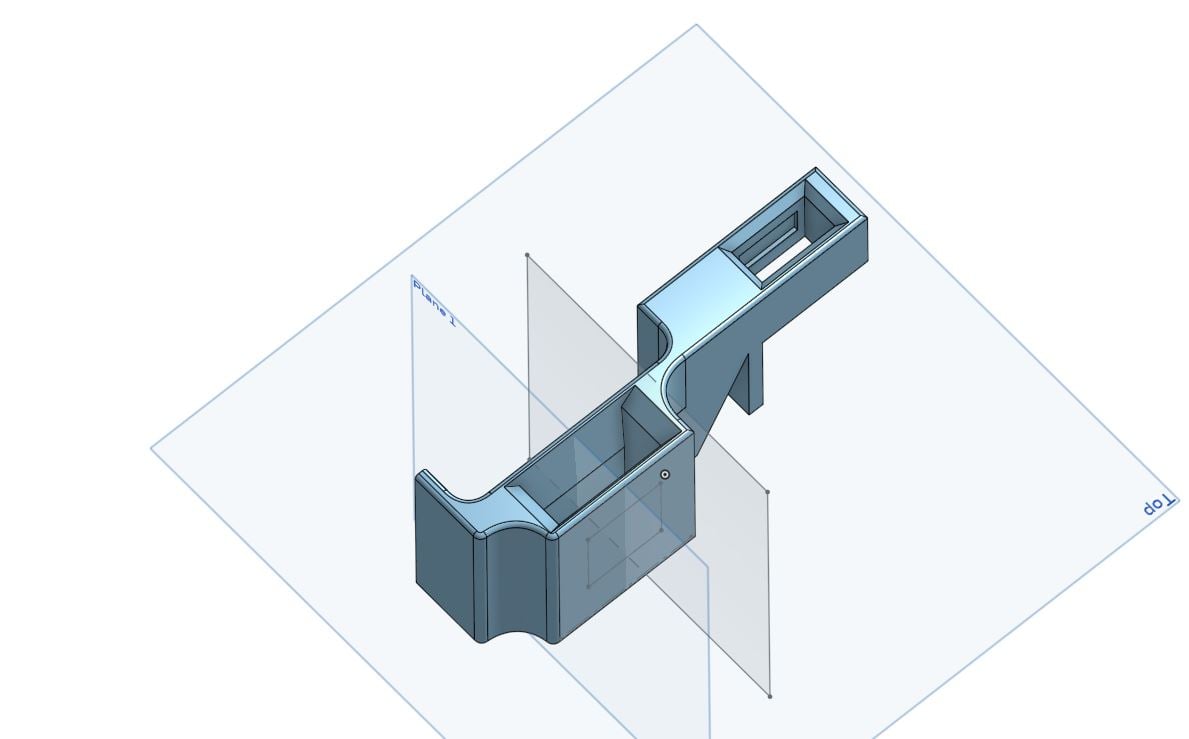
I'm new to CAD, and new to OnShape. I'm using it for 3d printer projects. I could use a nudge in the right direction about splitting this part and mirroring it.
I'd like to split it around the area I've marked with "Plane 1". (Ideally I'd split it directly in the center of that main void). I'd like the keep the smaller, lower left half, and then mirror it.
I've watched some YouTube videos, but so far nothing has been similar enough to what I am doing to be helpful.
Thanks for any help.
This is my file, which I copied from a public one I found: https://cad.onshape.com/documents/712e820776e7438f38ab7eaa/w/1b60a957467c5452331c47d1/e/ac094b9b0a2975f1d64d67a8?renderMode=0&uiState=65bed5a37ae5ca2aeaae5fd7


0
Comments
https://cad.onshape.com/documents/712e820776e7438f38ab7eaa/w/1b60a957467c5452331c47d1/e/ac094b9b0a2975f1d64d67a8?renderMode=0&uiState=65bed5a37ae5ca2aeaae5fd7
Here is the link now, from that Share modal window: https://cad.onshape.com/documents/712e820776e7438f38ab7eaa/w/1b60a957467c5452331c47d1/e/ac094b9b0a2975f1d64d67a8?renderMode=0&uiState=65beecd4c278c921e10868b4
I was able to perform both operations by following your instruction.
A follow up question for you or anyone: How do I go about resolving all the features with errors? I thought maybe they referred to the parts (I'm sure thats not the right term...) that have been deleted via the split. So I tried just deleting all of them, but that ends up removing some extrudes and fillets from my part. So instead I tried deleting them one by one. Some of them can be deleted just fine (no effect on the part), but this one, for example (Sketch 11, screenshot below), does affect it.
... so I double clicked on Sketch 11 to edit it, then I deleted everything that was showing up in red (I don't know what they were, I haven't found a page yet that tells me what all the little line icons mean). Then clicked the green tick. Sketch 11 is no longer showing as a red error.