Welcome to the Onshape forum! Ask questions and join in the discussions about everything Onshape.
First time visiting? Here are some places to start:- Looking for a certain topic? Check out the categories filter or use Search (upper right).
- Need support? Ask a question to our Community Support category.
- Please submit support tickets for bugs but you can request improvements in the Product Feedback category.
- Be respectful, on topic and if you see a problem, Flag it.
If you would like to contact our Community Manager personally, feel free to send a private message or an email.
Inside my STEM classroom, Christmas tree and onShape :)
 daniel_chow
Member Posts: 108 ✭✭✭
in General
Season Greetings everyone!
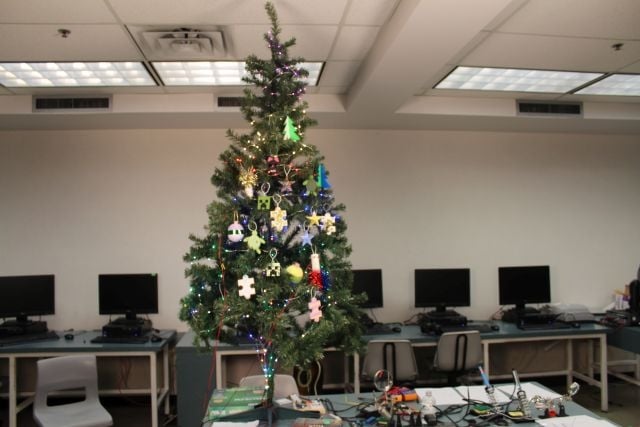
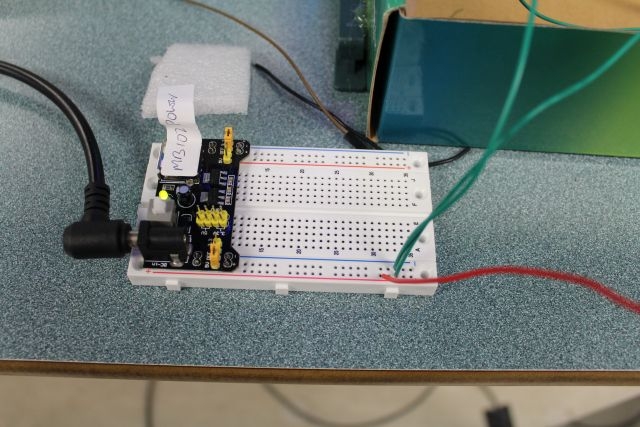
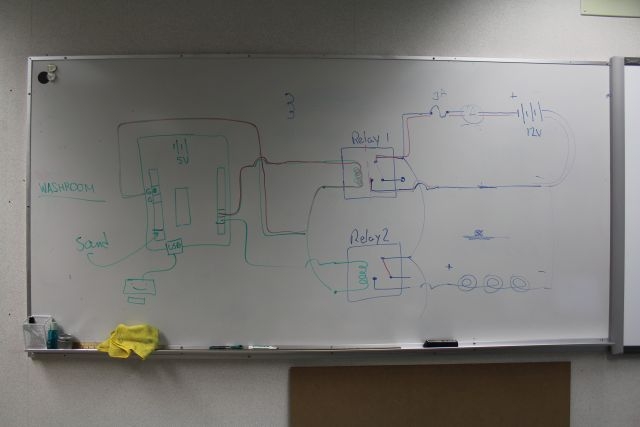
Just wanted to share with you what we have been doing inside of my secondary school classroom "STEM" (science, technology, engineering, math) classroom. We made a bumpin' Christmas Tree that bumps to the beat of music. We used an Arduino microcontroller with a KY-37 audio sensor. We also used 6 strips of LED lights around a tree and controlled them using a set of relays. The lights bump to the level and beat of the music.
The cool part is that my students have been learning the fundamentals of CAD using onShape. They have been designing Christmas ornaments and then producing them on our 3D printer. Some of them build two and even three piece models. They learned to design around the limitations of the 3D printer. Here are some pics:





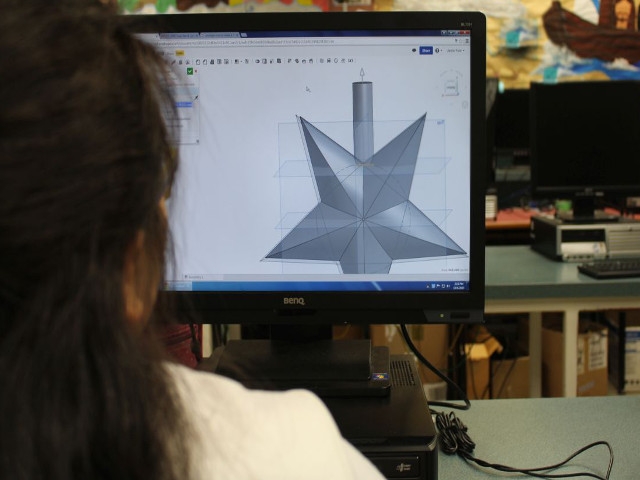
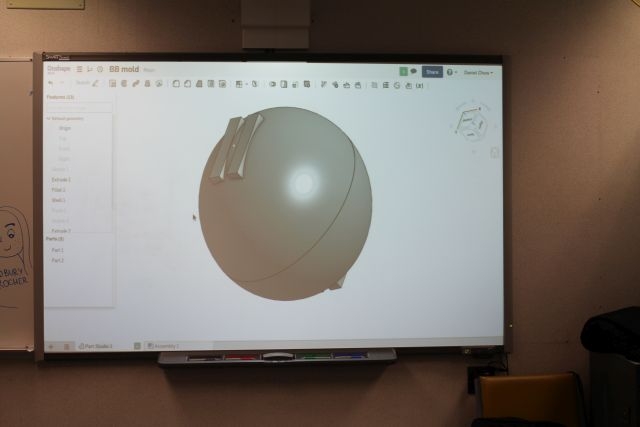


Merry Christmas! onShape rocks!
Just wanted to share with you what we have been doing inside of my secondary school classroom "STEM" (science, technology, engineering, math) classroom. We made a bumpin' Christmas Tree that bumps to the beat of music. We used an Arduino microcontroller with a KY-37 audio sensor. We also used 6 strips of LED lights around a tree and controlled them using a set of relays. The lights bump to the level and beat of the music.
The cool part is that my students have been learning the fundamentals of CAD using onShape. They have been designing Christmas ornaments and then producing them on our 3D printer. Some of them build two and even three piece models. They learned to design around the limitations of the 3D printer. Here are some pics:


Merry Christmas! onShape rocks!
5
Comments
But I do think you are missing the attached ornament
This student was first to design her ornament in onShape then print it. Doesn't seem like much but a lot of know-how had to come together from idea > design > 3D print.
We originally printed the entire star as one piece. The first print failed because she disabled support material. The second print worked when support material was added to the GCode of the printer but it was hard to remove. We tweaked the support material settings and that made it easier to peel off but still left with a rough surface. Here is a pic of it printing with support material added by Repetier --- the program that converts the STL file generated by onShape to GCode (XYZ cartesian coordinates) for the printer.
Thinking this through a bit, we decided to change the model in onShape and print two halves of the star thereby eliminating the need for support material. It prints faster, and less prep at the end. Its not a hard model to design but again, this represents the first complete cycle of being able to complete the entire production process from initial idea to finished / produced product.
I should mention that we changed the model again to print SOLID instead of hollow / shell. Repetier by default will not print solid plastic, it will infill the solid with a honeycomb pattern. But we could have printed the exact model shown above WITH support material added by Repetier. But at the time we printed this, we were still learning CAD and 3D printing.

It has been an incredible learning experience for the girls to move from initial idea to finished job. onShape allows them to load the model on their cell phone and look at it on the bus to get some ideas, then bring it home and work on it. This entire process demonstrates the feedback cycle of imagine > design > build > then resolve issues > re-design > build > resolve more issues > re-design again and build. The cycle continues until successful, what an incredible learning experience and a great way to introduce the world of CAD / CAM / CNC / 3D printing! onShape ROCKS!The sides / edges of the star are curved. Its also hollow.
The idea here is to use onShape to hollow it out or shell then split it into two halves. Then she could design screw holes or snaps so the model can be disassembled easily and snapped back together. Initial plans are to design a bed in it to house an Arduino Nano. She should use onShape to design a battery holder as well, a switch. Or she could onShape a USB port on it as well so we could program it without needing to open it up. The possibilities are endless.
Other ideas include using 1W LED's around the edges of the star and controlled by the Arduino Nano. We could also include a button where we could push to change the pattern of the lights blinking. Or perhaps put an audio sensor in it so you could clap and it would change the flash pattern. Or bump to music. Or a heartbeat sensor so when you touch it the lights would bump to your heartbeat. Or a temp sensor whereit would start to glow red when the temp increases. Or whatever interactivity she wants to include.
And here we have another great example of STEM using onShape. Science (physics, electrical circuits) Technology (programming), Engineering (CAD, onShape, CNC machine control), Math (uhm, yea:)
We'll see what she wants to do. As her teacher, basically anything she wants is fine with me.
I'm putting together a new activity --- a bridge building contest combining onShape and 3D printing. It will be appropriate for secondary school students. More on that later.
So I haven't introduced CAD or STEM to my grade 9's. There are only so many changes I can make in one year, getting this STEM program started has been a lot of work! SO anyways, my grade 9's are working on a stop motion / claymation project as part of an IT class. Generally, I like to "teach" IT by doing things rather than a traditional "lecture".
So anyways I wasn't planning to start CAD or CNC with the grade 9's until later. But the opportunity just kind of popped up! Here's how: one group needed some arrows for their 1-2 minute claymation project. They can't be made of clay because they need to be rigid. Hmm... what to do? What about CAD? Lets draw it in Onshape and print the props they need? So I had each of the girls start an Onshape account, 90 seconds later we were ready to draw. When I asked to share the drawing with each other and myself, they knew exactly what to do. Here are some pics:
So a video production starts with an idea, then a script and/or storyboard to sketch out the video. The storyboard allows them to play the videos in their head. They can move around the pieces of paper to re-arrange the story. We'll be filming at only 10-12 fps for a 1-2 minute production.
Here is the setup. Got a Canon D5, no just kidding LOL just a T5 DSLR, light box, they made the backdrop and clay characters.
Designing the arrows using Onshape!
Importing the STL files into Repetier which is the program that will generate the GCode XYZ coordinates for the 3D printer
Really, how fun is designing and printing your own props for your claymation stop motion video??
And a view of our CAD / 3D workstation.
For extra credit, if you or your students were interested in seeing more of how the printed arrows could be made in production faster and for a better price (pretending here that these kids wanted to commercialize something) - I would recommend poking around a company like protolabs (https://www.protolabs.com/). You can submit the models for quote, correct the geometry issues needed for production, and see what it would cost. Very worthwhile when the kids or you are ready to see the escalation of prototyping and development work moving into production considerations. Maybe its the next semester in your syllabus you've got going there. All the Best!