Welcome to the Onshape forum! Ask questions and join in the discussions about everything Onshape.
First time visiting? Here are some places to start:- Looking for a certain topic? Check out the categories filter or use Search (upper right).
- Need support? Ask a question to our Community Support category.
- Please submit support tickets for bugs but you can request improvements in the Product Feedback category.
- Be respectful, on topic and if you see a problem, Flag it.
If you would like to contact our Community Manager personally, feel free to send a private message or an email.
How can I create a smooth ergonomic surface?
 JeH
Member Posts: 10 ✭
JeH
Member Posts: 10 ✭
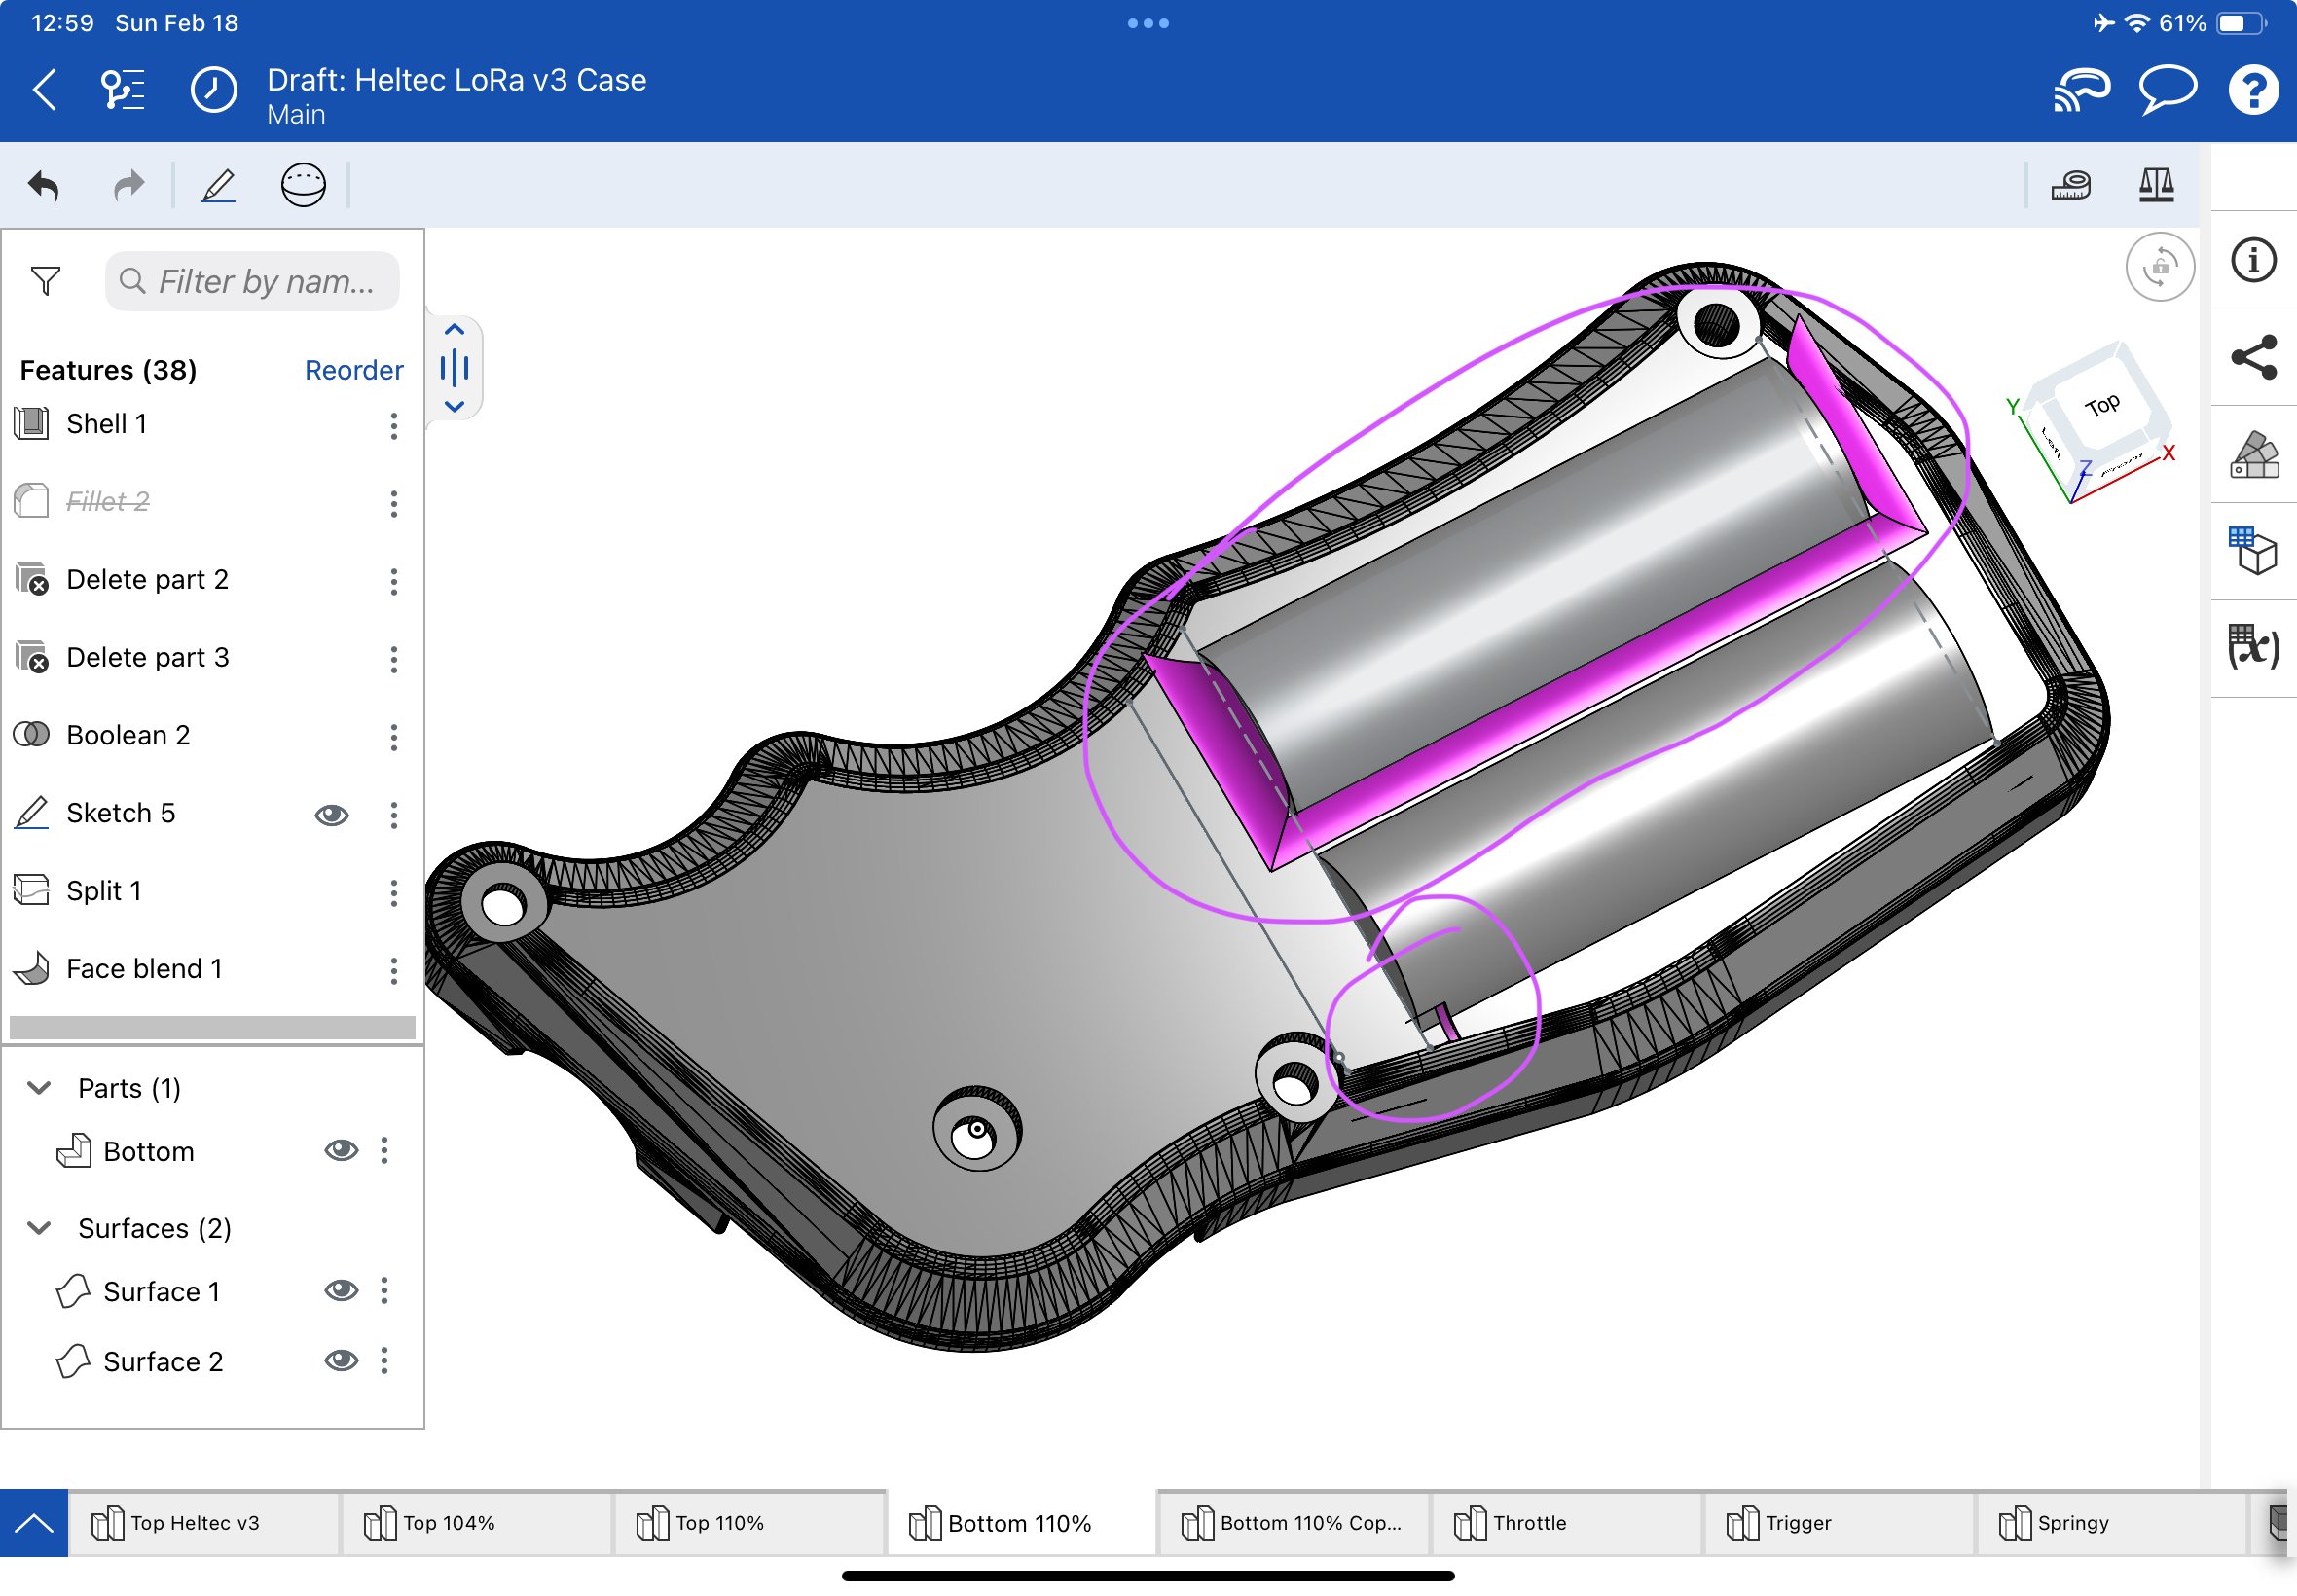
Hi! I’d like to create a nice ergonomic surface to this case, which has two batteries sticking out on it’s back, that I added.
I tried boundary surface, surface blend and fill but was not able to get anywhere near a satisfactory result. The only thing I can get to show up at all is a detached face blend, that is far from useful.
I tried boundary surface, surface blend and fill but was not able to get anywhere near a satisfactory result. The only thing I can get to show up at all is a detached face blend, that is far from useful.
The pink surfaces should be added rather than produce new ‘objects’ and of course both batteries should be fully enclosed. A smooth transition into the case edges would be nice.
Can you explain how this would be realised?
Here is my model: https://cad.onshape.com/documents/a924765c7bd63f6713c7a208/w/5d66717cdfa3dce030d5f493/e/a75b413d6c58529556799f4b
Here is my model: https://cad.onshape.com/documents/a924765c7bd63f6713c7a208/w/5d66717cdfa3dce030d5f493/e/a75b413d6c58529556799f4b
0
Best Answers
-
 martin_kopplow
Member Posts: 1,212 PRO
To achieve this, you'll need to learn surface modeling. That's an art form some people make a living on and is not explained in a few words. There are quite good surface modeling tutorials in the leaning section of Onshape, though, which I recommend working through.To build the surface you want, you'll have to create sets of strategically placed curves, to define the shape, such as a representation of the base part silhouette, the contact faces, and some profile and guide curves, then put a number of faces on them.1
martin_kopplow
Member Posts: 1,212 PRO
To achieve this, you'll need to learn surface modeling. That's an art form some people make a living on and is not explained in a few words. There are quite good surface modeling tutorials in the leaning section of Onshape, though, which I recommend working through.To build the surface you want, you'll have to create sets of strategically placed curves, to define the shape, such as a representation of the base part silhouette, the contact faces, and some profile and guide curves, then put a number of faces on them.1 -
 S1mon
Member Posts: 3,974 PRO
It also looks like you're starting with an imported STL or other mesh. While it's possible to work with these in a mixed modeling approach, it will only make surface modeling - which is already not a beginner thing - much, much harder. I would recommend learning to remodel the basic imported shape natively first, and then work towards how to add whatever shape you want for the battery bulges.
S1mon
Member Posts: 3,974 PRO
It also looks like you're starting with an imported STL or other mesh. While it's possible to work with these in a mixed modeling approach, it will only make surface modeling - which is already not a beginner thing - much, much harder. I would recommend learning to remodel the basic imported shape natively first, and then work towards how to add whatever shape you want for the battery bulges.Simon Gatrall | Product Development, Engineering, Design, Onshape | Ex- IDEO, PCH, Unagi, Carbon | LinkedIn
0 -
 John_P_Desilets
Onshape Employees, csevp Posts: 271
John_P_Desilets
Onshape Employees, csevp Posts: 271  @JeH 100% agree that surfacing is the way to go here. One technique you can try out is offsetting some of these surfaces to use as construction geometry and add the features to those surfaces. Once complete, you can enclose the surface and add to the import. Not very "clean" so to speak, but opens the door to alternative workflows.


Here is a quick example of using this workflow with an STL.
Both examples are in this document.
https://cad.onshape.com/documents/f9677ffc3b05bc175eefda07/w/d7527c0554d0ad3dc610062a/e/fd85329677806a482d6613b8
0
Answers
Simon Gatrall | Product Development, Engineering, Design, Onshape | Ex- IDEO, PCH, Unagi, Carbon | LinkedIn
I’m doing basics modelling for the home-3D printer for some years now but surface modelling is at totally more complex thing. I accept that
Here is a quick example of using this workflow with an STL.
Both examples are in this document.
https://cad.onshape.com/documents/f9677ffc3b05bc175eefda07/w/d7527c0554d0ad3dc610062a/e/fd85329677806a482d6613b8
Offsetting the face and work with the result sounds interesting, I will try that.