Welcome to the Onshape forum! Ask questions and join in the discussions about everything Onshape.
First time visiting? Here are some places to start:- Looking for a certain topic? Check out the categories filter or use Search (upper right).
- Need support? Ask a question to our Community Support category.
- Please submit support tickets for bugs but you can request improvements in the Product Feedback category.
- Be respectful, on topic and if you see a problem, Flag it.
If you would like to contact our Community Manager personally, feel free to send a private message or an email.
Using the auto-layout featurescript on multiple parts
 sam_one
Member Posts: 19 ✭
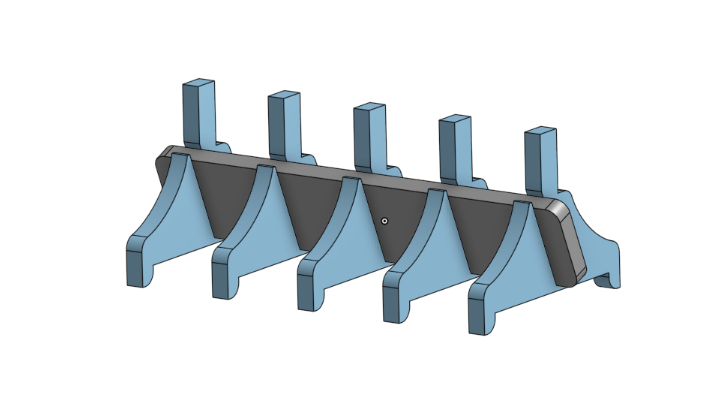
I made a toothbrush stand consisting of the following two unique parts: rack (grey) & foot (light blue)

In the assembly tab, I put them together using a pattern, so that there are 5 instances of the foot under the one rack. This sums up to a total of 6 parts.
I'd like to put the auto layout featurescript to use for arranging these 5 parts in a lasercutter friendly fashion.
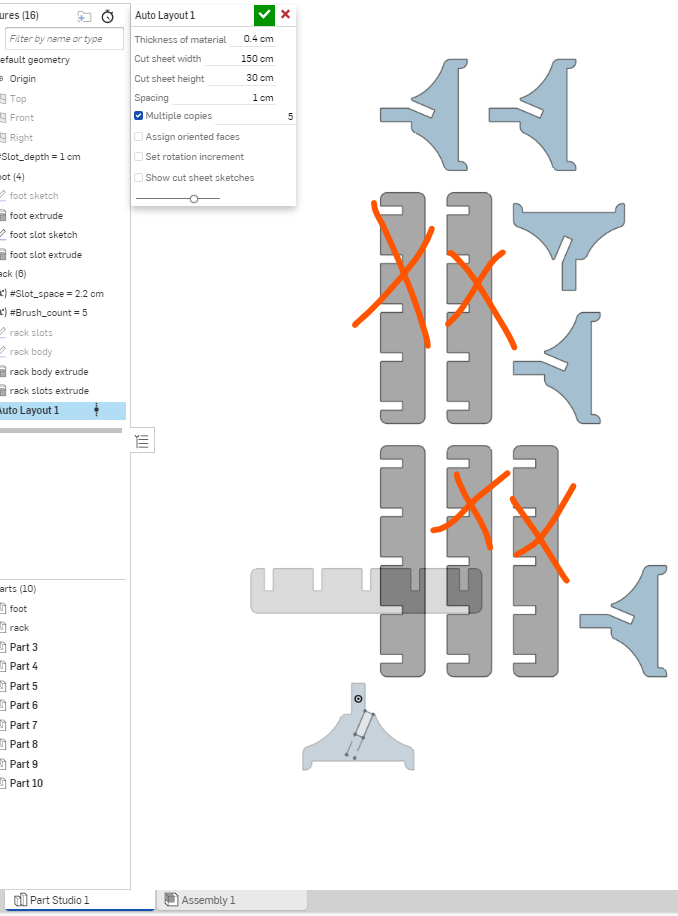
The problem is that I can't use the script inside the assembly, the button only shows up in the part studio. So, I'll have to do it in the part studio then. However, in the part studio, there's only one instance of the foot (I do the instancing with the pattern in the assembly). Fortunately, there is an option within the featurescript that let's you do add duplicates, but when I enter 5, it also copies the rack 5 times. 4 out of 5 are redundant (see the red cross), because I only need one (see the first image).


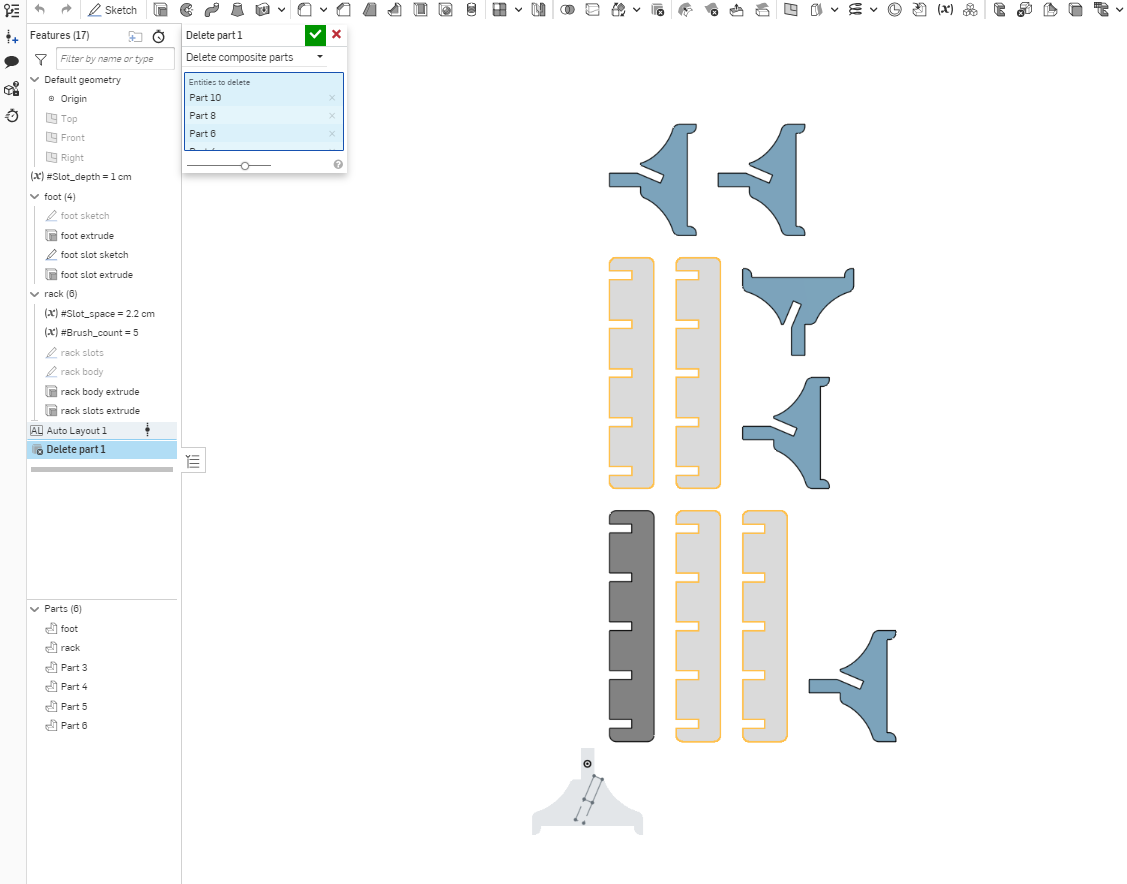
so, you might say, just delete the redundant parts (see image below). That works, but it leaves holes, defeating the purpose of auto-layout..
here's a thought: maybe I can re-layout the parts? I tried it, but it failed to recognise the thicknesses? Probably did something wrong.


Given this situation, what are some things that I can do to lay out my parts and overcome this problem?

In the assembly tab, I put them together using a pattern, so that there are 5 instances of the foot under the one rack. This sums up to a total of 6 parts.
I'd like to put the auto layout featurescript to use for arranging these 5 parts in a lasercutter friendly fashion.
The problem is that I can't use the script inside the assembly, the button only shows up in the part studio. So, I'll have to do it in the part studio then. However, in the part studio, there's only one instance of the foot (I do the instancing with the pattern in the assembly). Fortunately, there is an option within the featurescript that let's you do add duplicates, but when I enter 5, it also copies the rack 5 times. 4 out of 5 are redundant (see the red cross), because I only need one (see the first image).


so, you might say, just delete the redundant parts (see image below). That works, but it leaves holes, defeating the purpose of auto-layout..
here's a thought: maybe I can re-layout the parts? I tried it, but it failed to recognise the thicknesses? Probably did something wrong.


Given this situation, what are some things that I can do to lay out my parts and overcome this problem?
0
Best Answer
-
 eric_pesty
Member, pcbaevp Posts: 2,467 PRO
If you really want to use the "auto layout", create a new part studio and derive in the one instance of the rack and then 5 instances of the foot.
However given how simple this is I'm not sure why you need to use the auto-layout at all... You could just "manually" layout the parts in an assembly (using a pattern for the feet) and create a drawing of that to export a DXF (this could even be a configuration of you assembly).0
Answers
However given how simple this is I'm not sure why you need to use the auto-layout at all... You could just "manually" layout the parts in an assembly (using a pattern for the feet) and create a drawing of that to export a DXF (this could even be a configuration of you assembly).
Yeah so I made this thing partly because I need it and partly because I wanted to practice my lasercutting workflow by actually doing it. If it wasn't for the educational value, I'd go for a manual layout in an assembly, as you said. Many thanks for describing both options!