Welcome to the Onshape forum! Ask questions and join in the discussions about everything Onshape.
First time visiting? Here are some places to start:- Looking for a certain topic? Check out the categories filter or use Search (upper right).
- Need support? Ask a question to our Community Support category.
- Please submit support tickets for bugs but you can request improvements in the Product Feedback category.
- Be respectful, on topic and if you see a problem, Flag it.
If you would like to contact our Community Manager personally, feel free to send a private message or an email.
Sketching / extruding along a curved surface
 ethanjrt
Member Posts: 4 ✭
Hi! Long time (off-and-on) relatively low-skill user, first time forum participant.
I have a dust collection adapter with some compound curves -- a square design at top narrowing to a hollow cylinder at bottom -- that I'm 3D printing in four parts due to limited printer bed size. I've actually printed a V1 of this design successfully, but I'm unhappy with how the single "puzzle piece" style connector at the top of each part allows the bottom to float freely; it doesn't perform well under the stress of the dust collector suction.
I'm trying to add another "puzzle piece" style connector on the vertical column near the bottom -- you can see my first attempt here. However I can't figure out how to make a sketch or an extrusion that follows the curve of the cylinder.
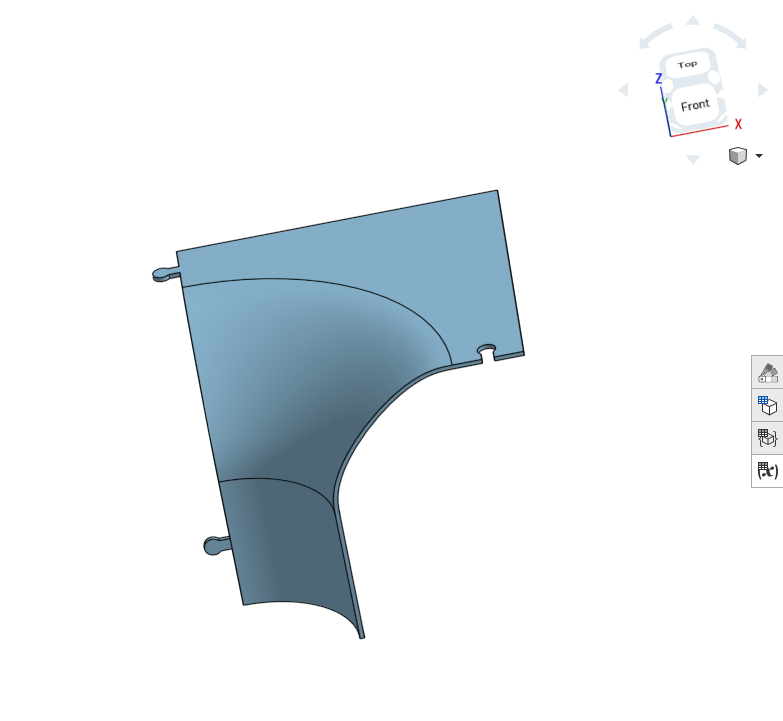
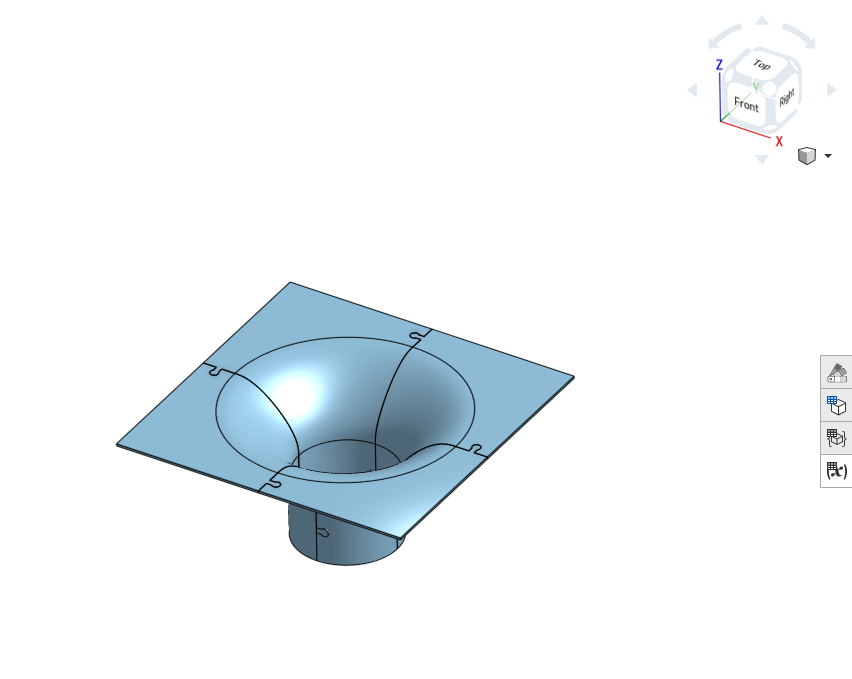
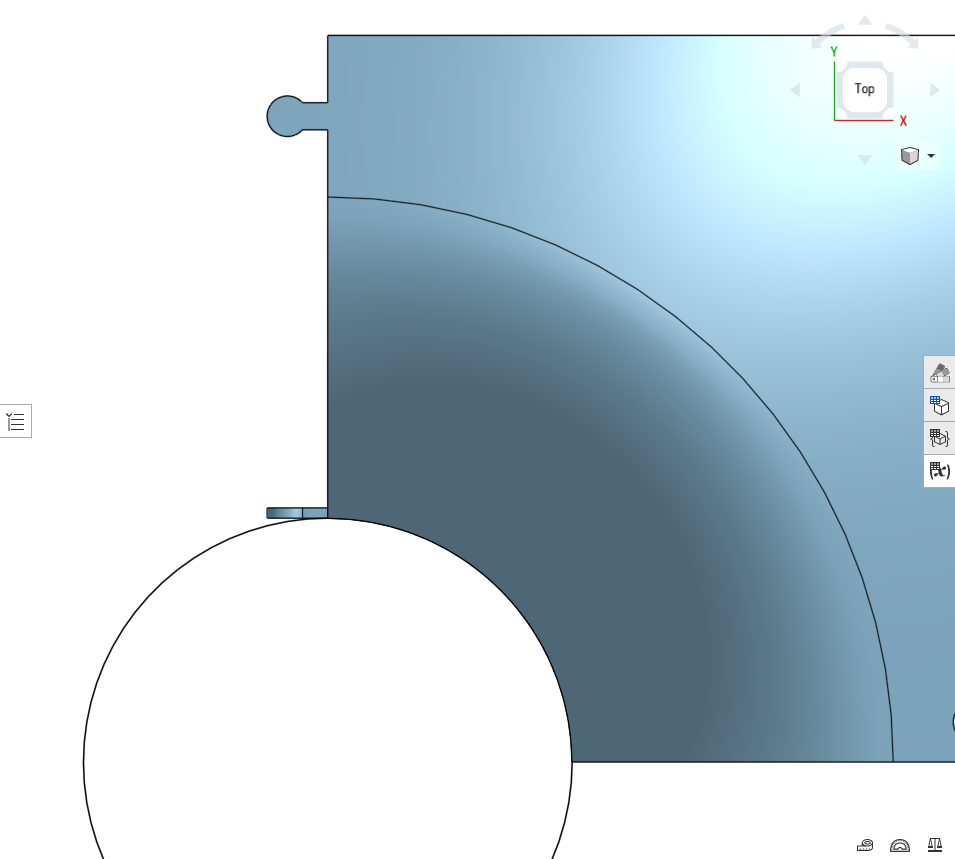
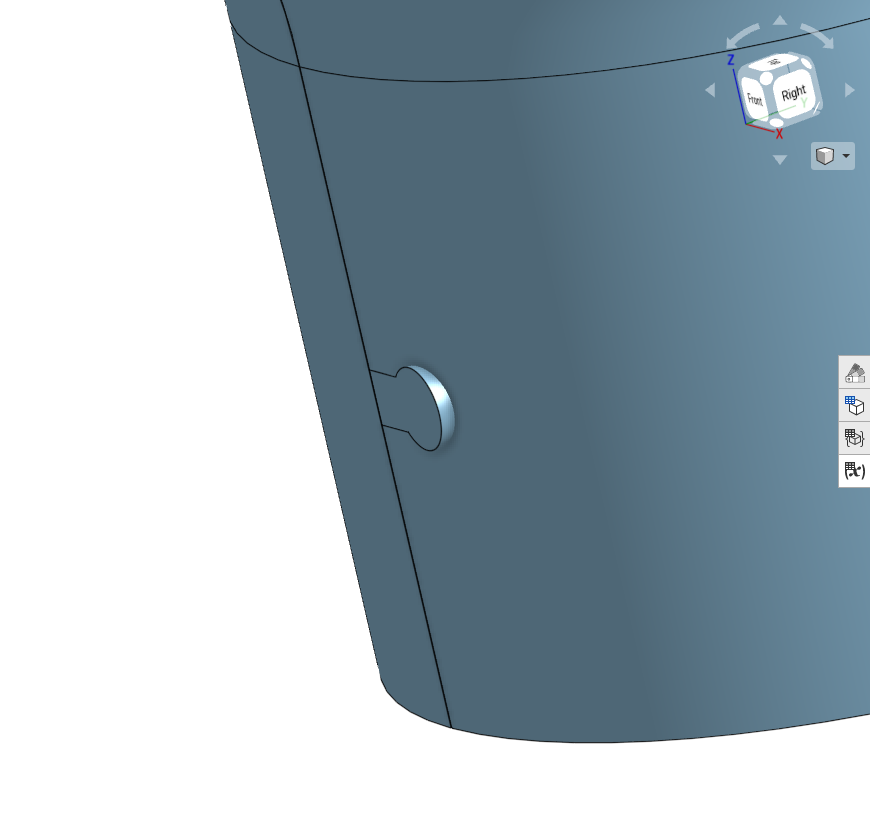
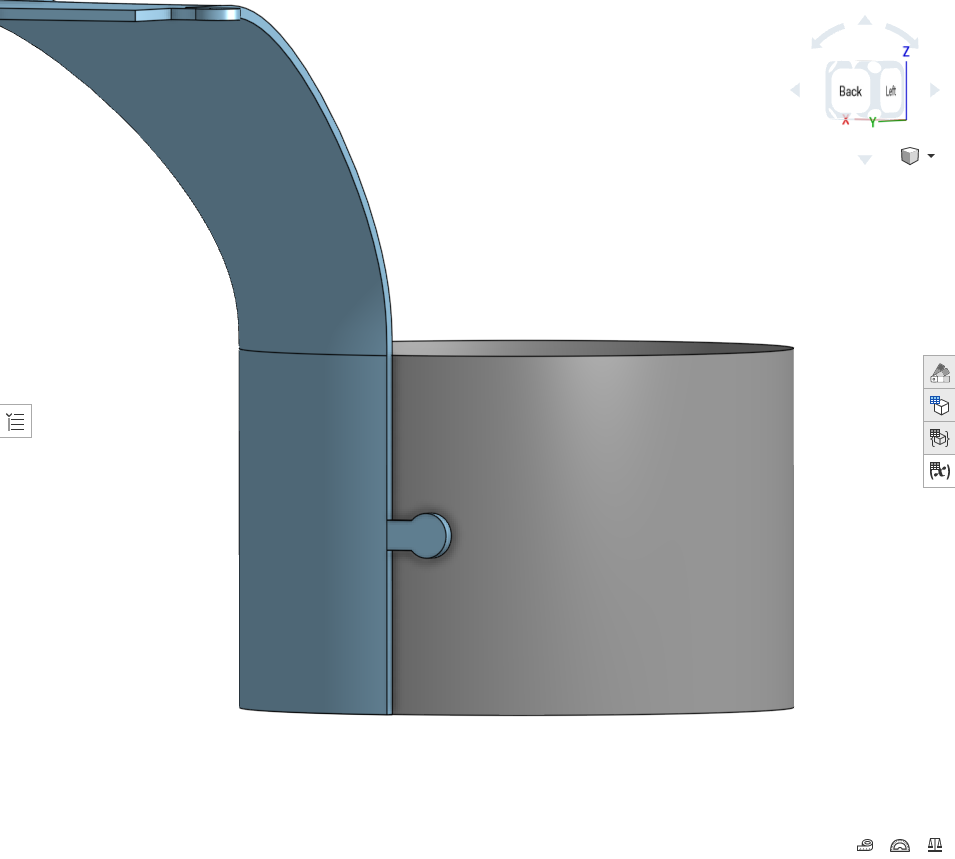
Hopefully you can see the issue in these images, or if you have time, you can check out the part here. When I draw the puzzle piece on the plane formed by the edge of one part, it extends straight out, when what I really want is for it to follow the curvature of that circle. I've tried messing with Ruled Surfaces (you can see one in gray in the final image), but I can't figure out how to create a shape along such a surface. Basically if there is a way to extrude in direction = "blind but along the specified surface" then that would instantly solve my problem.
Thanks in advance!
0
Best Answer
-
 james_aguilar160
Member Posts: 57 ✭✭
I've never personally used it but YouTube for some reason gave me a video that seems to be almost exactly what you want. It's called the "Wrap" tool.
 https://www.youtube.com/watch?v=6W4TpGx26xc
3
Answers
This might not be the cleanest way of doing it, but if you are this far along, you could use a couple of replace face commands to get the curves you seek. Another option is to create a surface to extrude up to. And there are probably many more ways to get there.