Welcome to the Onshape forum! Ask questions and join in the discussions about everything Onshape.
First time visiting? Here are some places to start:- Looking for a certain topic? Check out the categories filter or use Search (upper right).
- Need support? Ask a question to our Community Support category.
- Please submit support tickets for bugs but you can request improvements in the Product Feedback category.
- Be respectful, on topic and if you see a problem, Flag it.
If you would like to contact our Community Manager personally, feel free to send a private message or an email.
Creating different appearances in Render Studio
 joshua_wise822
Member Posts: 9 PRO
joshua_wise822
Member Posts: 9 PRO
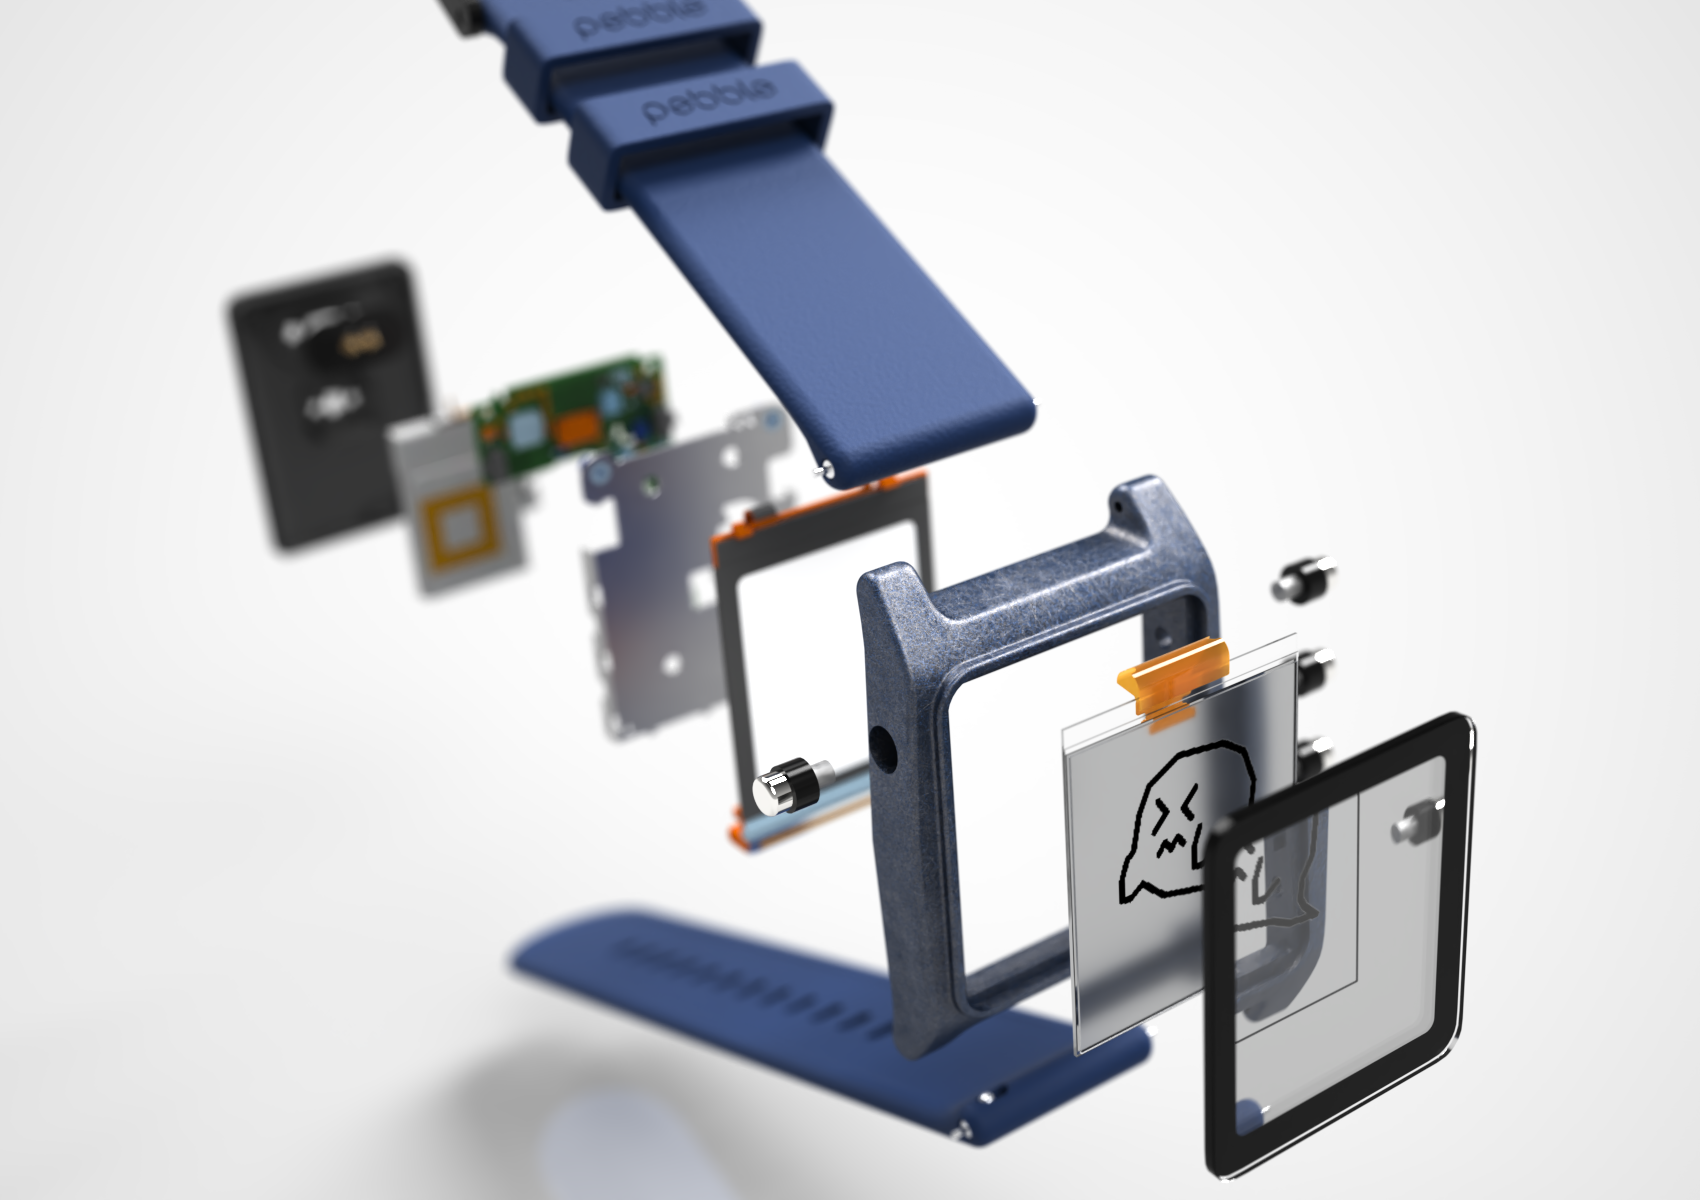
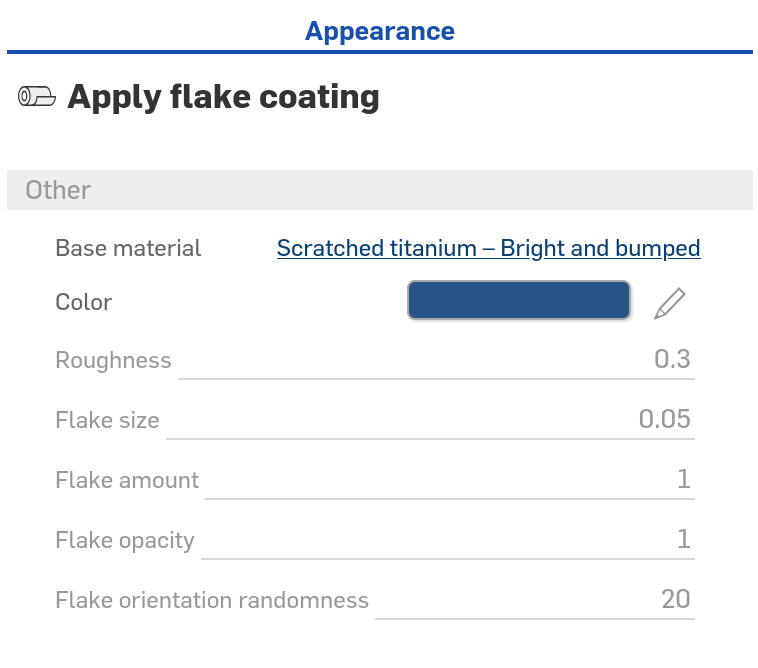
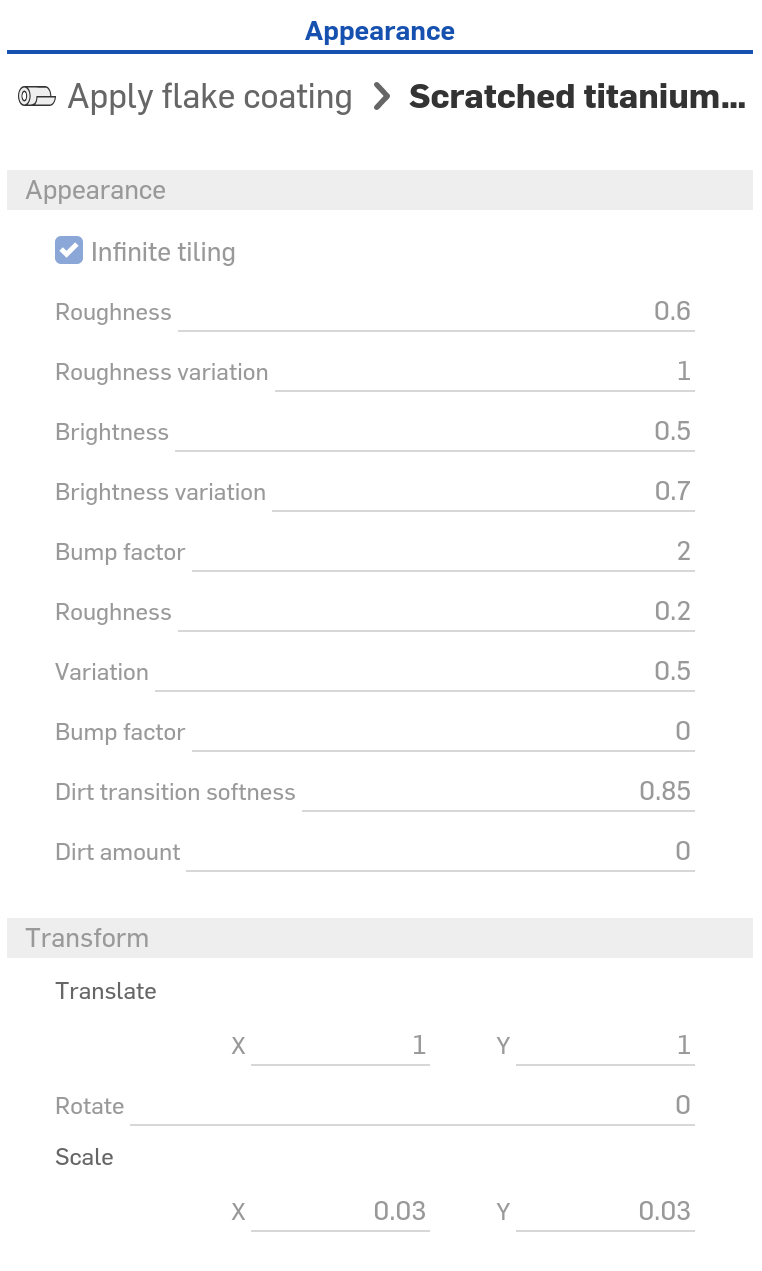
This might be a stupid question, but I'm having trouble wrapping my head around how appearances work in Render Studio. There are a bunch of materials that seem frustratingly rigidly defined, and I don't understand how to replicate "that, but slightly different" — or, for that matter, how they are defined to begin with. For instance, what I want to render is anodized DMLS titanium. There are lots of titaniums that are close, but not quite — for instance, I have the following render (below, to avoid breaking up the text with a colossal image), with the following settings (also below).
This look is obviously getting there, but not quite. I would like to use a different bump map to match the DMLS texture, and really, I would like to change the underlying metal diffuse color to reflect the anodization. I feel like, looking at the settings, there must be something featurescript-like driving this, but for the life of me, I cannot figure out where the source for an Appearance is — or how to edit it to create my own.
Does anyone have any tips on how to more effectively model materials that are "almost but not quite" in the Render Studio library?
(n.b.: there is another bug in the below render, I believe! The LCD module has a roughness of 0.4, which renders correctly when rays directly hit it. But interestingly, when rays hit it by way of the LCM cover glass, you can see that the roughness goes away! I guess I'll have to figure out how to file a bug.)
Thanks,
joshua
Answers
The majority of the appearances in the library are from the NVIDIA vMaterials library. The parameters which are exposed are mainly down to the design philosophy they used for these which for NVIDIA was more about exposing parameters which are meaningful to someone with knowledge of the substance itself than rendering tools. In some cases this means less parameters might be exposed than one would like.
Internally they are all defined using MDL (Material Definition Language) however we do not currently provide access to the underlying code for those appearances and do not allow you to upload your own MDL content yet.
However, in addition to the pre-defined library appearances there are also many more building block like appearances (e.g., Flex material, PBR - metallic rougness) in the library which can be used to create more customised appearances. These can be combined with the "Appearance functions" and "Modifiers" items in the library (e.g., by connecting those functions to the inputs of the appearances) to achieve a wide range of looks.
You can drag and drop functions from the "Appearance functions" onto any parameter which is of a compatible type (when you drag the compatible parameters will be highlighted in the appearance panel on the right. For modifier appearances you can apply these to something with an appearance already and it will automatically connect it in (looks like you already did that) but you can also drag and drop appearances onto parameters which are appearances in the right panel (so for example you can drag other appearances onto the "Base material" parameter in the "Apply flake coating" appearance you have.
As you've found you can also use the modifiers (there is an Add global bump map as well) which can be used to add further bump mapping to appearances which don't expose a normal parameter. Note that the base titanium appearance does expose a normal parameter so can have functions which modify the normal attached directly do it rather than using a modifier appearance, you'd have to supply your own scratches though if you wanted them. There is also a "Surface blender" appearance which lets you combine two appearances based on a mask (or fixed blend factor).
For the issue you're seeing with the cover glass I have a couple of guesses there. Looking at the refraction is seems to be extremely strong, is the glass modelled as a solid or a surface and which appearance is on it? There are some considerations needed in choosing the appearance and settings depending on whether the refractive object is modelled as a real-world solid or a single surface. If this is not setup correctly when looking through the surface it might be treated as though what you are seeing is inside the glass. The other quick check is whether it makes any difference if the background (in the Background menu item on the viewcube menu) is turned on or not. If that affects this it also tells me more about what is happening. Otherwise definitely file a ticket and we can look at it.