Welcome to the Onshape forum! Ask questions and join in the discussions about everything Onshape.
First time visiting? Here are some places to start:- Looking for a certain topic? Check out the categories filter or use Search (upper right).
- Need support? Ask a question to our Community Support category.
- Please submit support tickets for bugs but you can request improvements in the Product Feedback category.
- Be respectful, on topic and if you see a problem, Flag it.
If you would like to contact our Community Manager personally, feel free to send a private message or an email.
Having trouble creating a "Lock" at the correct angel and spot for screw
 albert_smith726
Member Posts: 4 ✭
albert_smith726
Member Posts: 4 ✭
Hello! I'm having trouble trying to create a physical lock stop (like a bayonet lock) for a screw and would love help on how the correct way to solve this. I have attached two crude drawing and I have linked the document.
What I need is for this stop to engage at the very end of the screw so that the user does not over tighten the screw, but I'm having trouble finding a way to get the correct angle and depth to make a rounded squared outcrop on the "bottom" image to perfectly fit into a sloped embossed part on the "Top" image. (please pretend the crude drawings are perfect semi circular grooves and extrudes that securely fit into each other.)
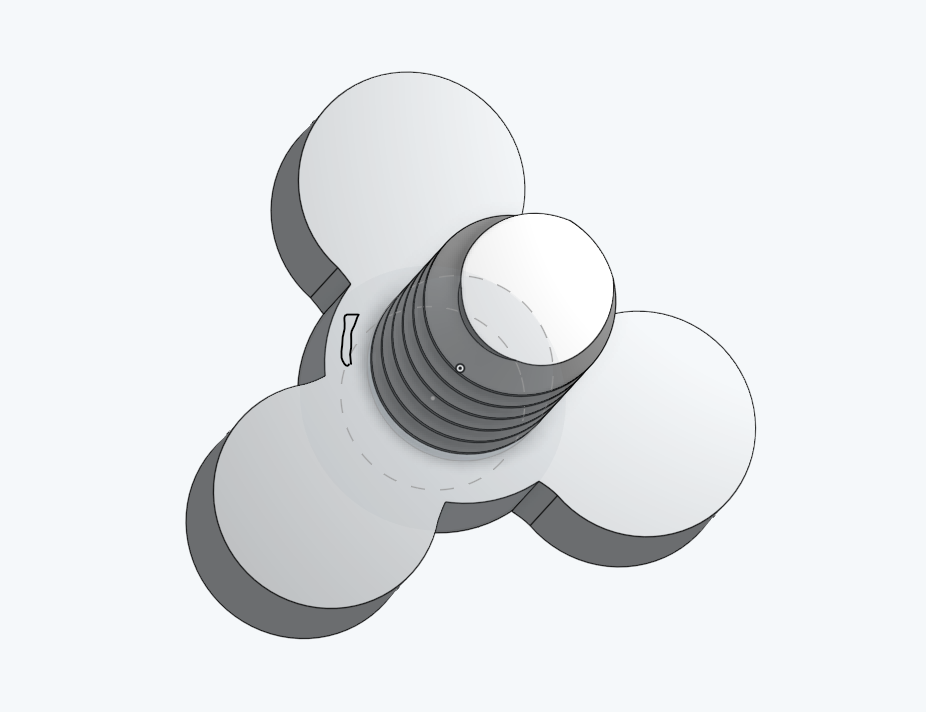
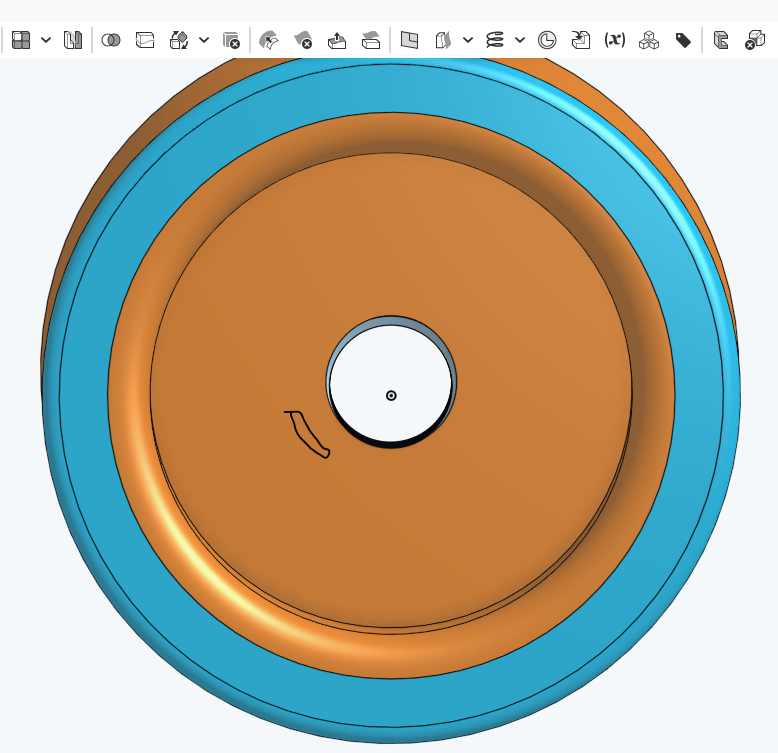
I understand the "Top" groove needs to be of variable height as the extruded "bottom needs to slowly turn and descend into the groove until it stops, but I cannot for the life of me figure out how to get it done.
Comments
I'm not sure I understand what the goal is here; to not overtighten the screw, correct?
If so, wouldn't the face of the screw act as a stopper? Not sure exactly what you're trying to design here.
If you want a semicircular extrusion on the screw to insert into a cutout on the part it threads into, you will need a 360-degree cutout, since the screw with the extrusion will be spinning as it threads to its final position. (If the cutout is the same size as the extrusion, then it will collide and not tighten properly).
Hopefully this helps :)
That was the goal yes. It does stop at the end of a thread, but because it is made out of a TPE, it's easy to continue threading.
Could you think of a better way to design a stop? I do like the 360 degree cut out, but then there wouldn't be a wall to stop it. I was thinking of a shorter "peg" that only starts to go into the swept cutout towards the end, and the cutout gets deeper with the turns and finally ends when the screw is the most screwed on.
I'm trying to water proof this so correct threading matters. Man.. engineering something is hard! Kudos to you guys. I'm going nuts trying to figure out a way to do this that won't break the bank mold wise.
The lid of my car's engine oil filler cap has such a stopper. It works flawlessly, but they made it close to the outside perimeter in order for it to take more torque. That is important, when it comes to (presumably dumb) user interaction. The small 'hook' that goes into the stop is elastic and when meeting the top of the filler opening, it gets preloaded a tiny bit, then slides down the ramp, allowing it to snap into the end position with a tactile stop.
It is a french car. The french are pretty smart with little useful details like this.