Welcome to the Onshape forum! Ask questions and join in the discussions about everything Onshape.
First time visiting? Here are some places to start:- Looking for a certain topic? Check out the categories filter or use Search (upper right).
- Need support? Ask a question to our Community Support category.
- Please submit support tickets for bugs but you can request improvements in the Product Feedback category.
- Be respectful, on topic and if you see a problem, Flag it.
If you would like to contact our Community Manager personally, feel free to send a private message or an email.
Repeating fillet
 joseph_newcomer
Member Posts: 101 ✭✭✭
joseph_newcomer
Member Posts: 101 ✭✭✭
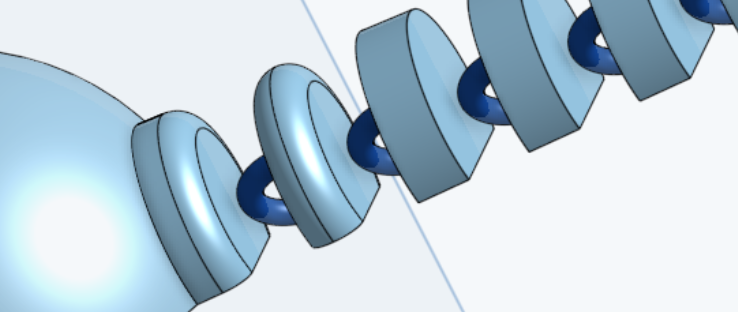
This is a worm. It has #segments in its body. I have shown fillets here. I need to repeat each (front, back) fillet #segments times. That number is currentlly 15, but think of that as being a Configuration parameter and it can vary from, say, 6 to 30 (which is about the maximum I can print diagonally across my print bed).
When I select a linear pattern, the entity to pattern apparently cannot be a fillet. I also realize I may have to venture into scripting language to do this. I would prefer to avoid this as my student is 14 and not a programmer.
Comments
It depends on the type of linear pattern you select.
If you do a feature pattern, it could work: make sure "Reapply Features" is selected.
But nowadays an even stronger tool is available:
Just recently Onshape released "Query Variables". This is the perfect situation for that tool:
Create a "Query variable" to automatically (and dynamically) select the proper edges.
choosing the right settings for the Query may take some practice and only if you share your doc, i could help with that in an example.
then feed the query variable into the fillet entity selection field and Voila.
NB it seems the worm-segments are not attached to be one part. Perhaps the part studio should only contain one separate segment, and the pattern should be done in the subsequent assembly.
That would be best practice, since this way you're creating a lot of different CAD parts that represent the same actual geometry.
Thank you. I will look up that new feature and if I am confused, I will get back to you.
You are seeing half of the attachments in the image I included. Here is the finished image, with each segment individually filleted by hand.
https://cad.onshape.com/documents/bb62ee15a8f72336ba6a5609/w/87910df456753a607749e92d/e/3f3ac5948b1b2d8bcbf7619a?renderMode=0&uiState=68cb3fcf1d24edf77165845d
OK, I have been experimenting for an hour and can't get anything I tried to work.
I called this #back_edge, and the idea was to replicate the fillet on the back of the head segment all the way down the worm. Then I would create a symmetric one called #front_edge and put a fillet on the tail which would propagate forward. #segments is the magical number.
The worm body was formed as a single tapered object and then sliced into segments using a Remove linear pattern.
The last thing I tried was a bounded surfaces pattern, which is what you will find in it. Key here is that if #segments is assigned a different number, we will get all the segments filleted on both sides. Eventually, a more worm-like body sheath may be developed that hides those connectors.
The student is a 14-year-old, so I want to keep things as simple as possible.
https://cad.onshape.com/documents/f8213cc6e157a9148bf781ff/w/9d5d9499ef818be79c8614d4/e/c999e94413212c27f4ae0ad7