Welcome to the Onshape forum! Ask questions and join in the discussions about everything Onshape.
First time visiting? Here are some places to start:- Looking for a certain topic? Check out the categories filter or use Search (upper right).
- Need support? Ask a question to our Community Support category.
- Please submit support tickets for bugs but you can request improvements in the Product Feedback category.
- Be respectful, on topic and if you see a problem, Flag it.
If you would like to contact our Community Manager personally, feel free to send a private message or an email.
Sweep along Cylinder Surface
 andreas_riedmayer
Member Posts: 6 ✭
andreas_riedmayer
Member Posts: 6 ✭
Hey,
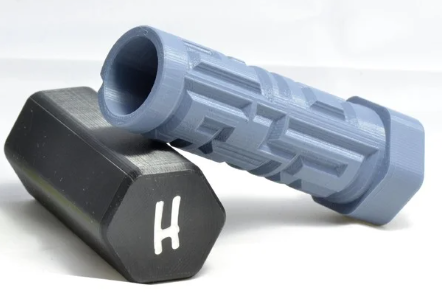
I am trying to do some sort of engraving on a cylinders outer surface.
The goal in this case is to model a puzzle box where you have to find the way to open the box. For better illustration see this image of the inspiration i found on thingyverse:
But this is just an example. I'm sure sooner or later i will stumble over another situation where i need this.
My first intuition was the approach to create the Cylinder and Wrap a Drawing with the solid→remove option
→ Problem: I want to chamfer the outline like in the above example. I know i can do that after wrapping, but the remove option of the wrapping does not create 'straight' walls (size of the cutout is bigger on the cylinder surface as it is on the bottom of the cutout). So when i do a chamfer on the edges of the cutout, the chamfer does not go all the way to the bottom everywhere. it is a little bit hard to describe, so i post a picture to show:
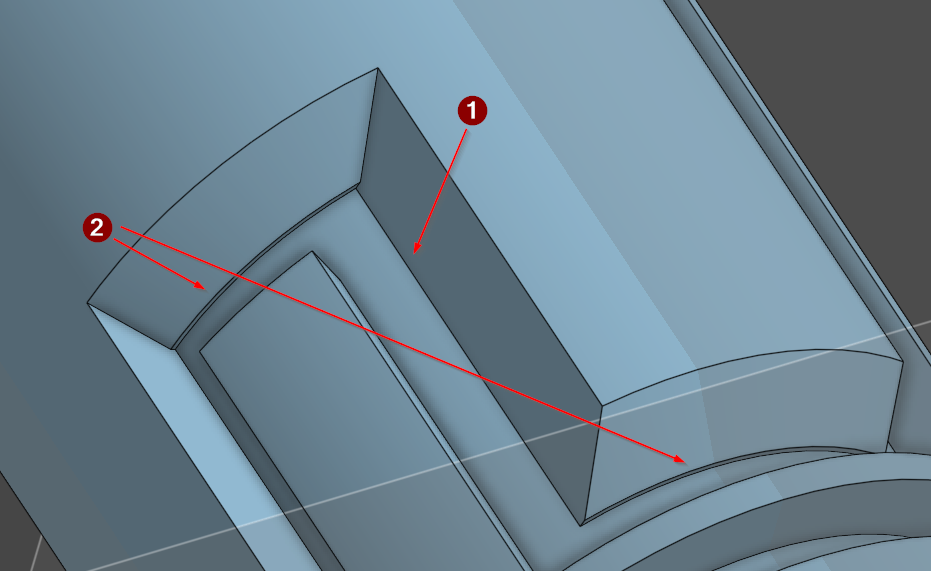
The depth of the cutout is 3mm
- Vertical chamfers go all the way to the bottom
- Horizontal chamfers don't
In the particular case of the puzzle box, this may work anyway, but it doesn't seem to be the right way to do this, as for another application, this may not work. For example if i want the cutout to be round, have a T-shape or a dovetail. In those cases, I would need another approach.
The ideal way would be to create a sketch with a path, wrap that around the cylinder and use that path so sweep along. With this way i could cut out any form that i want. Sadly, it is not possible to wrap just a 'path'. there always has to be a surface.
I tried another approach where i made several cuts trough the part to creat some kind of grid on it where i could sweep alont. But that didn't work as well. The sweep tool lost orientation or created an error when going around 90° corners.
So at this moment i am pretty much lost and have no other idea how to achieve what i want.
Maybe i miss something.. can this really be so hard to achieve? I cannot be the only one struggling with this?
I found several other forum posts and tutorials for similar questions, but the provided solutions didn't work for my problem.
Thank you in advance for your help!
Here the link to my public dokument:
Best Regards,
Andreas
Best Answer
-
 ry_gb
Member, csevp, pcbaevp Posts: 177 PRO
ry_gb
Member, csevp, pcbaevp Posts: 177 PRO
I finally figured it out.
It's a bit of a weird workaround, butthe trick is to use selectTangentinstead ofOffsetin your Chamfer feature.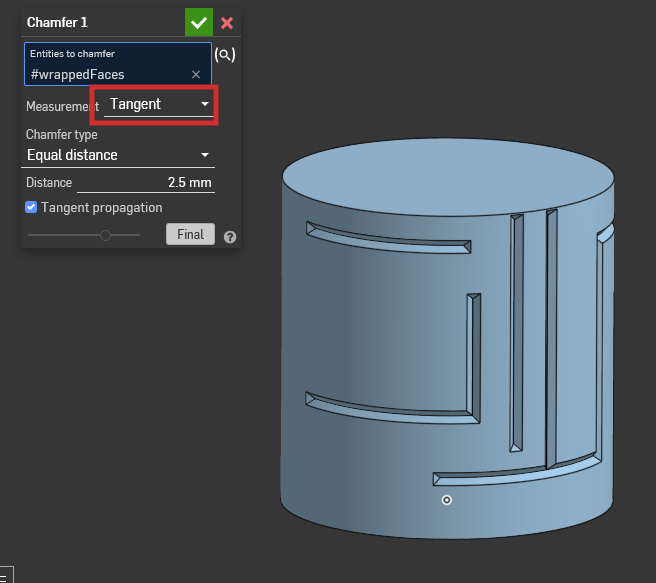
Ramon Yip | glassboard.com
0
Answers
Can you create a flat surface that's equivalent that the unrolled cylinder, split that flat surface using a sketch, and then wrap the split surface around the cylinder?
Then use the edges created from the wrap as your sweep path.
Additionally, I would create a triangle as my sweep profile to avoid the need for the chamfer.
Edit: I see why this doesn't work. Looks like the Wrap feature explicitly asks for faces or sketch regions.
Ramon Yip | glassboard.com
I finally figured it out.
It's a bit of a weird workaround, butthe trick is to use selectTangentinstead ofOffsetin your Chamfer feature.Link to Onshape doc
Ramon Yip | glassboard.com
thank you very much for your input!
i got it to work this way, but only with a circle face. when i tried it with a triangle shape, the sweep cannot generate properly. i think the reason is the curved path, as the first straigt section works with the triange aswell.
circle face sweep::
triangle face sweep:
your two suggestions give me two ways to achieve a clean result for the current project. but i still would really like to know how i can do this with various faces.
So maybe someone has another idea or input for that?
Thank you for the help!
Yeah, the triangle face didn't work for me for whatever reason. What ended up working was to use Wrap New and then to Chamfer the faces from the Wrap. It's basically what you had although it's slightly different. If you roll up and down the feature tree, you'll notice I extruded a second cylinder that's offset at the depth that I want to cut. That's the surface I used for the target in my Wrap feature. Hope that makes sense.
In another vein, have you tried Profile Sweeper? I'd link it here, but I'm on mobile right now. I'm sure you could Google it. It's a custom feature script by @EvanReese
Ramon Yip | glassboard.com
Yeah i saw what you did there. That's very clever. It makes sure that the 'inner' surface has the desired measurement, so you can apply the same chamfer size on all the edges.
I didn't know about the Profile Sweeper feature script. But i will check that out, thank you!