Welcome to the Onshape forum! Ask questions and join in the discussions about everything Onshape.
First time visiting? Here are some places to start:- Looking for a certain topic? Check out the categories filter or use Search (upper right).
- Need support? Ask a question to our Community Support category.
- Please submit support tickets for bugs but you can request improvements in the Product Feedback category.
- Be respectful, on topic and if you see a problem, Flag it.
If you would like to contact our Community Manager personally, feel free to send a private message or an email.
Creating Beveled Edges
 liam_boyle
Member Posts: 8 ✭
liam_boyle
Member Posts: 8 ✭
So I'm working on designing out a modern version of an antique blade.
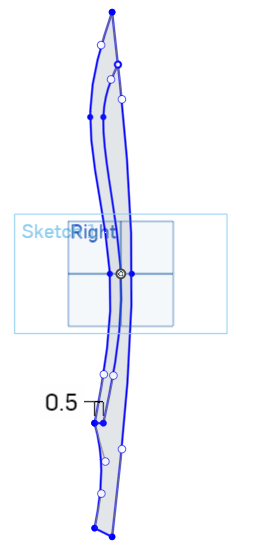
I need the handle and interior area to have a thickness of 6 mm and then symmetrically taper out to the exterior edge.
I did a symmetrical extrude to the correct thickness, now I need to bring the material out in a wedge to the outer spline curve. My apologies for the noob question but I didn't see quite how to do this in the help or the videos. If it is there could you all pleade point me in the right direction.
0
Best Answer
-
matthew_menard
Member Posts: 96 ✭✭✭
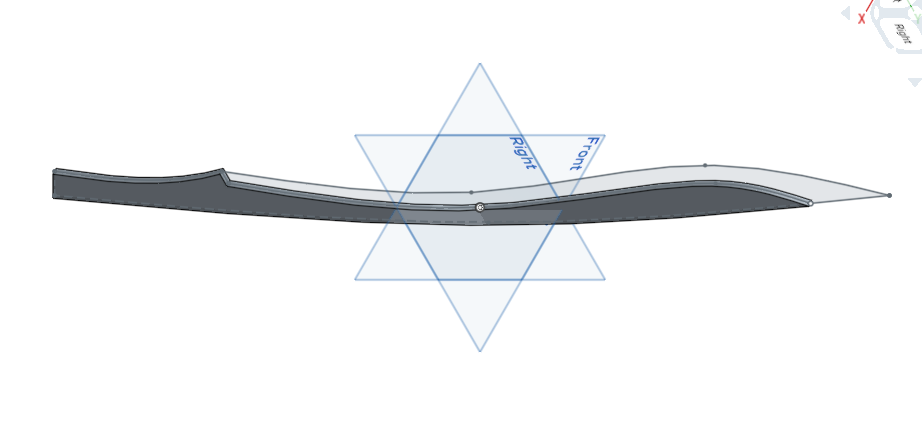
I was coincidentally thinking about almost this exact same situation the other day, so I gave it a try. Here's my (in my opinion) fairly terrible take on what you started:

https://cad.onshape.com/documents/56d4a9afe4b02da21ba11c9f/w/9f61de78675dd80f47144111/e/1f2ae805e0176896e58240fe
The main thing I did was make a surface loft from the upper surface inner portion of the blade to the midpoint outer edge of the blade. That is where I started running into trouble. I would usually just split the bodies using this surface, but I think it didn't like the fact that the back side of the blade is a non planer surface. I ended up thickening the surface and then splitting it and then deleting the bodies I didn't want. Finally, I added a triangle to your base sketch to trim out a small residual surface defect that resulted from Booleaning the previous operations together. Hopefully somebody more familiar with Onshape's surfacing capabilities will come up with a better solution.
1
Answers
Here's the LINK for anyone interested.
Thanks
Link
HTH
_Dave_
https://cad.onshape.com/documents/56d4a9afe4b02da21ba11c9f/w/9f61de78675dd80f47144111/e/1f2ae805e0176896e58240fe
The main thing I did was make a surface loft from the upper surface inner portion of the blade to the midpoint outer edge of the blade. That is where I started running into trouble. I would usually just split the bodies using this surface, but I think it didn't like the fact that the back side of the blade is a non planer surface. I ended up thickening the surface and then splitting it and then deleting the bodies I didn't want. Finally, I added a triangle to your base sketch to trim out a small residual surface defect that resulted from Booleaning the previous operations together. Hopefully somebody more familiar with Onshape's surfacing capabilities will come up with a better solution.
Then I can move on to the rest of the pieces and final assembly.