Welcome to the Onshape forum! Ask questions and join in the discussions about everything Onshape.
First time visiting? Here are some places to start:- Looking for a certain topic? Check out the categories filter or use Search (upper right).
- Need support? Ask a question to our Community Support category.
- Please submit support tickets for bugs but you can request improvements in the Product Feedback category.
- Be respectful, on topic and if you see a problem, Flag it.
If you would like to contact our Community Manager personally, feel free to send a private message or an email.
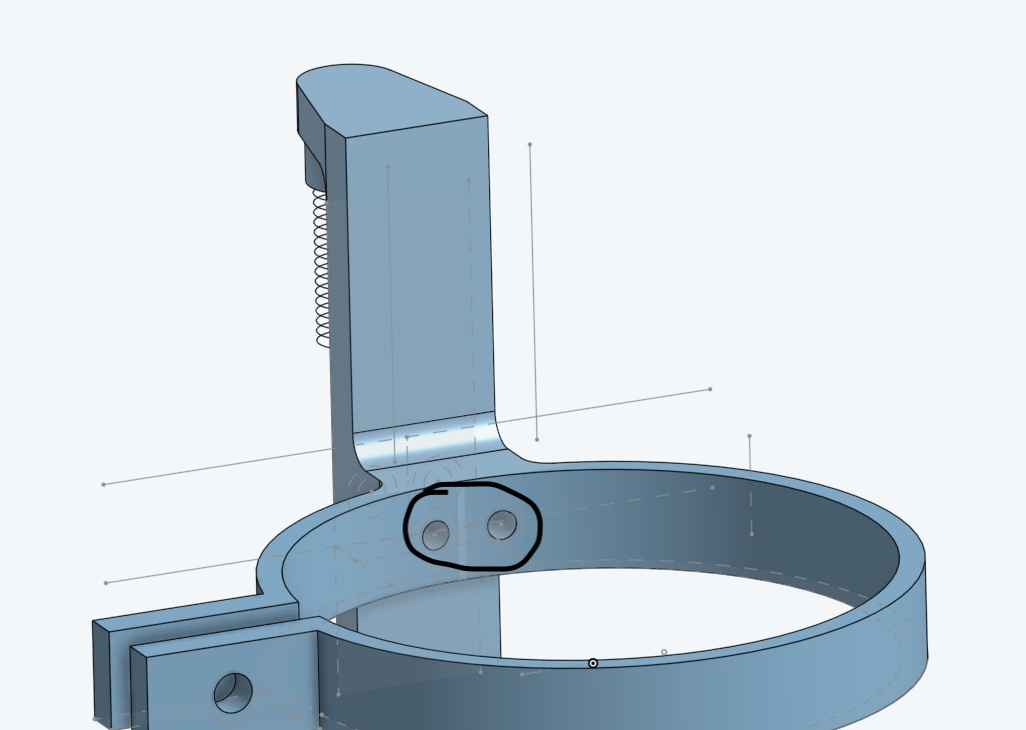
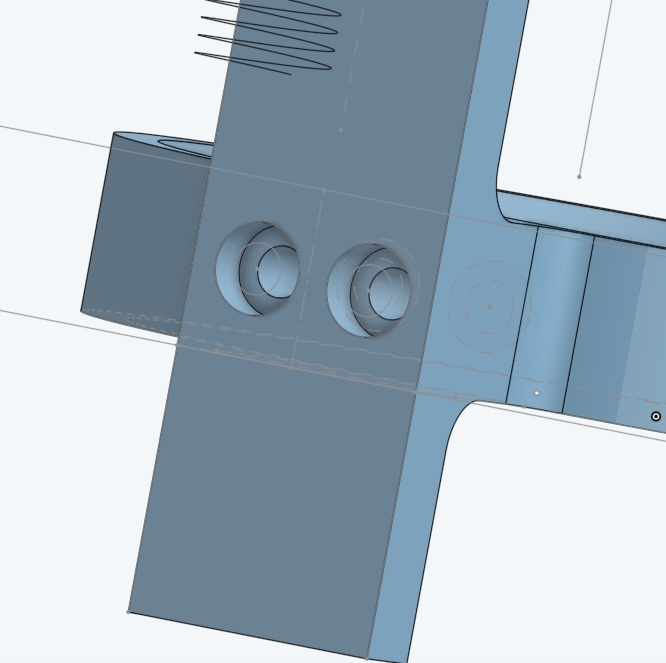
Countersink for screw heads on the inside of a ring
 ProApe
Member Posts: 231 ✭✭
ProApe
Member Posts: 231 ✭✭
Hello,
How can I recess the area between the small and large circles in the ring (for the head of a screw), as shown on the back? I placed a plane at the end of the ring and drew a sketch on it showing the holes, but these could not be extracted, probably because they were drawn on the flat plane and not on the ring (I was unable to place a sketch on the inside of the ring).
I was then able to ‘drill’ the holes from the back.
Once I have done that, I still have to split the part into two pieces – I don't know how yet – because it is difficult to print as one piece, and then I will connect them with screws. Their heads must be countersunk.
Kind regards
ProApe
https://cad.onshape.com/documents/1c5beeb06afdeeb7cdcbc514/w/8272fe53c12cc718dec56349/e/5492fb48c3f2e57ff6b26050?renderMode=0&uiState=68a2ecc53717580a46af3361
Comments
This document has a couple of methods you might be able to use. - Scotty
I have just succeeded with the holes (with the tool projected curve), but don't still know how to split the part in two.
Couple of ways to get to the countersink on your curved face. One way is using the hole tool on your sketch center points. then move the face that hidden inside the curve to that it breaks thru the curved face. then use delete face for the rest of the material removal for the countersink.
Alternatively you could skip the move and delete face and just use extrude if you like the look of second pic better.
There are others as well such as using a revolve cut.
Place a plane where ever you want the split and use the split tool.
I tried Scotty's method of using mate connectors (but inside the hole feature) prior to my suggestion and couldn't get it to work, but gave it a retry after seeing his post…. and then it worked. you can use mate connectors to offset the sketch points outside of the the curve so that the hole will be cut from outside of the part. avoiding any extra moves or extrudes, etc.
Thank you.
With the projected curve it worked rather easily.
But with all the modifications I made, some more than once so that they interfere, I'm rather missed up.
I should reconsider the necessary steps and begin again at 0 with a more clean construction.