Welcome to the Onshape forum! Ask questions and join in the discussions about everything Onshape.
First time visiting? Here are some places to start:- Looking for a certain topic? Check out the categories filter or use Search (upper right).
- Need support? Ask a question to our Community Support category.
- Please submit support tickets for bugs but you can request improvements in the Product Feedback category.
- Be respectful, on topic and if you see a problem, Flag it.
If you would like to contact our Community Manager personally, feel free to send a private message or an email.
Extruding Sheet Metal Model on Flange
 craig_townsend418
Member Posts: 20 ✭
in Drawings
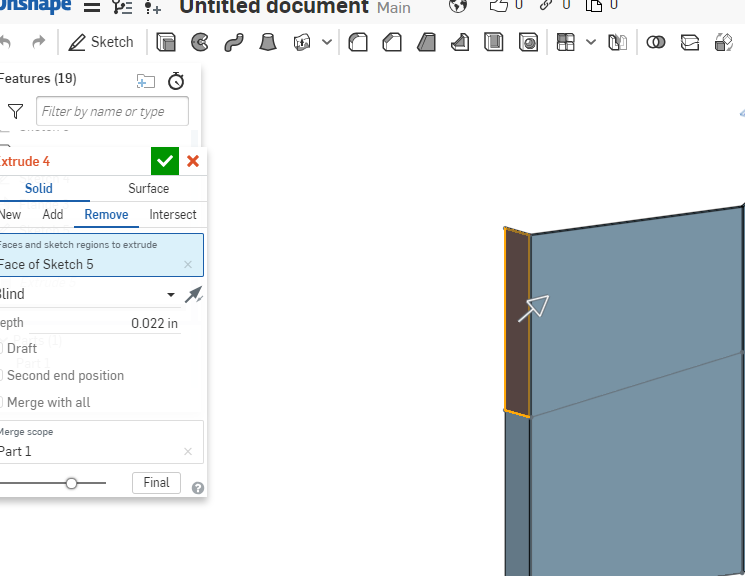
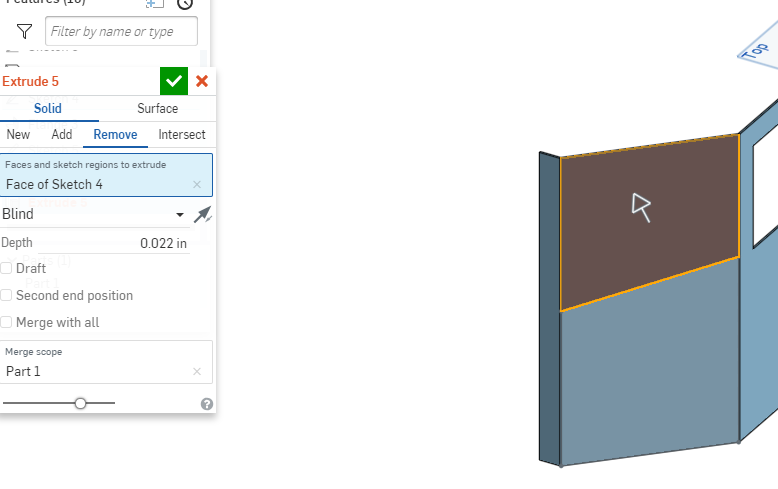
I am working on a sheet metal model, and am extruding various parts, but I have stumbled upon a problem with an extrude on a flange. I have created a variable of #Etch (thickness 0.022") that my sheet metal model uses over and over to extrude parts (thickness of #Etch = thickness of sheet metal model). Using the same method I used on the rest of the model, I created a flange, then created a new sketch on top of the flange to extrude the open parts.
The problem becomes evident on two flanges that are at 45 degrees to the rest of the model. Creating a flange, then sketching on top, then extruding said sketch is resulting in a error message "Sheet Metal Model can not be built". I'm not sure how to fix this issue. The extrude is only the depth of the sheet metal model. This method worked just fine on the opposite 90 degree flange.


I have attached a link to the file below.
https://cad.onshape.com/documents/ace02dca554841d82ca31887/w/dec9cbb1fc8fb227f8635678/e/04c21757a943e406a5dc300a
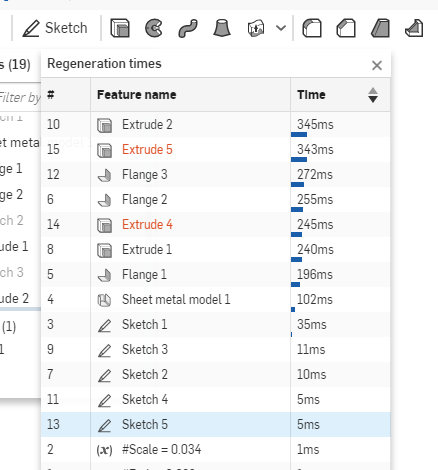
Another unrelated, but related question. Regeneration times seem to be slowing with every extrude I make. Any way to deduce the regeneration times?

Thanks in advance,
Craig Townsend
The problem becomes evident on two flanges that are at 45 degrees to the rest of the model. Creating a flange, then sketching on top, then extruding said sketch is resulting in a error message "Sheet Metal Model can not be built". I'm not sure how to fix this issue. The extrude is only the depth of the sheet metal model. This method worked just fine on the opposite 90 degree flange.


I have attached a link to the file below.
https://cad.onshape.com/documents/ace02dca554841d82ca31887/w/dec9cbb1fc8fb227f8635678/e/04c21757a943e406a5dc300a
Another unrelated, but related question. Regeneration times seem to be slowing with every extrude I make. Any way to deduce the regeneration times?

Thanks in advance,
Craig Townsend
Tagged:
0
Comments
Still trying to follow what you did to learn the process, but my follow up question may lead itself to your solution. In the original drawing I had a flange with the upper half extruded away, and the bottom half visible. On the final model, I need to take that top upper half of the flange and bend it at a more acute angle which I was able to do. However, I need to create an additional flange (top view) on the angled flange. I get a collision on the sheet metal when I attempt to do that between the two flanges. Would I just need to adjust the height of the new flange so that it doesn't cover the whole length?
If this helps, this is the prototype that I'm basing this model on. The front window area is the 90 degree flange, with the 'top cover' piece being covered with a layer of snow.
Craig
https://cad.onshape.com/documents/7a29ad8a8fc43a93ee0c7198/w/3bd0f1d1f3dfcc6c7c5a06df/e/0af508357951e63beb1d104a
Sorry for that mistake. Does that change how the flange is created & removed?
Craig
Great project!
You can see that this model can't possibly be build from a single piece of sheetmetal.
You'll to build two pieces and weld them together. You can use bend table to convert one of the bends to rip and continue with two parts.
Use RMB menu for the bend you want to convert.
So I've progressed on this model a little more and need one final flange to complete the model, but I can't seem to quite get it to join. If the flange 4 is flat (height consistent) the join flange tool works fine. However, once I introduce a slope to flange 4, I can't use the join flange function. Flange 5 needs to cover both flange 4 and the mirror of flange 4.
https://cad.onshape.com/documents/7a29ad8a8fc43a93ee0c7198/w/9fc0941b5562f76e6d549e45/e/0af508357951e63beb1d104a
I did figure out a 'trick' to extrude an edge of a flange like I've done on flange 3. By drawing a line .001" from the fold line and then extruding the model is tricked into thinking that the flange can still can built with partial flange extruded (because it 'sees' the whole flange as .001" wide at the minimum.
There is a link below the image so that you can look through all the steps Lana took to get to the final product. Click on "Like this?"
But looking at the steps, it's similar to what I was doing. Create flange, extrude, create new flange on top of extruded area, and join. I guess I'm just not understanding why I couldn't accomplish the same thing.