Welcome to the Onshape forum! Ask questions and join in the discussions about everything Onshape.
First time visiting? Here are some places to start:- Looking for a certain topic? Check out the categories filter or use Search (upper right).
- Need support? Ask a question to our Community Support category.
- Please submit support tickets for bugs but you can request improvements in the Product Feedback category.
- Be respectful, on topic and if you see a problem, Flag it.
If you would like to contact our Community Manager personally, feel free to send a private message or an email.
Tambour front box (aka roller door)
 connor_macmurray
Member Posts: 11 EDU
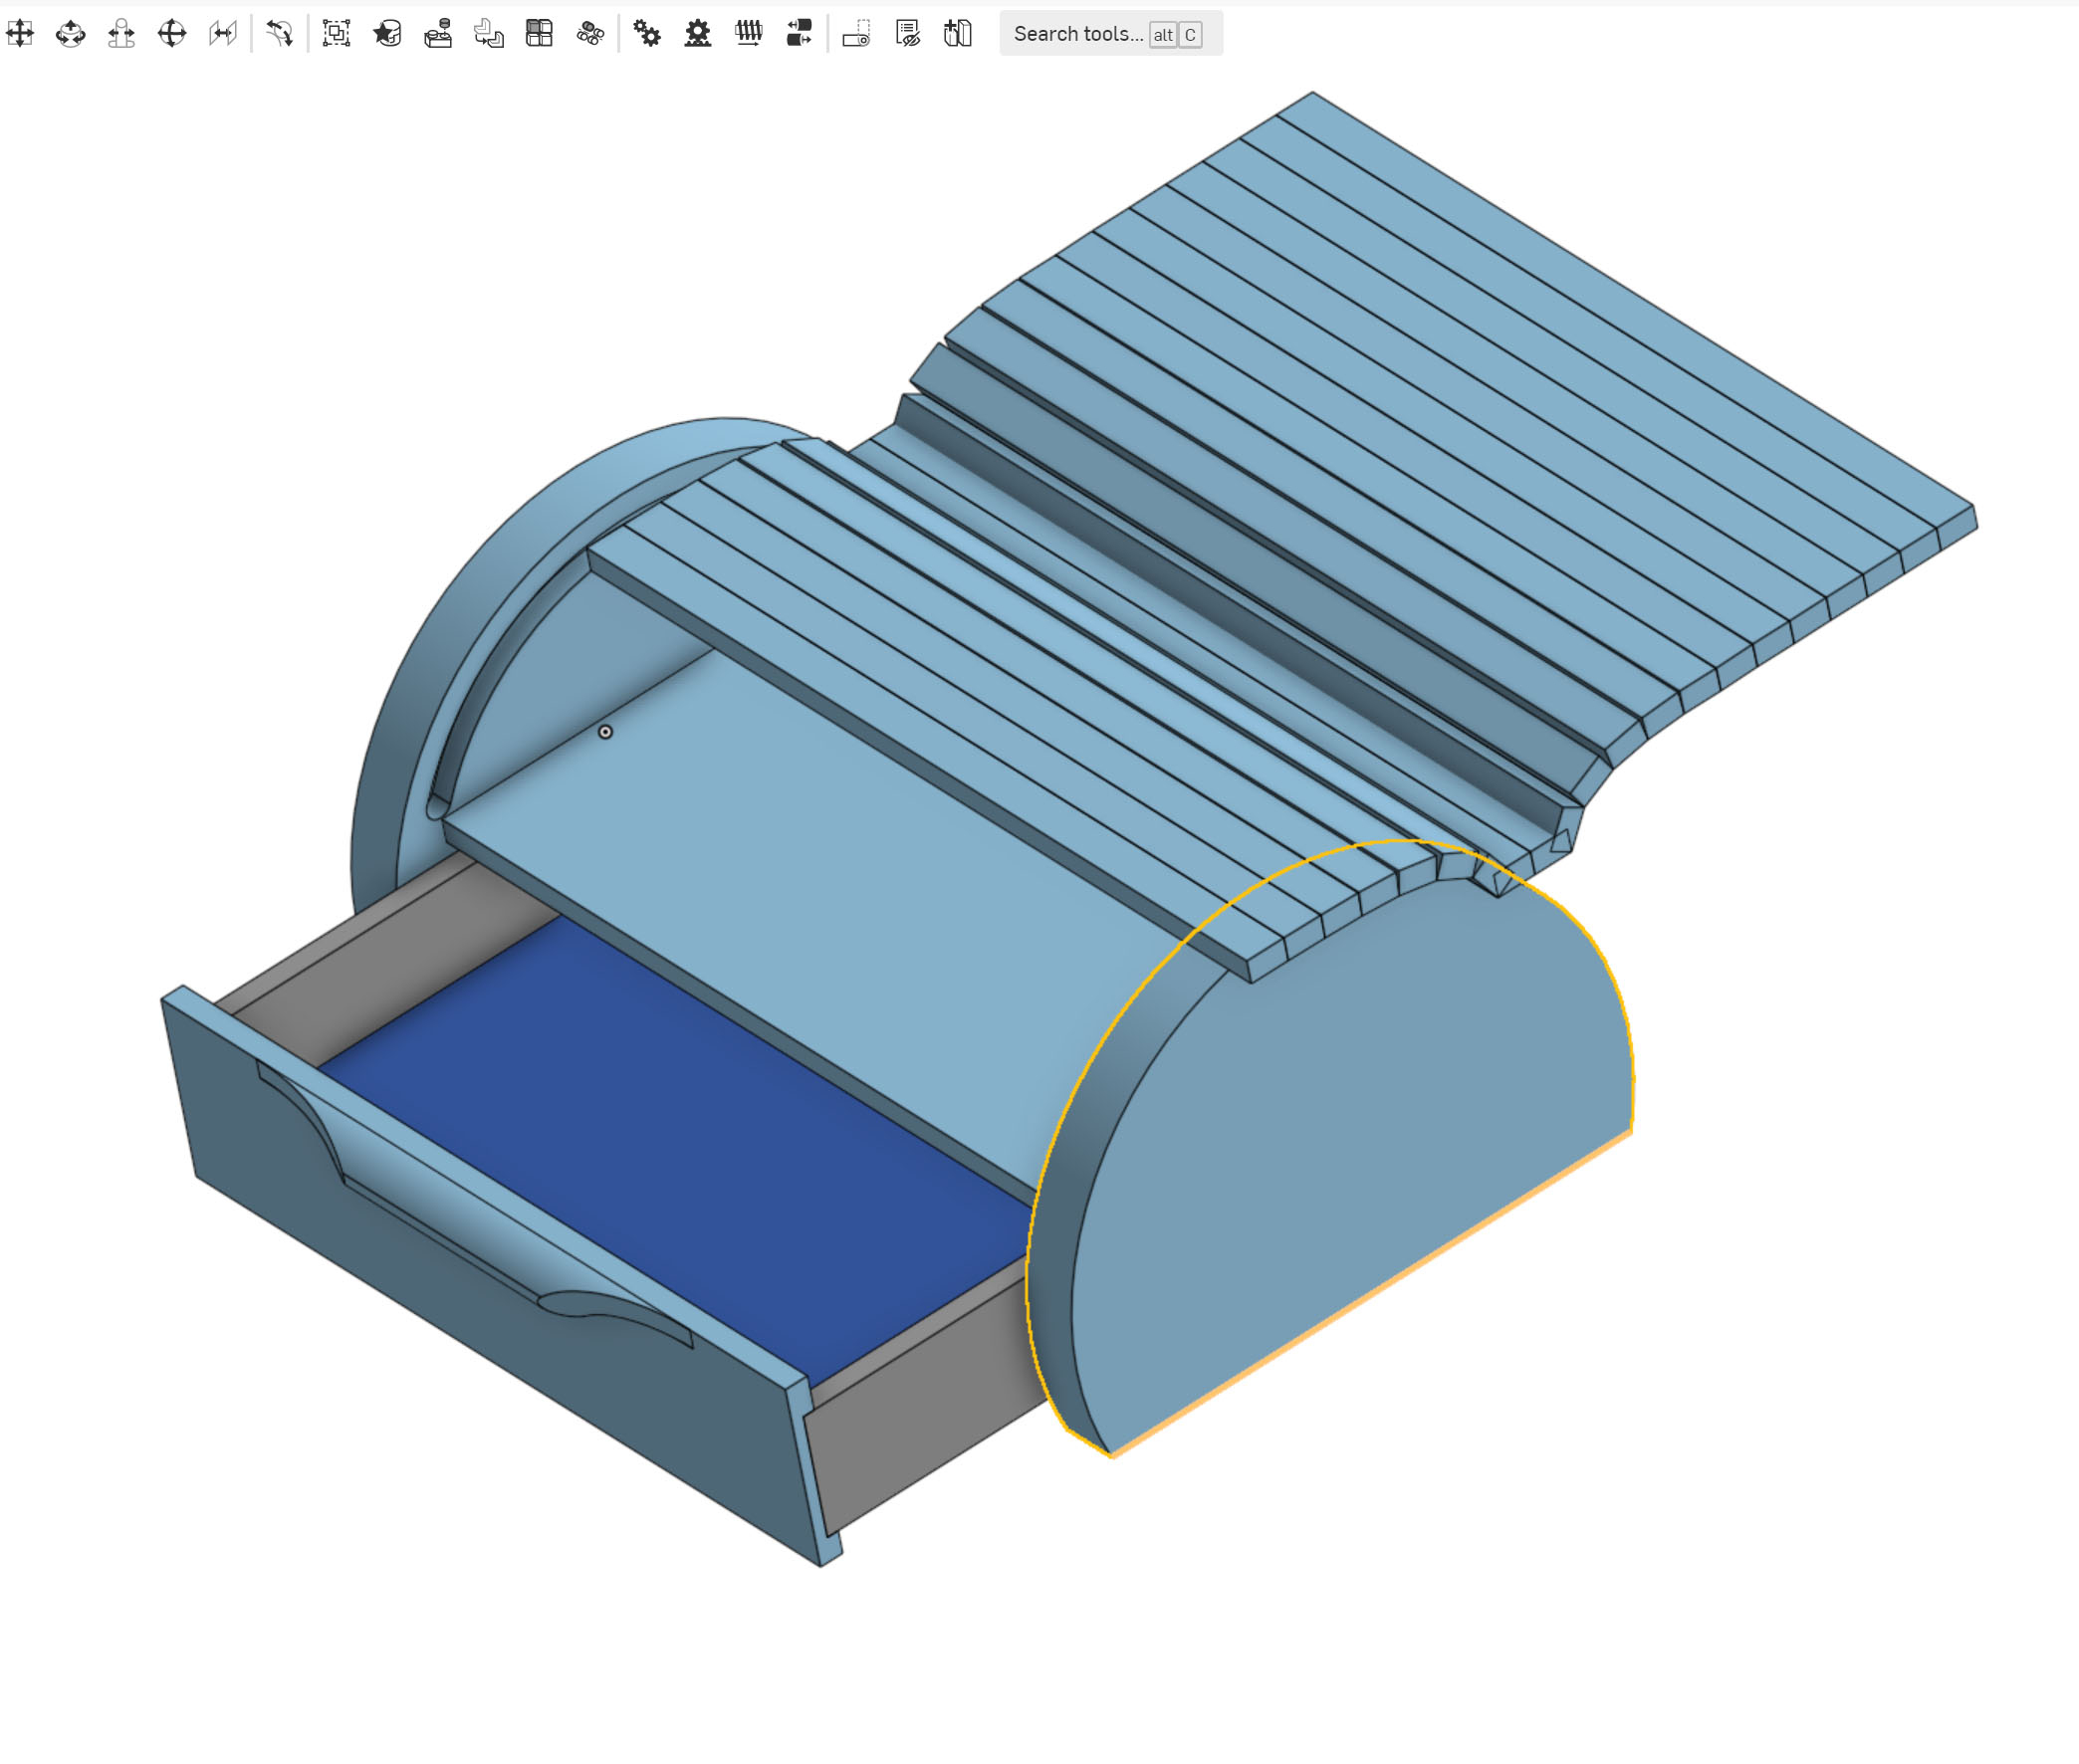
I am attempting to make a tambour front box, like a bread box, only smaller and with a bottom drawer that the roller door section connects to. When you pull out the drawer, the roller door opens, when you close the drawer, the roller door closes.
The tambour/roller door is made up in real life from timber slats 6mm thick, 10mm wide and 220mm long. They run in a groove that is 6.5mm wide and are connected together by laying them out flat and gluing canvas to the underside which provides the articulation. In order to replicate this in Onshape I made a revolute mate between the lower edges that touched therefore allowing the tambour to in theory bend around the groove in the sides.
In real life the tambour is inserted into the grrove at the bottom and fed up and around. Then the tail end is screwed into the bottom of the drawer which means when the drawer is opened it then gets pulled along the groove underneath and therefore retracts the tambour on top.
Here is the view from the other side
Also, the reason why it looks so funny is that I tried to move them upward in one go but the middle two decided not to move and so the others flexed accordingly showing the revolute mate obviously works.
I have only been using Onshape for a day, but have used other CAD packages before, but this is killing me. I've tried pin and slot, which I now know is the wrong thing, and tangent but it doesn't seem to want to work either.
Any help with this would be greatly appreciated.
Connor
The tambour/roller door is made up in real life from timber slats 6mm thick, 10mm wide and 220mm long. They run in a groove that is 6.5mm wide and are connected together by laying them out flat and gluing canvas to the underside which provides the articulation. In order to replicate this in Onshape I made a revolute mate between the lower edges that touched therefore allowing the tambour to in theory bend around the groove in the sides.

In real life the tambour is inserted into the grrove at the bottom and fed up and around. Then the tail end is screwed into the bottom of the drawer which means when the drawer is opened it then gets pulled along the groove underneath and therefore retracts the tambour on top.
Here is the view from the other side

Also, the reason why it looks so funny is that I tried to move them upward in one go but the middle two decided not to move and so the others flexed accordingly showing the revolute mate obviously works.
I have only been using Onshape for a day, but have used other CAD packages before, but this is killing me. I've tried pin and slot, which I now know is the wrong thing, and tangent but it doesn't seem to want to work either.
Any help with this would be greatly appreciated.
Connor
0
Best Answer
-
 john_mcclary
Member, Developers Posts: 4,008 PRO
When making paths with tangent mates and slots, it is sometimes best to thicken one wall of the slot and use it as a mate surface.
otherwise the tangent path will attempt to wrap around the radius at the end of the slot and travel up the back side of the slot.
from there add a tangent mate to the leading corner of each part to the highlighted face i show here.
then you can hid your path part and all should be well
2
Answers
otherwise the tangent path will attempt to wrap around the radius at the end of the slot and travel up the back side of the slot.
from there add a tangent mate to the leading corner of each part to the highlighted face i show here.
then you can hid your path part and all should be well
No problem, welcome to Onshape and the forum by the way
above is a link to my version for reference.
Let us know if you have any more questions
When I finally got it working, animating it was the only option too, when I tried doing it manually, the sections of the tambour did odd things!
But thanks again it was really helpful.
The parts are offset so I used planar so I didn't over constrain