Welcome to the Onshape forum! Ask questions and join in the discussions about everything Onshape.
First time visiting? Here are some places to start:- Looking for a certain topic? Check out the categories filter or use Search (upper right).
- Need support? Ask a question to our Community Support category.
- Please submit support tickets for bugs but you can request improvements in the Product Feedback category.
- Be respectful, on topic and if you see a problem, Flag it.
If you would like to contact our Community Manager personally, feel free to send a private message or an email.
How to mate (?) these parts correctly
 janos_szuromi
Member Posts: 2 ✭
janos_szuromi
Member Posts: 2 ✭
Hi!
This is my first time writing here (and the first day trying Onshape), so please forgive me if i make any mistake.
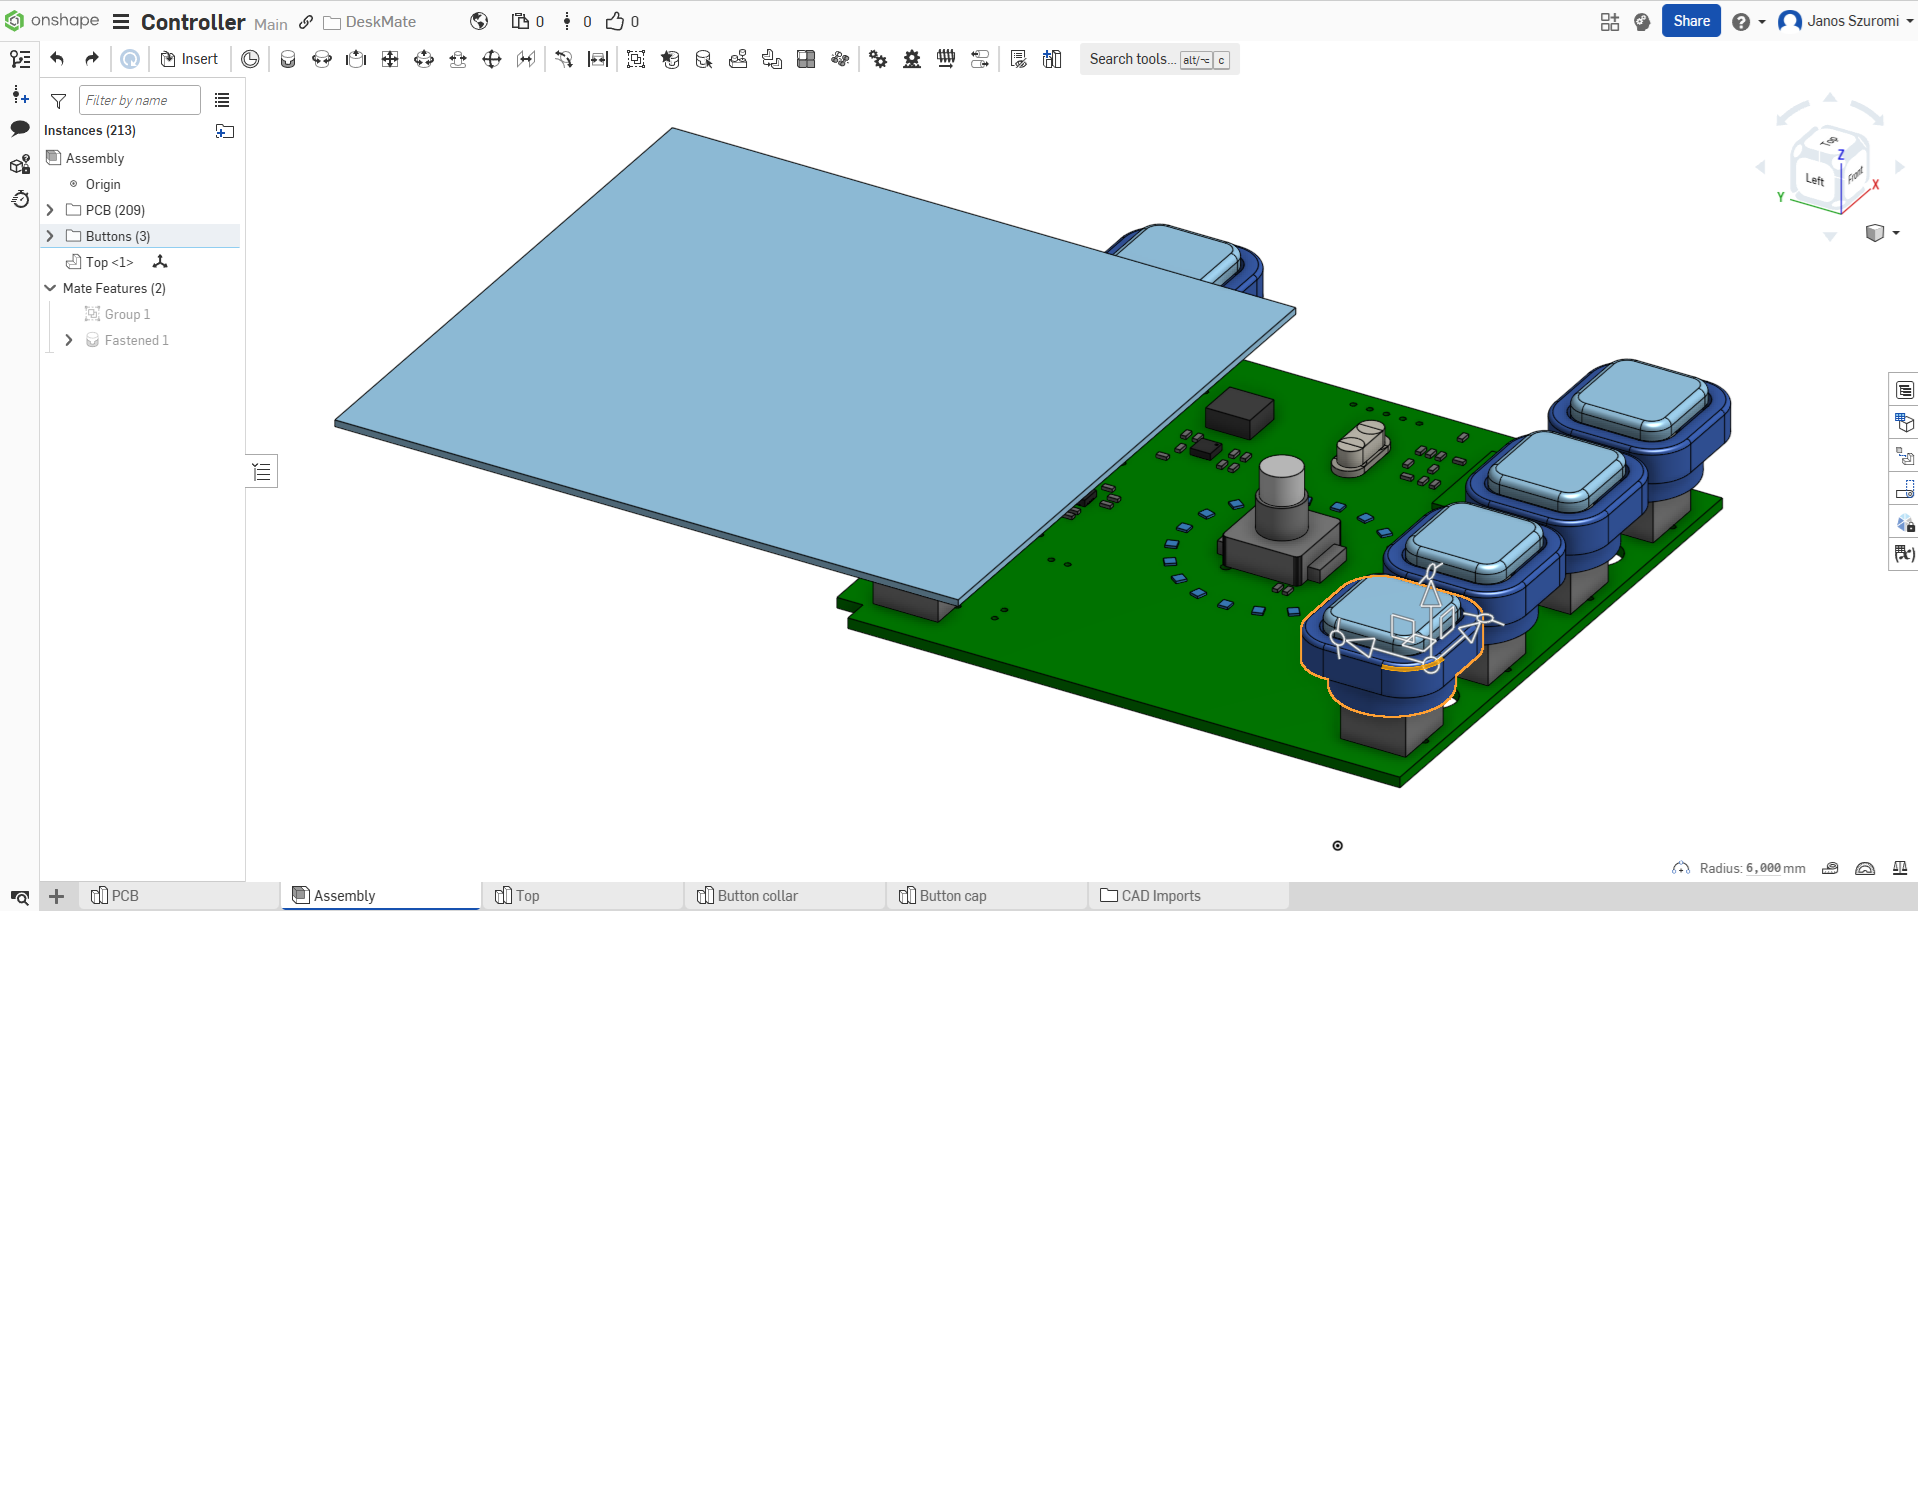
I'd like to mate (constraint) the blue plane part multiple ways. I'd like it to be centered along the X and Y axis to the light gray cylindrical part (rotary encoder) in the center, but also to be planar and at the same height as the selected curve on that button. Using the Planar mate i manage to solve the second point, but then when trying to center using the Slider mate, the light grey part is jumping up to the plane part, which is undesired. In my head, a slider allows sliding among that Z axis, and by itself not moving anything along it. Obviously, that's not what the devs are thinking. If I'm trying this in reverse order (centering first, planar after), then the plane part gets rotated in the second step in a weird way, completely disregarding the Planar mating. How could i do this?
Btw. I'm planning to edit the planar part in context later and making the necessary cutouts for those buttons and the encoder.
Thanks for the help in advance.
Comments
Probably a couple of options to do what you want. But one way. is to "fix" all the pcb parts so they don't move when you align the blue part. Then use a cylindrical mate on the center piece to the center of the blue part and setting limits of Z angles to zero then set a planer mate to the height of the blue parts to the button top.
Also check out the tutorials on learn.onshape.com for more in depth understanding of how the mate tools work.
https://learn.onshape.com/catalog?query=mate
I think you are over complicating this. You know there will need to be a hole in the plate for the encoder. Just go ahead and model that hole right in the middle of the plate. Then fasten-mate that hole to the encoder. Add an offset within the fasten-mate in the Z direction so the height is good. Manually calculate that offset and hand type it in (it won't be parametric).
This is day one of using onhsape, and you already have a model with derives and in-context edits? I don't believe it…