Welcome to the Onshape forum! Ask questions and join in the discussions about everything Onshape.
First time visiting? Here are some places to start:- Looking for a certain topic? Check out the categories filter or use Search (upper right).
- Need support? Ask a question to our Community Support category.
- Please submit support tickets for bugs but you can request improvements in the Product Feedback category.
- Be respectful, on topic and if you see a problem, Flag it.
If you would like to contact our Community Manager personally, feel free to send a private message or an email.
dimensioning a assembly, section view
 mischl
Member Posts: 28 ✭✭
often my need in OS is to assemble some parts and to see, how they fit together. for check, I control several distances inside the assembly, sometimes with a section view.
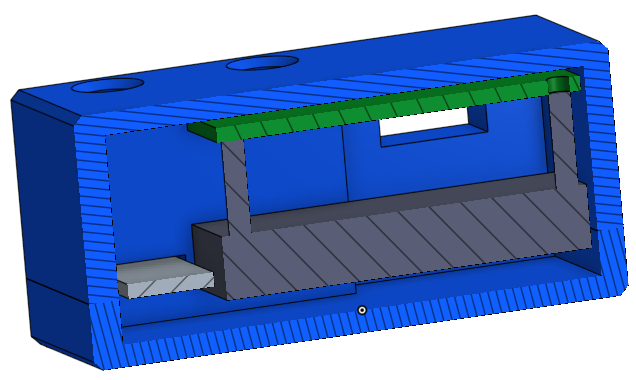
so I select two edges, go to the 'show measure details' in the right bottom edge, click them on and look.
but for the documentation of such a dimension, especially it there are ten spaces to check, it is not so fast and more important, I don't have them all together at the end for a screenshot or print out.
is there a way for this?
I have tried to create a drawing of a section view, but seems not possible.
dimension lines in an assembly would help, but probably that conflicts strongly with the intention of an assembly.
thanks in advance
Best Answers
-
 shashank_aarya
Member Posts: 265 ✭✭✭
There is a section view button in the drawing after the auxiliary view which will allow you to create section view. I think you might have tried it already but if you have any specific requirement in the section view itself such as depth of section view you can put this as improvement request.mischl said:I have tried to create a drawing of a section view, but seems not possible.
5 -
 viru
Member, Developers Posts: 619 ✭✭✭✭
@mischl, User can create section view in drawing. Kindly refer below image.
Kindly refer below information which will be helpful to create section view in drawing.
 Section view
Create a section view of an existing view by placing a cutting plane line and specifying a direction and label. Keep in mind that you cannot create section views from: auxiliary, detail, or other section views. By default, the label is on and the scale is off. To see the scale, double-click the view: the scale dialog opens to the top left of the drawing.
- Click
 .
. - Select Vertical or Horizontal in the dialog:
- Optionally supply a label for the view:

Labels are automatically applied (you can change them) and by default progress from A through Y, omitting I, O, Q, S, X, and Z.
- Move the cursor over the part for which to create a view. Hover to view snap points.
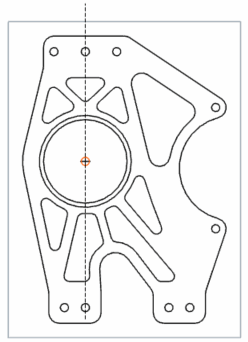
- When the dotted section cutting line is in the desired place, or the snap point is visible, click once to place the line.
- Drag the new section view away from the cutting line and click to place it.
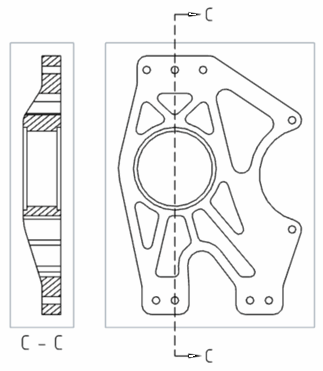
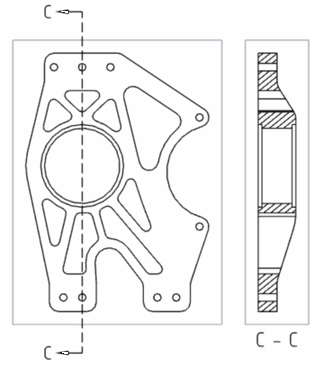
Note that dragging the section view to one side or the other before clicking it into place flips the side of the section:
- Double-click to edit the View properties, including setting the Scale and including a Scale label:

View properties dialog formats all input into an N:N or N/N format. For user input values, the second digit or denominator is always set to 1, and you can double-click the Scale label to edit it.
 Moving a section line
Once a section line is placed, if it was placed on a snap point, it is possible to move it to a new placement:
- Select the line:
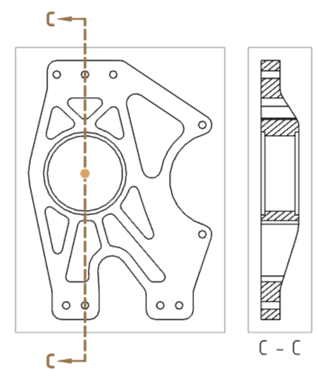
- Click and drag the snap point to a new location.
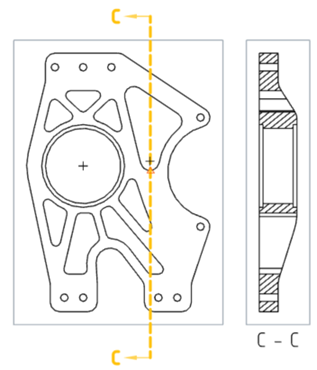
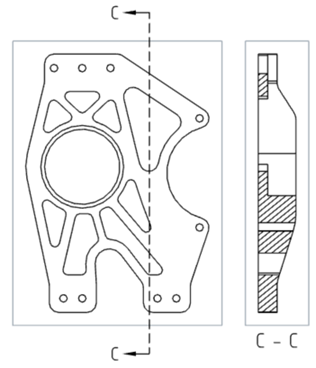
- Click to place the section line.
- Notice that the corresponding view changes.
 Flipping a section line
To flip a section line after you place it:
- Select the section line.
- Right-click and select Flip direction.
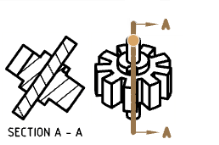
The section line labels change sides and the view regenerates appropriately.
6 - Click
Answers
Kindly refer below information which will be helpful to create section view in drawing.
Create a section view of an existing view by placing a cutting plane line and specifying a direction and label. Keep in mind that you cannot create section views from: auxiliary, detail, or other section views. By default, the label is on and the scale is off. To see the scale, double-click the view: the scale dialog opens to the top left of the drawing.
Labels are automatically applied (you can change them) and by default progress from A through Y, omitting I, O, Q, S, X, and Z.
Note that dragging the section view to one side or the other before clicking it into place flips the side of the section:
View properties dialog formats all input into an N:N or N/N format. For user input values, the second digit or denominator is always set to 1, and you can double-click the Scale label to edit it.
Once a section line is placed, if it was placed on a snap point, it is possible to move it to a new placement:
To flip a section line after you place it:
The section line labels change sides and the view regenerates appropriately.
so it was easy able to do this.
in meantime I found this improvement request: https://onshape.zendesk.com/hc/en-us/community/posts/210739637-Detail-views-in-section-view-drawing
as well as its implementation at the day I asked for: https://forum.onshape.com/discussion/3801/detail-views-in-section-view-drawing
Last Update: Many drawing improvements including detail views of section and auxiliary views, moving view labels, and flipping direction of section views. Kindly refer below video.