Welcome to the Onshape forum! Ask questions and join in the discussions about everything Onshape.
First time visiting? Here are some places to start:- Looking for a certain topic? Check out the categories filter or use Search (upper right).
- Need support? Ask a question to our Community Support category.
- Please submit support tickets for bugs but you can request improvements in the Product Feedback category.
- Be respectful, on topic and if you see a problem, Flag it.
If you would like to contact our Community Manager personally, feel free to send a private message or an email.
Placing features inside a shelled loft
 jan_rychter
Member Posts: 19 ✭
jan_rychter
Member Posts: 19 ✭
in General
I'm having trouble figuring out how to place features inside a part that is created by a) a loft between two cross-sections, b) a shell feature that removes the inside of the part.
I'm trying to extrude features from the internal floor plane (inside the shelled part), but the extrudes are not limited by the loft, so they protrude on the "wrong" side, too. I have no idea how to avoid this. I tried boolean operations, extruding from a face to another face, but nothing seems to work. The best I could do for ribs was extrude from one (internal) loft face to another, but that limits the rib height to the height of my curvature, because you can only use a single face to limit an extrude on each side, not two conjoined faces.
This is a problem when creating internal features such as ribs, screw mounts, etc.
Hopefully the attached pictures illustrate the problem. Any tips appreciated.
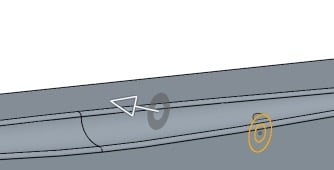
0
Comments
1. Extrude in the opposite direction and use up to next or up to part.
2. Create it as you have then use delete face to remove the bits sticking out.
Did something like this in the past, while working on a model of charge air cooler plastic end tank.
Here goes the tip:
Do an extrude of the bosses or ribs to be too long on purpose (use blind option and be bold with the distance), so it will positively stick out of the part on the other side. Then, prepare an offset surface (or surfaces) that have to lie inside the volume they are not supposed to go out of. In the end just use Split command to cut the problem parts of the ribs or bosses off.
It is very similar to Neil's number 2, but it wil (if the offset surface(s) is(are) done wisely) survive parameter changes, as the delete face command does (in its nature) involve some gueswork.
The difficulty here would be to get the skin surface of a solid part, but that is something yet to be implemented as I believe.