Welcome to the Onshape forum! Ask questions and join in the discussions about everything Onshape.
First time visiting? Here are some places to start:- Looking for a certain topic? Check out the categories filter or use Search (upper right).
- Need support? Ask a question to our Community Support category.
- Please submit support tickets for bugs but you can request improvements in the Product Feedback category.
- Be respectful, on topic and if you see a problem, Flag it.
If you would like to contact our Community Manager personally, feel free to send a private message or an email.
How to rotate a part in onshape
 Reuben_Abraham
Member Posts: 6 ✭
Best Answers
-
 viru
Member, Developers Posts: 619 ✭✭✭✭
@Reuben_Abraham, Please refer transform steps which will solve your requirement.
 Transform
Transform adjusts a part's location and orientation in 3D space with the option to copy the part in place.
 Steps
Steps
- Click
 .
.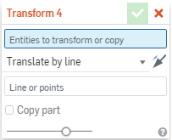
- Select the method of moving the part (transform type):
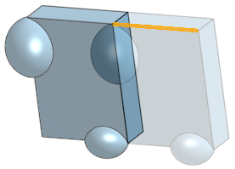
- Translate by line - Select an entity such as a part edge
- Translate by distance - Specify a value and select an entity to indicate direction
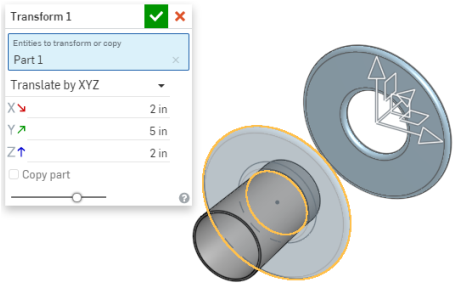
- Translate by XYZ - Specify axis values to move along or optionally, use the drag manipulator that appears to position the part along axis
- Transform by mate connectors - Specify two mate connectors by which to reorient the placement of the part.
- Rotate - Move the part about an axis specified by selecting an entity
- Copy in place - Make a copy of the part at the same location; this creates a separate and independent part enabling you to:
- Make changes to one part and use both to create different bodies during a later operation.
- Make a copy of a part prior to a series of operations enabling you to reference the original state for ancillary operations.
- Create multiple copies of a part in order to create multiple variants.
If you need to create multiple copies of a part at once, use the Pattern feature with a distance of 0 (zero).
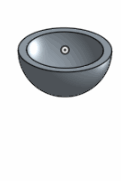
- Scale uniformly - Scale a part by a specific factor and select a point to scale about; optionally copy the part
- Click
 .
.
 Translate by line
Before translate by line
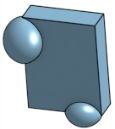

After translate by line
 Translate by distance
Before translate by distance


After translate by distance

 Translate by XYZ
Before translate by XYZ


After translate by XYZ with copy part option checked
 Transform by mate connectors
Before transform by mate connectors
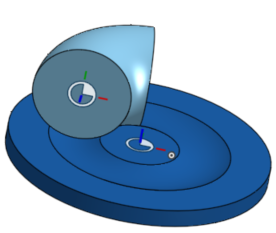
After transform by mate connectors
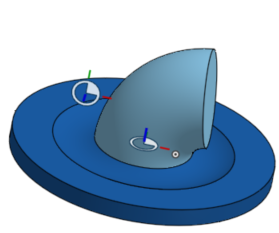
 Rotate
Before rotate


After rotate

 Copy in place
Before copy in place


After copy in place

 Scale uniformly
Before scale uniformly
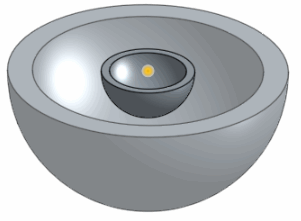
After scale uniformly
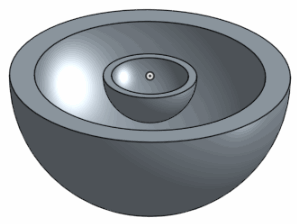
5 - Click

Answers
Transform adjusts a part's location and orientation in 3D space with the option to copy the part in place.
- Make changes to one part and use both to create different bodies during a later operation.
- Make a copy of a part prior to a series of operations enabling you to reference the original state for ancillary operations.
- Create multiple copies of a part in order to create multiple variants.
If you need to create multiple copies of a part at once, use the Pattern feature with a distance of 0 (zero).
Before translate by line
After translate by line
Before translate by distance
After translate by distance
Before translate by XYZ
After translate by XYZ with copy part option checked
Before transform by mate connectors
After transform by mate connectors
Before rotate
After rotate
Before copy in place
After copy in place
Before scale uniformly
After scale uniformly
I can't for the life of me figure out the AXIS requirement. I try to click planes but that doesn't do it. I'm lost.
1. It's best to take advantage of parametric CAD and just remodel the bevel on the right side.
2. Perhaps you can just rotate it in your slicer?
3. Failing 1 and 2, you can make an axis in a couple of easy ways - either make a sketch with a line to use as the axis, or use an implicit mate connector. Like so: https://cad.onshape.com/documents/b20feacf1f8a1423557fbc16/w/05f2f52b4ed4feaea73e0b78/e/60e16f608fd3f60c44893461