Welcome to the Onshape forum! Ask questions and join in the discussions about everything Onshape.
First time visiting? Here are some places to start:- Looking for a certain topic? Check out the categories filter or use Search (upper right).
- Need support? Ask a question to our Community Support category.
- Please submit support tickets for bugs but you can request improvements in the Product Feedback category.
- Be respectful, on topic and if you see a problem, Flag it.
If you would like to contact our Community Manager personally, feel free to send a private message or an email.
Position helpers for beams
 lars_rengersen
Member Posts: 32 ✭✭
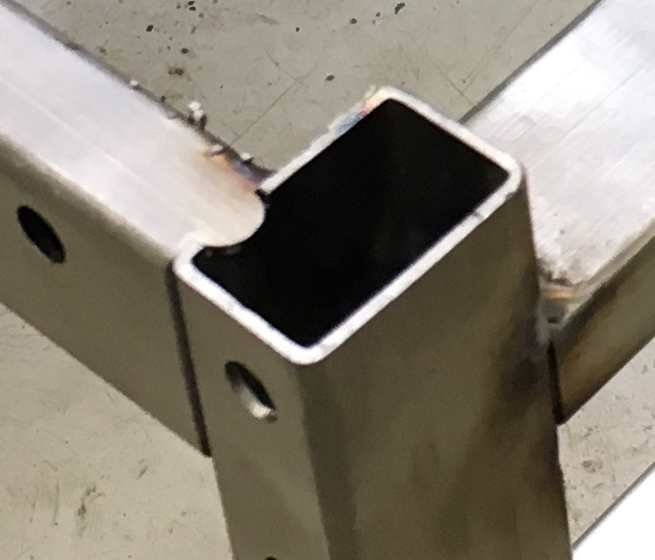
The laser cutting company used to have a feature called "position helpers" in their online ordering tool.
That allowed me to simply add them to connecting beams.
That resulted in a small extra flange on one tube a a corresponding hole in the other.

Unfortunately they do not offer that functionality anymore.
Is there an easy way of doing this in onshape?
I can always do this manually but if it can be done semi-automated that would be handy.
Thanks in advance for your help.
That allowed me to simply add them to connecting beams.
That resulted in a small extra flange on one tube a a corresponding hole in the other.

Unfortunately they do not offer that functionality anymore.
Is there an easy way of doing this in onshape?
I can always do this manually but if it can be done semi-automated that would be handy.
Thanks in advance for your help.
Tagged:
0
Best Answers
-
 john_mcclary
Member, Developers Posts: 4,005 PRO
Sure can!
For Sheet-metal It's called tab in OnShape
start by drawing a sketch of a square, or semi circle in your case on the part you want to have the tab attached to.
In the example below I sketched a rectangle on the "top surface" of the gray part. Then you select the "Tab" feature in sheet-metal commands.
Select your sketch, and the two parts you want, and OnShape will add the relief cut to the slotted part. (the blue part in this example)
For any other part:
Use Boolean with offset, it takes a few more inputs, but does the same thing.
Sketch your tab shape just like sheet metal, except this time you will use extrude-add to make it a part of the "red" part shown below.
then use Boolean-subtract.
Select the tab part as a "Tool"
Select the slot part as a "Target"
Select offset.Select all 4 faces around the tab.Then enter your offset distance.Don't forget to check the "Keep Tools" option to keep your original part.
4 -
 john_mcclary
Member, Developers Posts: 4,005 PRO
I just did .1 because it was default and easy to see on a screen shot.
It all depends on your machinist and what tool he will use.
For example: We use a laser table so we usually use a .01 clearance because we can hold that pretty easy.5
Answers
For Sheet-metal It's called tab in OnShape
start by drawing a sketch of a square, or semi circle in your case on the part you want to have the tab attached to.
In the example below I sketched a rectangle on the "top surface" of the gray part. Then you select the "Tab" feature in sheet-metal commands.
Select your sketch, and the two parts you want, and OnShape will add the relief cut to the slotted part. (the blue part in this example)
For any other part:
Use Boolean with offset, it takes a few more inputs, but does the same thing.
Sketch your tab shape just like sheet metal, except this time you will use extrude-add to make it a part of the "red" part shown below.
then use Boolean-subtract.
Select the tab part as a "Tool"
Select the slot part as a "Target"
Select offset.
It worked perfectly.
Instead of an offset of 0.1 inch (2.5 mm) I used 0.5 mm (0.02 inch), should that be sufficient to insert the tab?
It all depends on your machinist and what tool he will use.
For example: We use a laser table so we usually use a .01 clearance because we can hold that pretty easy.
Yes, I noticed it was Onshapes default indeed.
I just checked.
The machine at the laser cutting company that I intend to use has a tolerance of 0.2 mm (0.008 inch), so I could also move to 0.01 inch.
Thanks for your help!