Welcome to the Onshape forum! Ask questions and join in the discussions about everything Onshape.
First time visiting? Here are some places to start:- Looking for a certain topic? Check out the categories filter or use Search (upper right).
- Need support? Ask a question to our Community Support category.
- Please submit support tickets for bugs but you can request improvements in the Product Feedback category.
- Be respectful, on topic and if you see a problem, Flag it.
If you would like to contact our Community Manager personally, feel free to send a private message or an email.
Taper/Draft
 shane_smith605
Member Posts: 9 ✭
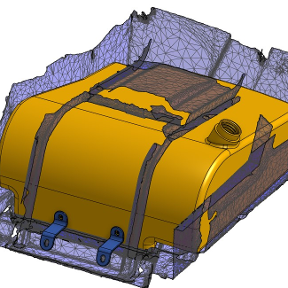
Trying to model the below. Will be tapered in 2 directions.
Got the taper from bottom to top by using draft. Goes from 33mm to 26mm.
Now in the below image, I need the taper to go from 80mm back from front edge from the 26mm down to 16mm. This will start from the point vertically below the line on the isometric view. Is this possible.
Link to model.
New to onshape.
Thanks
Best Answers
-
 MDesign
Member Posts: 1,266 PRO
I interpreted it to mean something like this. but in that case I'd just suggest an extrude from the top face cutting through the part.
0 -
 MDesign
Member Posts: 1,266 PRO
Vertical plane where you want the angle to start…split faces using that plane.... Then on each side use move face tool but use rotate option with the a,xis being the split line.
0


Answers
I'm not totally clear, but do you mean like this? https://cad.onshape.com/documents/e07a9c9a2c90c4778196d35c/w/43ed08c79c2956d0937f1657/e/a99b2406bff3c896db0f98b0
The Onsherpa | Reach peak Onshape productivity
www.theonsherpa.com
Since your talking about taper in terms of ending dimensions. I'd suggest using a simple 2 sketch rectangular loft, top to bottom. That way you don't have to guess or calculate draft angles. and just apply fillets for the rounded areas.
I interpreted it to mean something like this. but in that case I'd just suggest an extrude from the top face cutting through the part.
Mdesign, thats what I am aiming for. It came to me last night that extrude through should work. Except I just tried that and I ended up with a shoulder as it went down. I guess because it extrudes vertically and since it gets wide at the bottom created a shoulder. Did you do it differently for the above outcome? I'm starting to think though that it will just add more problems later as the whole underside will need to have a concave added as it is supposed to sit over a rounded frame.
Thanks for the help.
Ah. I see what you mean about the shoulder. yeah I just took Evan's model and modified it which uses a plane to split the surface from which to draft from. another option is another loft to remove the material on one side and mirror to the to the other.
Mdesign, I've been playing around with this and can not for the life of me figure out how you did it. Could you please share.
Thanks
Vertical plane where you want the angle to start…split faces using that plane.... Then on each side use move face tool but use rotate option with the a,xis being the split line.
I guess draft works fine too. But all you have to do is take Evans project and change plane1 to reference the right plane instead of the face of the part. and you get the image I posted.
Thank you heaps for all the help. Still along way to go but slowly learning.
I Iwould highly suggest the online learning onshape courses. Save you a ton of trial and error. Look for the little head with gears icon in the upper right of your onshape.