Welcome to the Onshape forum! Ask questions and join in the discussions about everything Onshape.
First time visiting? Here are some places to start:- Looking for a certain topic? Check out the categories filter or use Search (upper right).
- Need support? Ask a question to our Community Support category.
- Please submit support tickets for bugs but you can request improvements in the Product Feedback category.
- Be respectful, on topic and if you see a problem, Flag it.
If you would like to contact our Community Manager personally, feel free to send a private message or an email.
Need help with copying scanned shape
 jonas_eklund
Member Posts: 5 ✭
jonas_eklund
Member Posts: 5 ✭
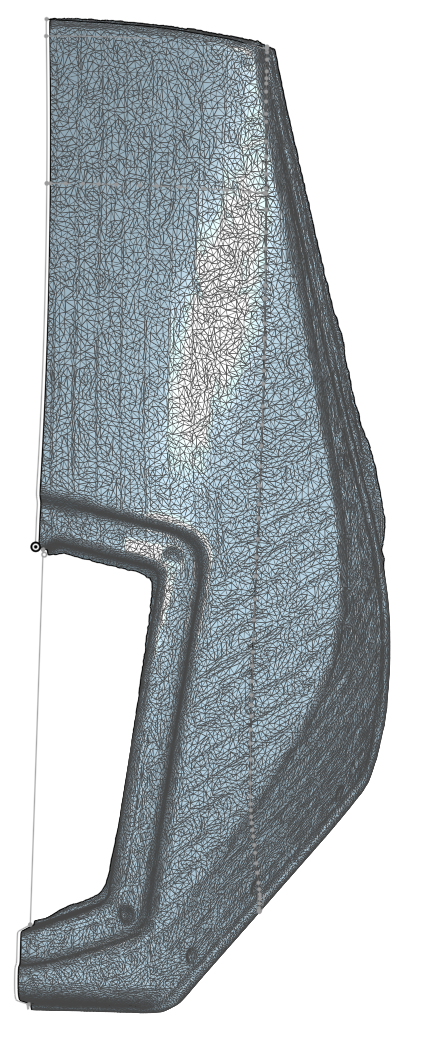
I have a rally screen for my morocycle which I have scanned … but I don't know how to copy it to a functioning shape to make 3d-prints for.
Maybe that was the worst description of a problem but I don't know ^^
The most important features are the holes and the curvature of the middle part, where a replacable screen goes covering the (pretty expensive) lights.
The rest is mostly eye candy and reference for when I have scanned and imported the complete nav tower.
I have seen some surfacing videos from @EvanReese but I can't seem to even get started with something useful!
Anyone have some tips for videos pointing me in the right direction?
Or maybe even a starter for me to finish, I can absolutely do the tedium but I don't know where to start 😐️
Comments
Evan's surfacing tools are what you will need.
As far as the right direction:
.
Learn more about the Gospel of Christ ( Here )
CADSharp - We make custom features and integrated Onshape apps! Learn How to FeatureScript Here 🔴
Thanks, will check out!
Here's the start of a possible workflow. You could work in patches and connect them later to add fillets. There's not going to be a silver bullet for this though. The way to get the cleanest surfaces is to just re-model it using the scan as a visual reference though instead of trying too hard to "convert" the mesh to something usable. It depends on your needs though. Maybe you don't need super clean surfaces as long as it prints and fits.
https://cad.onshape.com/documents/c5bcdd03054352380d190fed/w/690360e41db73d191690792e/e/b98cb991114a182783f1809d
The Onsherpa | Reach peak Onshape productivity
www.theonsherpa.com
Exactly my thoughts, it would be done in patches … but I struggle with surface options and when it doesn't work … I have no idea why haha!
It doesn't have to be submicron accurate, the area that needs most accuracy is the lower part, where there's a cover / protection I thought I'd might need to be able to fabricate myself …
I also wanted something to place in my scan of the entire rally tower, to be able to (maybe) 3D print the actual mounting of this windscreen.
I'll keep trundling along with some tutorials and maybe the methods will click … eventually.
Simplify your surfaces down to big 4-sided patches and overbuild them so they all overlap a lot, then use Mutual Trim to merge them and add your fillets back in. Your first patch might look something like this (but better once you fiddle with it and make it a closer fit). Then your second patch would be on that side surface, and a third would be the small front bit.
https://cad.onshape.com/documents/c5bcdd03054352380d190fed/w/690360e41db73d191690792e/e/d02efc547a43f659c3d039ba
The Onsherpa | Reach peak Onshape productivity
www.theonsherpa.com