Welcome to the Onshape forum! Ask questions and join in the discussions about everything Onshape.
First time visiting? Here are some places to start:- Looking for a certain topic? Check out the categories filter or use Search (upper right).
- Need support? Ask a question to our Community Support category.
- Please submit support tickets for bugs but you can request improvements in the Product Feedback category.
- Be respectful, on topic and if you see a problem, Flag it.
If you would like to contact our Community Manager personally, feel free to send a private message or an email.
How to create a "triangular extrusion" simply?
 jonathan_stewart160
Member Posts: 10 ✭
jonathan_stewart160
Member Posts: 10 ✭
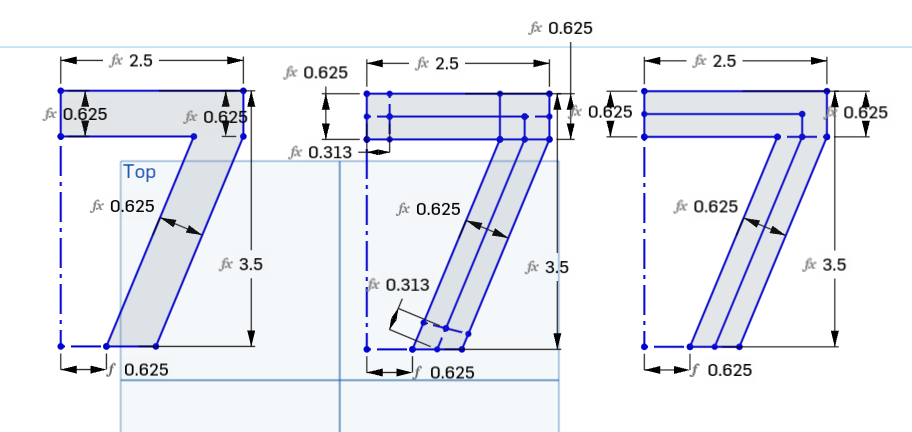
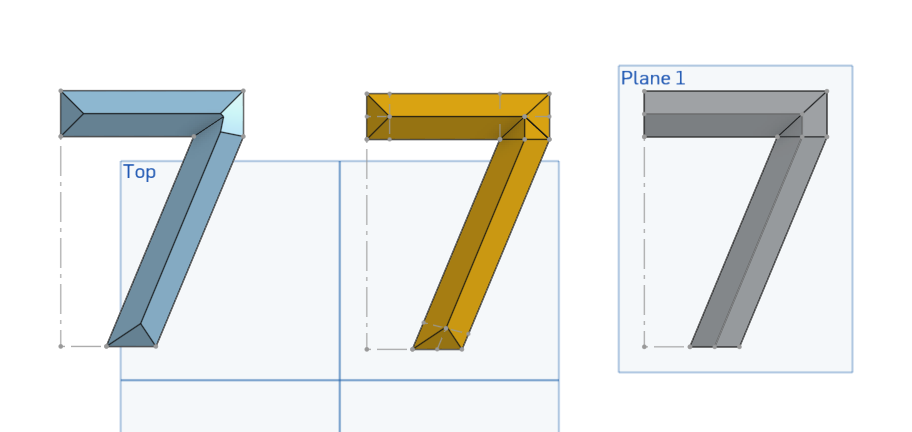
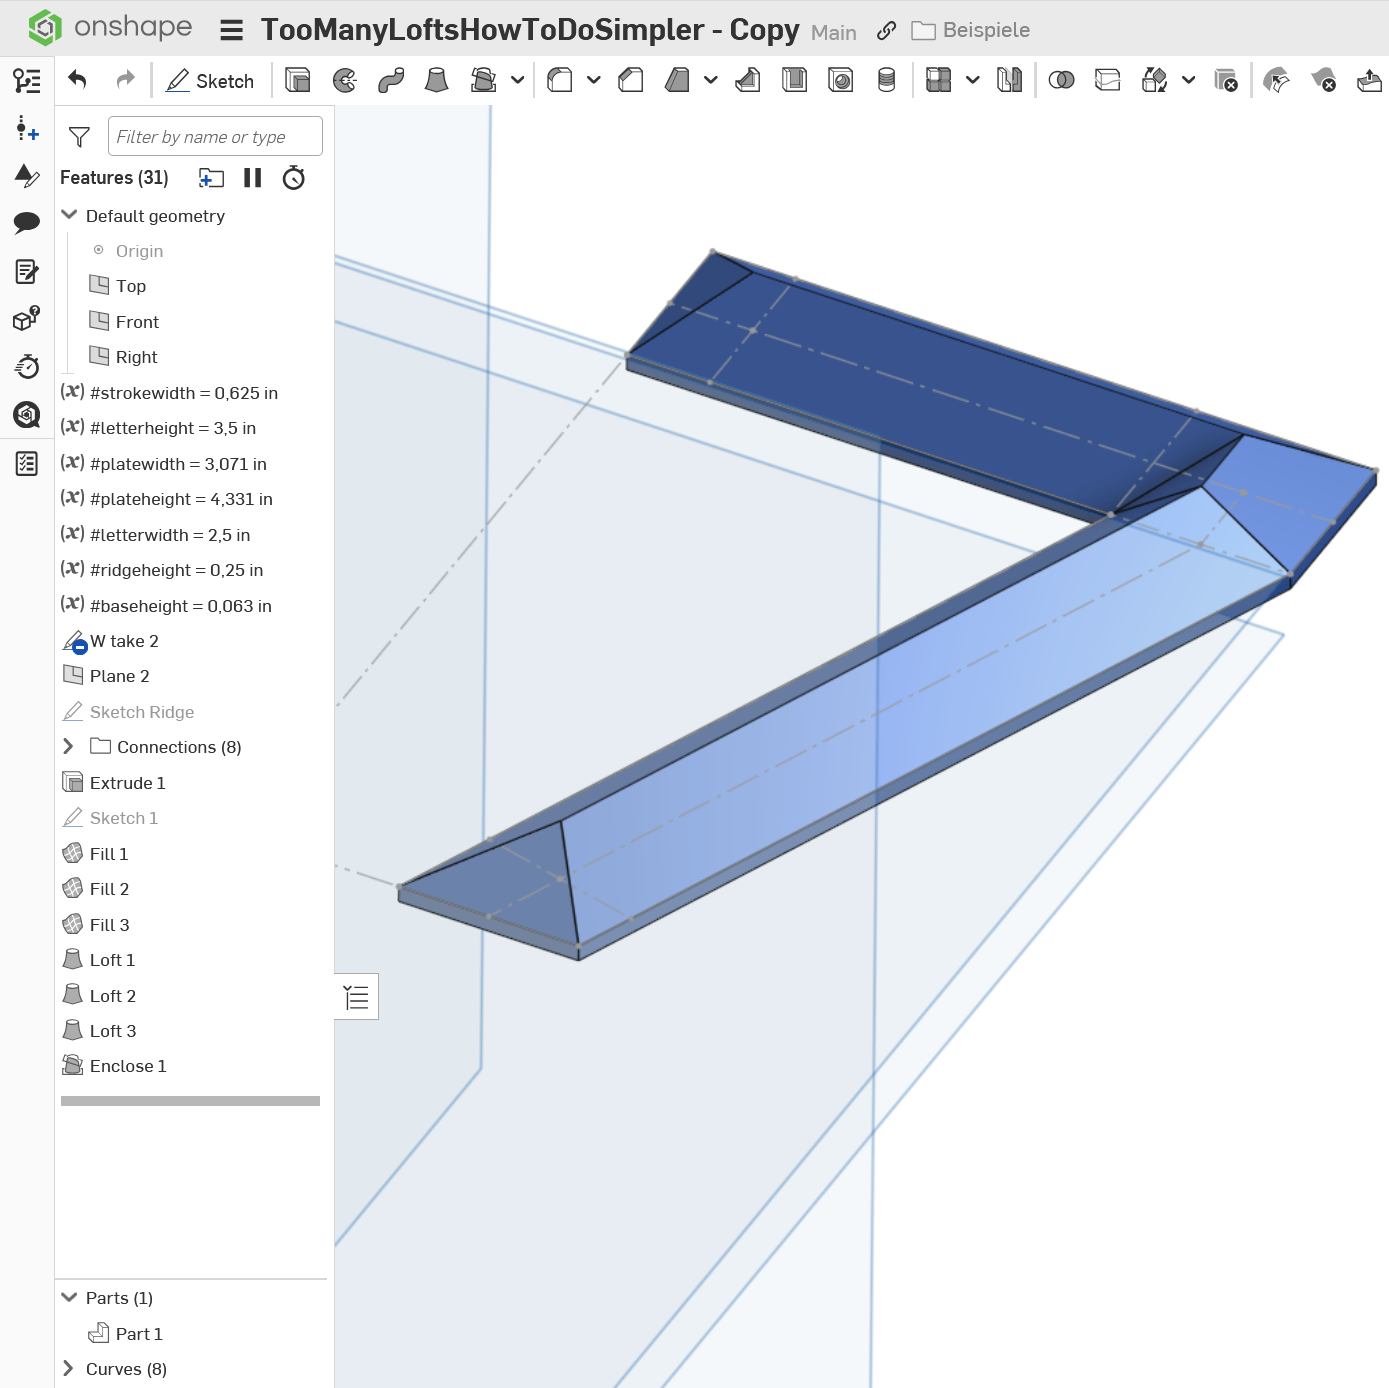
I've linked 3 different attempts I've made at this. The first one just does a draft angle which is easiest but doesn't quite get it right.
The second one builds and chamfers 3 different extrudes which are then boolean joined, but the chamfer on the upper right of the 7 isn't quite right and fiddling with decimal places to get it "close enough" is not a fun workflow.
The last one uses lofts and thicken but requires an offset plane and projected geometry and a whole bunch of lofts because if I try to chain them it gets curvy and I want them straight walled/triangular..
Best Answer
-
 martin_kopplow
Member Posts: 1,249 PRO
martin_kopplow
Member Posts: 1,249 PRO
Less lofts are possible, but since you will inevitably get self intersections in the tighter corners, you will need to stay in control and that requires a certain number of steps, be they lofts or anything else. The "draft" on such type of letters is not constant, so that is not an option. Lofts work on a point as one profile, but not on points as a part of one profile, so nothing to gain here, too. Since your main control is via the footprint and the ridgeline, I'd approach this by creating exactly the control elements, define an offset variable for the ridge heigt and then specify the ridgeline right in place, then loft or otherwise connect it to the simple extrusion of the base.
 0
0
Answers
Less lofts are possible, but since you will inevitably get self intersections in the tighter corners, you will need to stay in control and that requires a certain number of steps, be they lofts or anything else. The "draft" on such type of letters is not constant, so that is not an option. Lofts work on a point as one profile, but not on points as a part of one profile, so nothing to gain here, too. Since your main control is via the footprint and the ridgeline, I'd approach this by creating exactly the control elements, define an offset variable for the ridge heigt and then specify the ridgeline right in place, then loft or otherwise connect it to the simple extrusion of the base.
https://cad.onshape.com/documents/7ccddd1df3ace641a6e9e807/w/dee131ebd4358b318a1e0d51/e/62d3a0bd1e6a6ea13d6be8ae?renderMode=0&uiState=6992f22005068cf1f8106243
Not sure what the ultimate goal is but with a little bit of math you could make this workflow work and be parametric that you can adjust the height of the ridge if needed to work out perfectly. I just tweaked the Draft 2 angle and the move face 1 (actually a rotate) angle to get close to what you want. Ooorrrrr…. you could use this 5 feature workflow in the 2nd pic and skip the math.. 😉
Build yourself 10 studios like that and slap some amalgam tags on em and you only need to do it once for all the places you're gonna use those numbers.
Derek Van Allen | Engineering Consultant | Meddleramalgam tags? I'm a little behind on what that is.
Amalgamate custom feature I wrote. It's like a mega version of being able to derive parts into other studios where you get more control over being able to pre-bake multiple different boolean operations and naming conventions into the seed studios so that you can cut down on labor long term in all the places you're using that geometry.
Derek Van Allen | Engineering Consultant | MeddlerOh geez!! that sounds like voodoo. I'll have to check it out. Maybe @jonathan_stewart160 can use it for whatever he's cooking with this model.