Welcome to the Onshape forum! Ask questions and join in the discussions about everything Onshape.
First time visiting? Here are some places to start:- Looking for a certain topic? Check out the categories filter or use Search (upper right).
- Need support? Ask a question to our Community Support category.
- Please submit support tickets for bugs but you can request improvements in the Product Feedback category.
- Be respectful, on topic and if you see a problem, Flag it.
If you would like to contact our Community Manager personally, feel free to send a private message or an email.
How to shell airfoil shape
 yanni_papadimitriou
Member Posts: 6 ✭
yanni_papadimitriou
Member Posts: 6 ✭
Hi there,
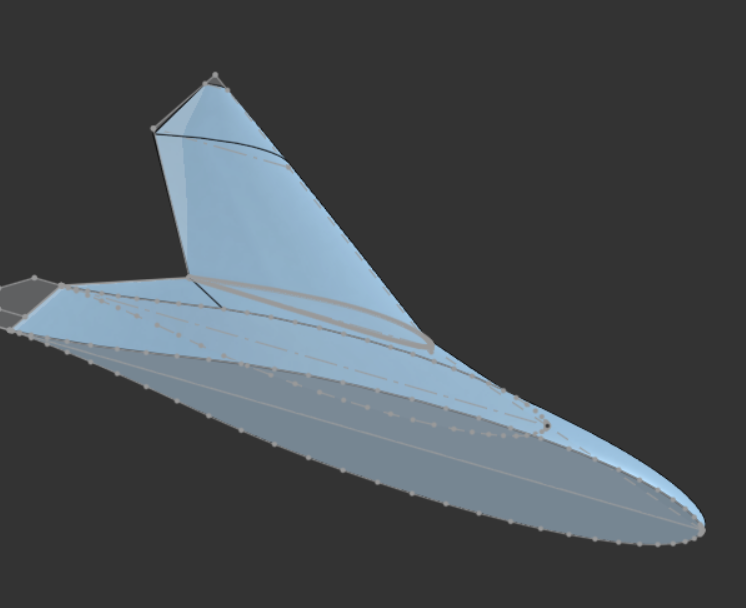
I'm trying to shell an airfoil shape, but it's forcing me to go to very low thickness - it errors when it gets too high. I have also tried offsetting faces and recreating the shape but smaller using profile offsets, but none of these methods work.
 https://cad.onshape.com/documents/7a246534f9cb873eaa743666/v/61a3187c8d5669cedc2d80d1/e/463126e253277ad5831a4216?showReturnToWorkspaceLink=true
 Best Answers
-
 MDesign
Member Posts: 1,312 PRO
MDesign
Member Posts: 1,312 PRO
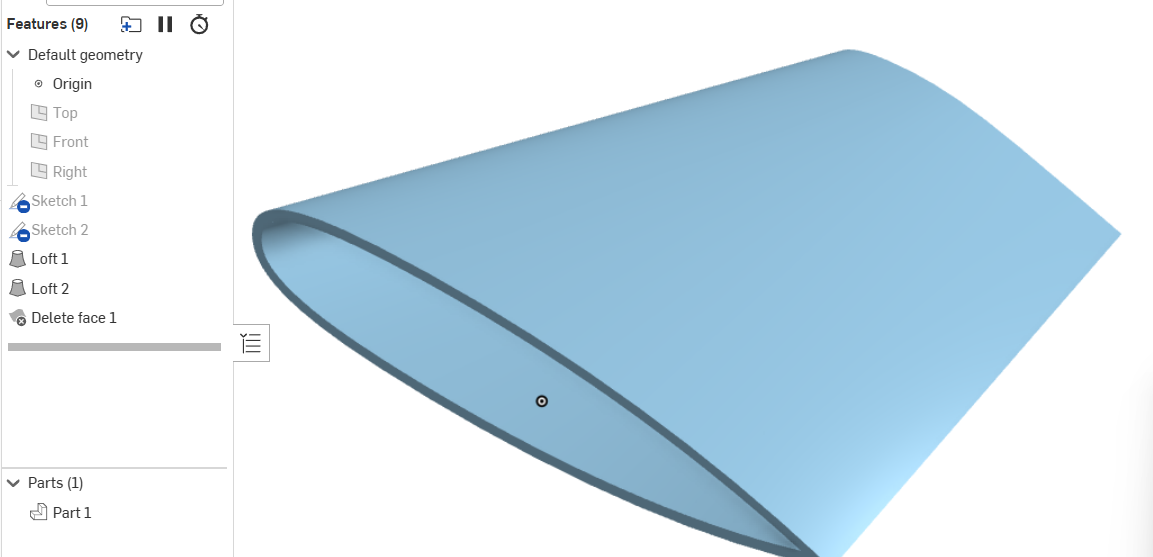
Shell can be finicky if your driving features are not near perfect and smooth. I haven't looked at your design but I see a segmented profile in that screenshot which will probably be an issue for shell at narrow places..
0 -
 glen_dewsbury
Member Posts: 1,279 PRO
glen_dewsbury
Member Posts: 1,279 PRO
I like to loft and upper and lower skin separately with over lapping trailing edge. Boolean together and trim trailing edge with delete face. This gets rid of the problem when lofting, thickening or shell that the curvature is too tight and trying to fold over its self in this case. One of the profile generators will allow separate curves.
 0
0 -
SMURFCAD
Member Posts: 7 ✭
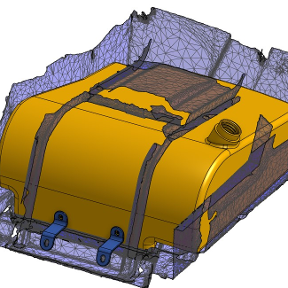
Shell feature results in collapsed geometry that can't be resolved. Can be real tedious to create/fix. One hack is to use thicken, but you have to thicken to the outside… so not 100% accurate/correct way to do this. Then patch up any wonky geometry that results. And do the jet exhaust shroud geometry totally separate and combine at end.
To model it the more elegant (tedious and time consuming) way, you will probably have to:
-Use surfaces not solids. Surfaces are more flexible to create complex geometry. You boolean/cap everything at the end to make a solid.
-Work on one airfoil section at a time, don't combine them until the end.
-Use Fill or Boundary Surface -built on top of curves- to create top surface of one airfoil section. Offset that surface. Repeat for bottom surface. Boolean the two inner surfaces using Move Boundary where needed.
-Repeat and boolean everything at the end.
You can also use Split to achieve similar result.
There's good training material on the Onshape website if you really want to dig in.
-S
0
Answers
Shell can be finicky if your driving features are not near perfect and smooth. I haven't looked at your design but I see a segmented profile in that screenshot which will probably be an issue for shell at narrow places..
I like to loft and upper and lower skin separately with over lapping trailing edge. Boolean together and trim trailing edge with delete face. This gets rid of the problem when lofting, thickening or shell that the curvature is too tight and trying to fold over its self in this case. One of the profile generators will allow separate curves.
https://cad.onshape.com/documents/9a16e90e97ff0f49350854fe/w/8b1147e1bb96ce49e97d63d0/e/76e33ddfa2d5e580ac0eb4ba
@yanni_papadimitriou
Shell feature results in collapsed geometry that can't be resolved. Can be real tedious to create/fix. One hack is to use thicken, but you have to thicken to the outside… so not 100% accurate/correct way to do this. Then patch up any wonky geometry that results. And do the jet exhaust shroud geometry totally separate and combine at end.
To model it the more elegant (tedious and time consuming) way, you will probably have to:
-Use surfaces not solids. Surfaces are more flexible to create complex geometry. You boolean/cap everything at the end to make a solid.
-Work on one airfoil section at a time, don't combine them until the end.
-Use Fill or Boundary Surface -built on top of curves- to create top surface of one airfoil section. Offset that surface. Repeat for bottom surface. Boolean the two inner surfaces using Move Boundary where needed.
-Repeat and boolean everything at the end.
You can also use Split to achieve similar result.
There's good training material on the Onshape website if you really want to dig in.
-S
Thanks, all. I'm going to go down the route of making it properly with surfaces. However, this geometry seems to be quite difficult to achieve:
The 'match curvature' with the first surface conflicts with the guide on the back - the back has to have a sharp geometry, but also match the curve at the front.
@yanni_papadimitriou Looks like you are getting it figured out. Surfacing takes a completely different workflow that some struggle with, but you seems to have a handle on it.