Welcome to the Onshape forum! Ask questions and join in the discussions about everything Onshape.
First time visiting? Here are some places to start:- Looking for a certain topic? Check out the categories filter or use Search (upper right).
- Need support? Ask a question to our Community Support category.
- Please submit support tickets for bugs but you can request improvements in the Product Feedback category.
- Be respectful, on topic and if you see a problem, Flag it.
If you would like to contact our Community Manager personally, feel free to send a private message or an email.
How to use SliderMate?
 dale_gaskill
Member Posts: 4 ✭
dale_gaskill
Member Posts: 4 ✭
I am brand new to learning CAD, so please take it easy on me!
I've been messing around with various shapes as I'm learning OnShape, and came up with two separate parts; one with a male and one with a female dovetail extrusion, the idea being I can get the parts to slide past each other along this rail. Problem is, no matter where I click, SliderMate just doesn't seem to work. YouTube hasn't helped; every tutorial is some version of "click here, then click there". It sounds so easy, but I just can't get it to work!
Help! Please!
https://cad.onshape.com/documents/3b43f5650635e9833ffc19be/w/80ea5486fbfff2ceada9acbb/e/a880da4754ac2e7ede9bc2b4?renderMode=0&uiState=69a35c76b8679575b4a34657
Best Answers
-
 martin_kopplow
Member Posts: 1,317 PRO
martin_kopplow
Member Posts: 1,317 PRO
Hi @dale_gaskill , here comes one possible solution:
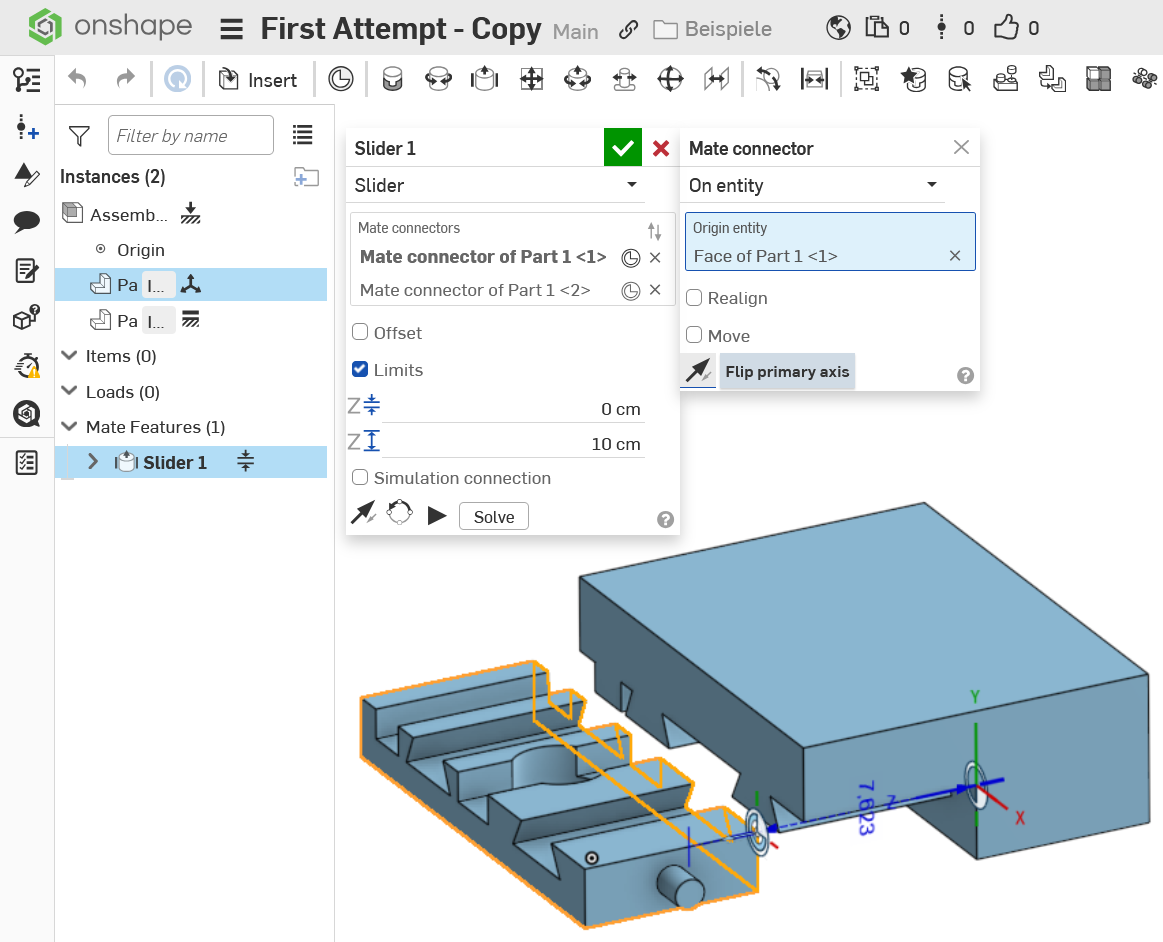
The trick is to figure out in which direction the two mate connectors need to be placed. Intuitively, they typically end up the wrong way around, but the Z-Axis must point away from each other in order to make the limits work. Just hit the reverse arrow for both of them until that happens, before you add limits. It is wise to place them at one end of the slide, not in the middle, to make applying limits (end stops) easier.
0
Answers
Hi @dale_gaskill , here comes one possible solution:
https://cad.onshape.com/documents/cecca6a675f3daf95df7d86f/w/dba824b06af33946fce93bf3/e/5ab1788dbf93dda7384cd85a?renderMode=0&uiState=69a3fbc98d07efe2a554dfb6
The trick is to figure out in which direction the two mate connectors need to be placed. Intuitively, they typically end up the wrong way around, but the Z-Axis must point away from each other in order to make the limits work. Just hit the reverse arrow for both of them until that happens, before you add limits. It is wise to place them at one end of the slide, not in the middle, to make applying limits (end stops) easier.
Thank you! I'I'd been selecting the wrong faces and had ththe Z axis pointing towards each other! I'm going to continue to play around.
Thanks!
Keep playing around. It is probably the only reliable way to find out how things really work. ;0)