Welcome to the Onshape forum! Ask questions and join in the discussions about everything Onshape.
First time visiting? Here are some places to start:- Looking for a certain topic? Check out the categories filter or use Search (upper right).
- Need support? Ask a question to our Community Support category.
- Please submit support tickets for bugs but you can request improvements in the Product Feedback category.
- Be respectful, on topic and if you see a problem, Flag it.
If you would like to contact our Community Manager personally, feel free to send a private message or an email.
STL export issue
 giacomo_ardesi
Member Posts: 13 ✭✭
giacomo_ardesi
Member Posts: 13 ✭✭
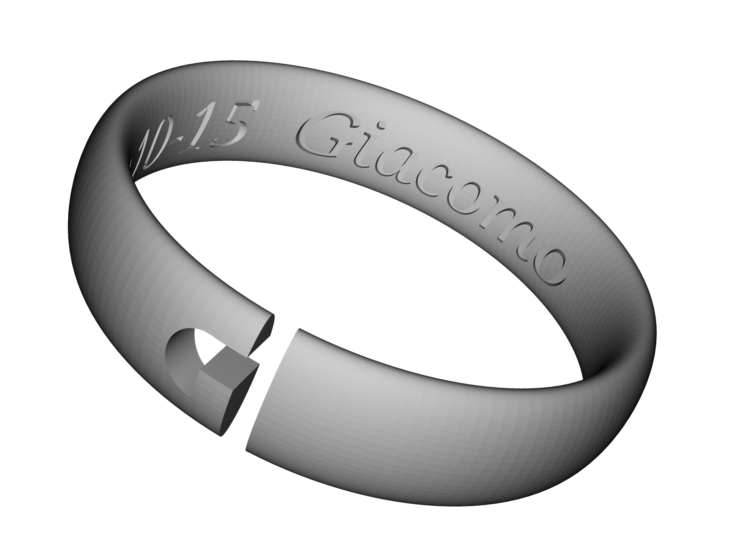
Hi all,
I'm exporting this model I made for our wedding rings to be 3D printed...but there's an issue with one hidden auxiliary surface I used to make the inner engravings with...: on export (STL, binary, fine) the surface "appears" even though it was hidden and notice it's actually fully circular, though on export it appears as if it's half circle...what's strange is that one month ago the (substantially) same model exported flawlessly! And also made 3D print perfectly.
I attached two images.
cheers
Giacomo
Tagged:
0
Comments
Please could you open a support ticket (from Help > Feedback) and we will investigate.
Congratulations on your marriage from the Onshape team!
Andy
Doh!
cheers
Giacomo
If the surface appears in the surfaces list (below the parts list, which in turn is below the feature list)
You will be able to select that surface (you will first need to click on the right-pointing arrowhead to expand the surface list as shown), then RMB , and choose "Delete"
Although this brings up a "Delete Part" dialog, the Delete feature also works to delete surfaces, and this is quite common practice to clean up a solid model once any surfaces have done their job further up the tree.
This might work as a stop-gap workaround to get your part printed.