Welcome to the Onshape forum! Ask questions and join in the discussions about everything Onshape.
First time visiting? Here are some places to start:- Looking for a certain topic? Check out the categories filter or use Search (upper right).
- Need support? Ask a question to our Community Support category.
- Please submit support tickets for bugs but you can request improvements in the Product Feedback category.
- Be respectful, on topic and if you see a problem, Flag it.
If you would like to contact our Community Manager personally, feel free to send a private message or an email.
Tapered Recess Creation?
 S1mon
Member Posts: 4,136 PRO
S1mon
Member Posts: 4,136 PRO
I've been struggling with one aspect of a molded boss feature I'm developing. I've tried a lot of different ways to solve this but getting a general case method that is robust is surprisingly challenging.
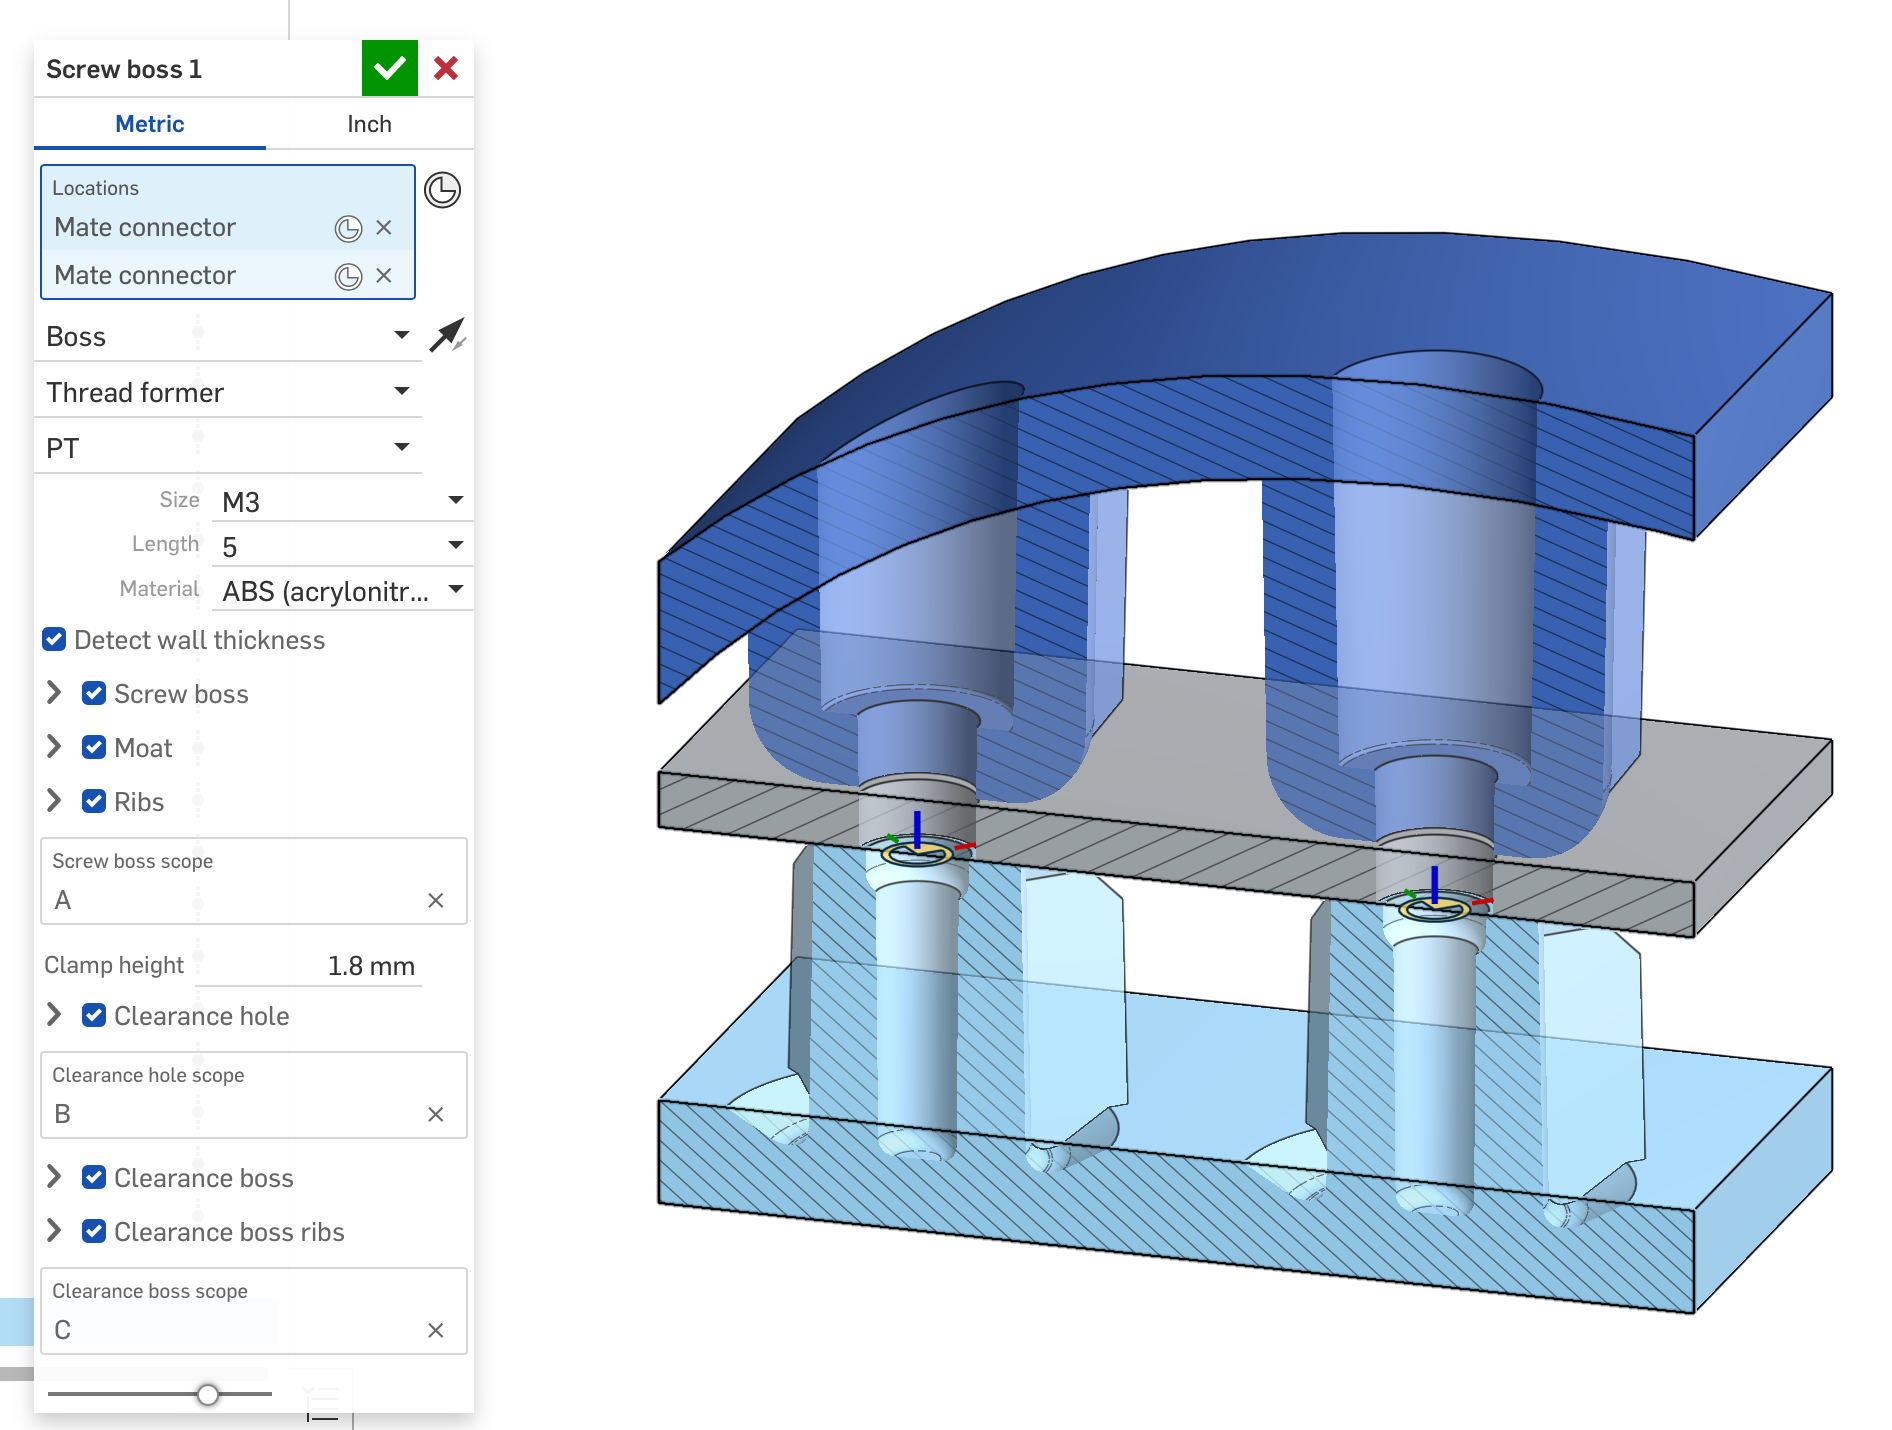
I'm working on a molded boss feature to rival hole.fs in complexity which takes basic choices for screw type/size and material, some locations, and then automatically targets the parts to add screw bosses, clearance holes, and clearance bosses. There have been some decent custom features which do some basic versions of these, but none to my knowledge that are as automatic as the hole feature, and include all the real world DFM details.
One of my biggest challenges is getting a robust way to add a transition in any arbitrary plastic part wall from the nominal to a local thinning - often called a "moat". It's easy for many cases, but if you try to make it very robust, it gets very painful.
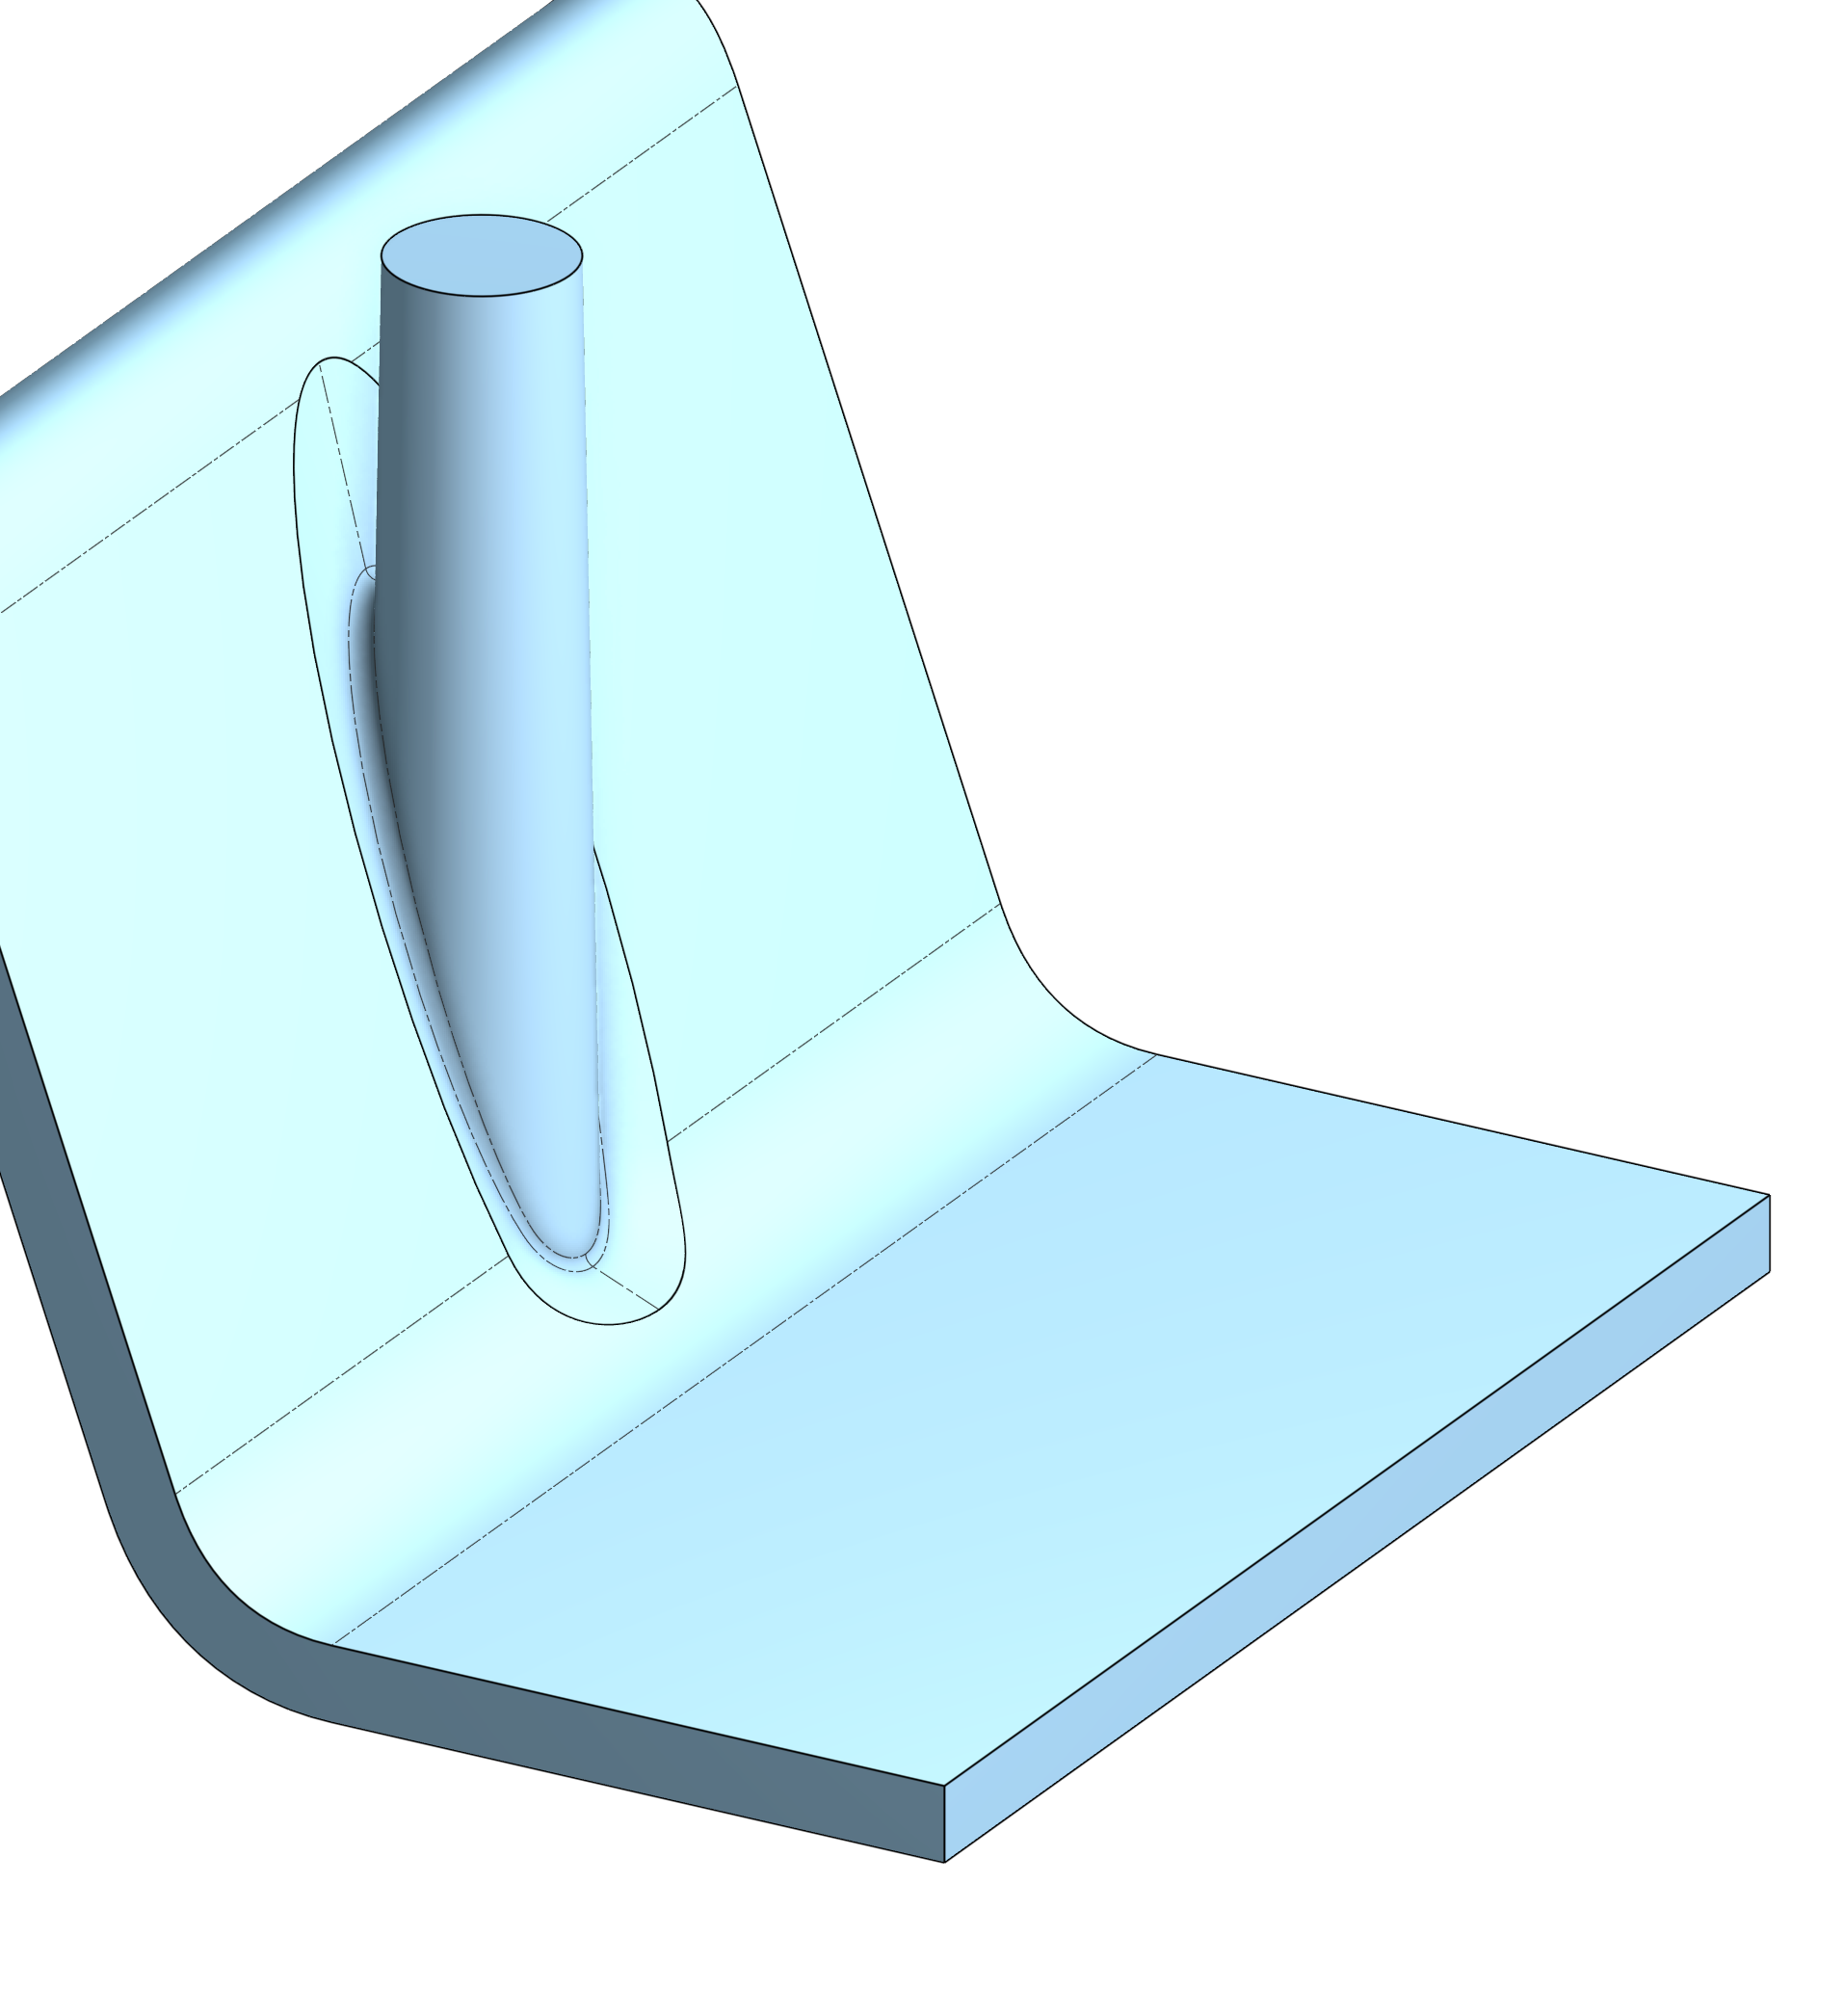
I'm essentially trying to do a chamfer which wraps around a drafted cylinder where the end of the cylinder is based on whatever random shape it runs into and some offsets. Here's a manual version that's almost working using a Face blend. (Fillets, loft and chamfer all fail miserably for these sorts of really steep angles)
I have something that works remarkably well when the walls are fairly normal to the line of draw for molding and the surfaces aren't too crazy.
Here's a preview:
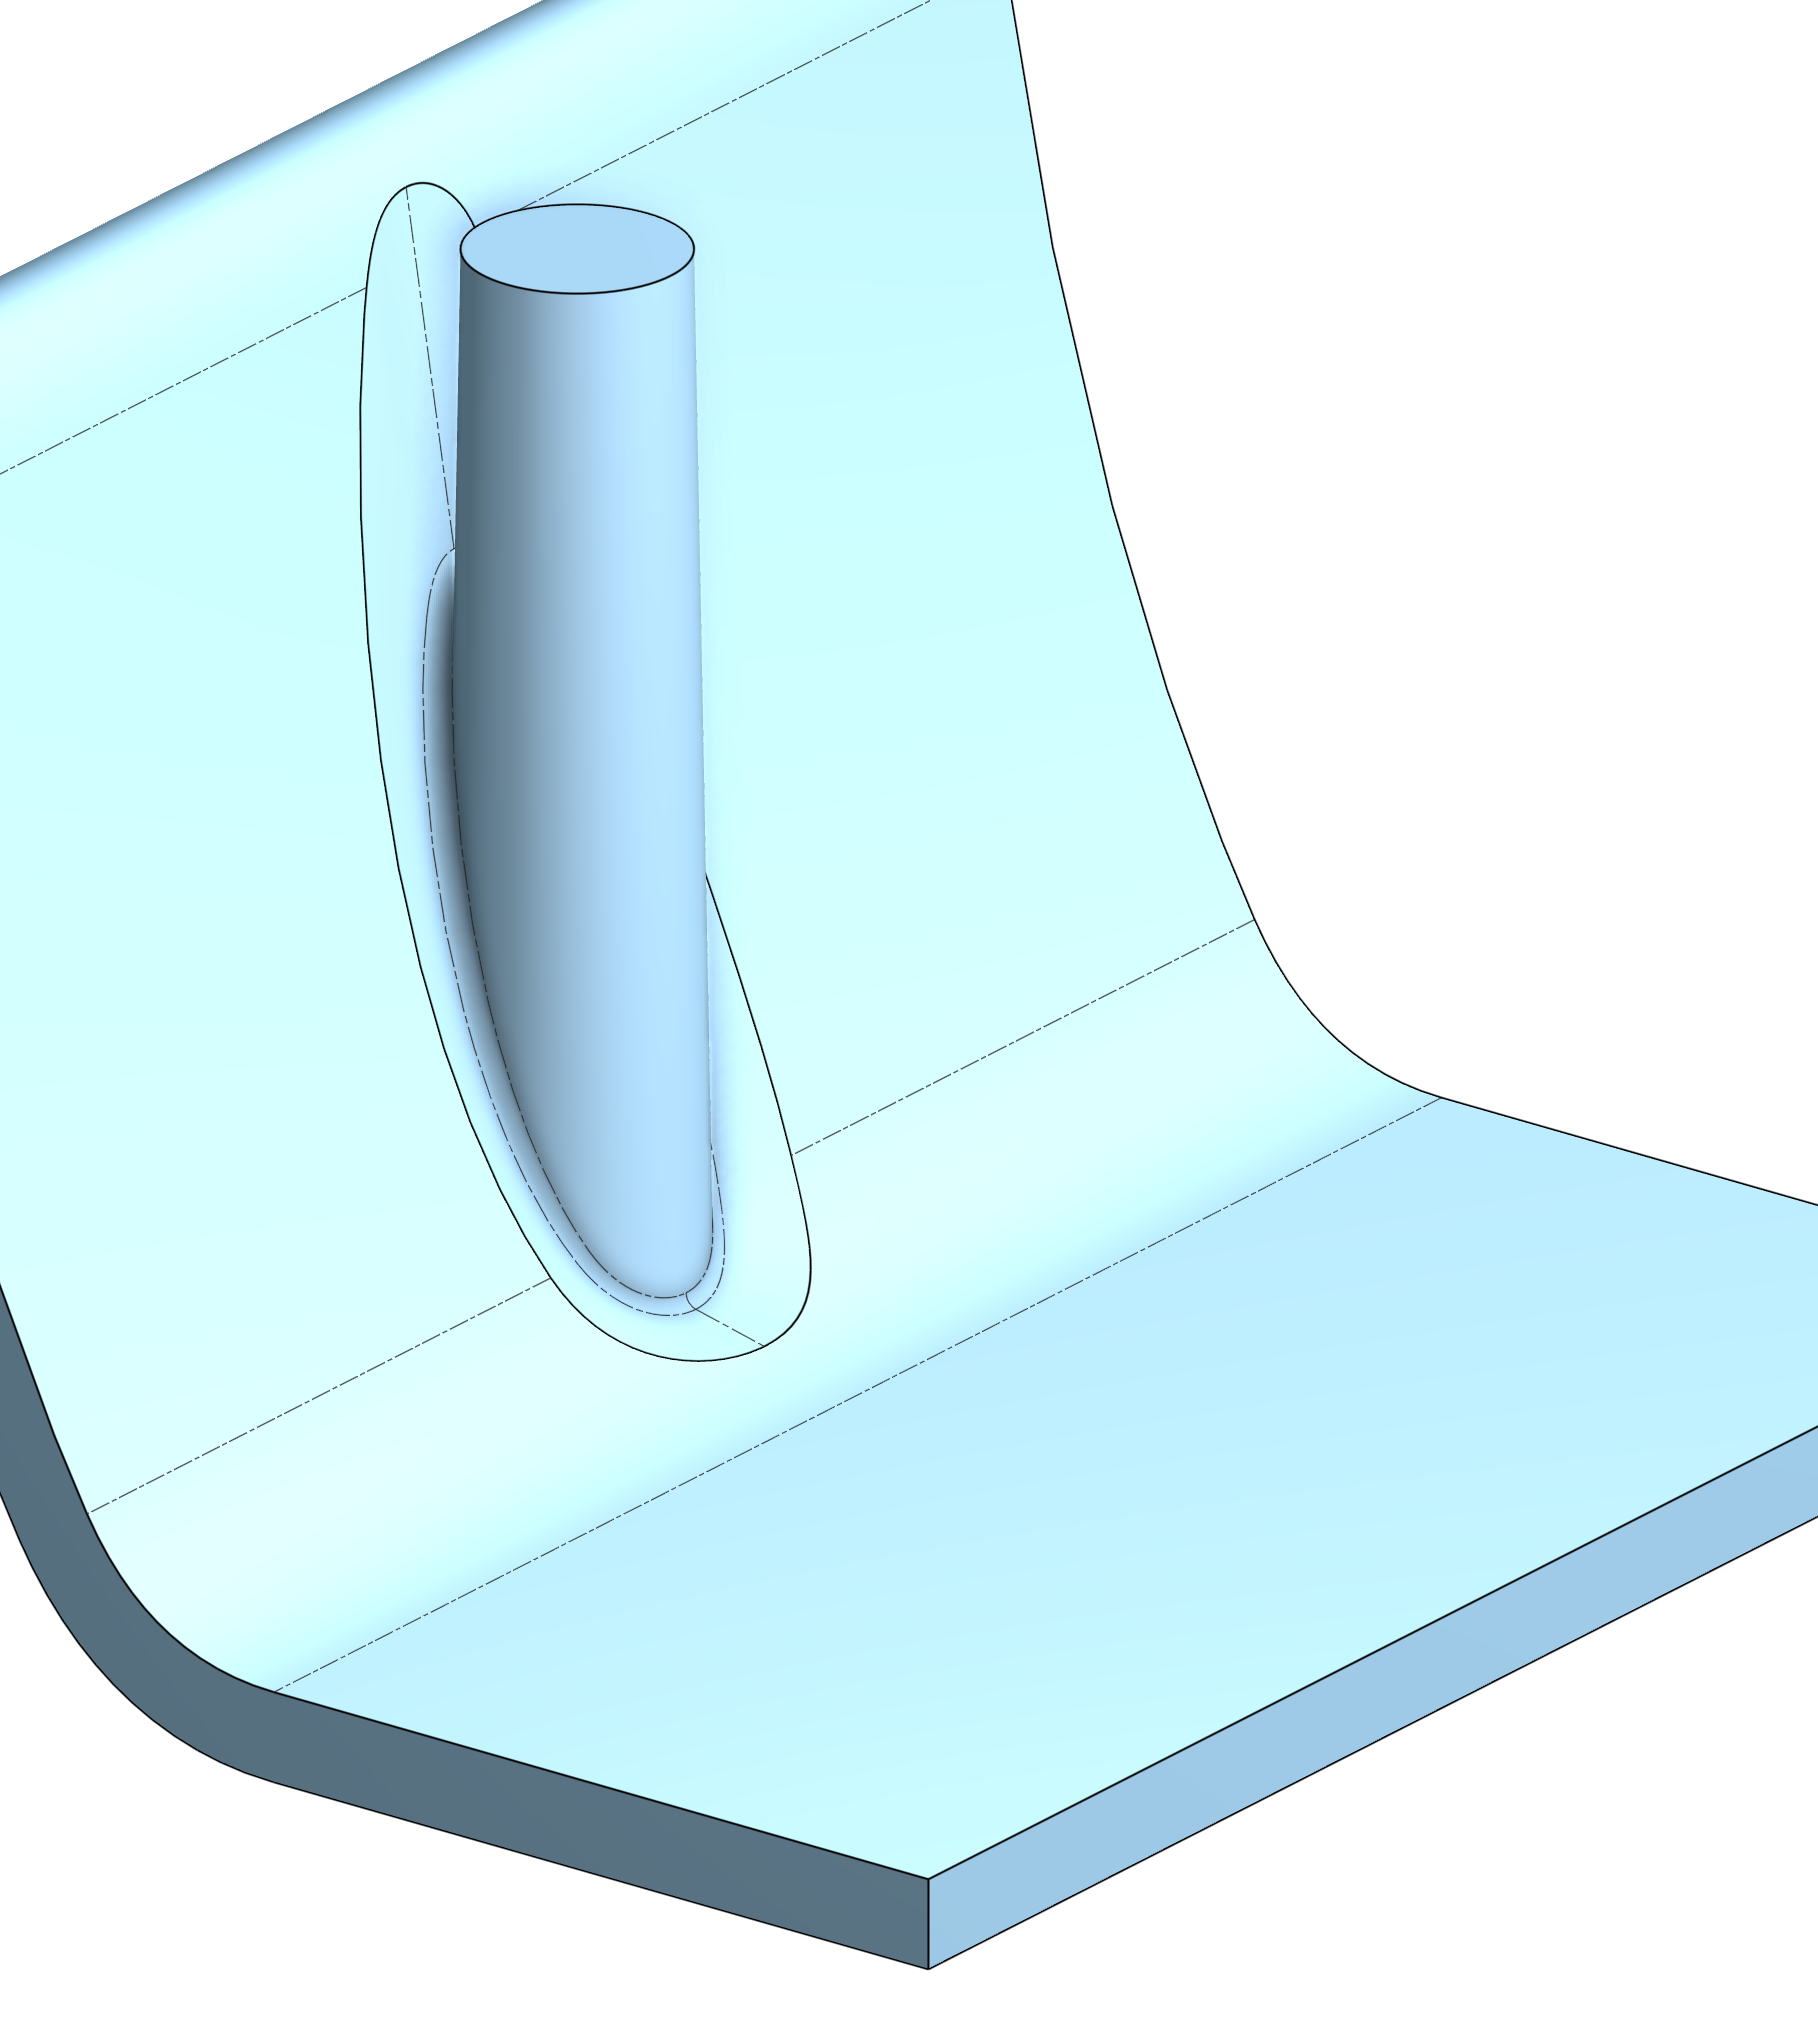
When the wall is really inclined, a boss is close, it's even more important to have a moat to reduce sink on the outside. Here's an example:
Here's a little playground where I've tried various ways to hand build this:
The only way I got something that didn't completely suck or fail, was to split the inputs in half, and use a boundary surface (which won't work with closed profiles). Getting clean edges which can then have fillets added is its own challenge.
Just curving the side wall a bit more makes the intersections a bit more complex. This example was easy to split in half since the boss axis is normal to the extrusion direction of the wall, but a more complex 3D shape will make it harder to generalize the boundaries. I have some ideas, but I'm wondering if I'm missing any. I've also tried using offset curve to see if it created anything that was cleaner, but it's easy to make a mess with really oblique angles like this. I tried using approximation with deg-3 and deg-5, but at least with loft that didn't help.
In another thread @Konst_Sh mentioned using opSplitBySelfShadow as a way to get the core/cavity surfaces as separate pieces. This could be helpful, but I would still need to locally do the offset to get the wall thinning, as a general offset of the internal surfaces is going to fail after other ribs and bosses are added.
Simon Gatrall | Product Development, Engineering, Design, Onshape | Ex- IDEO, PCH, Unagi, Carbon | LinkedIn
Comments
No idea if this will work for all of your demo cases necessarily but in developing my Chamlet feature I had to look at the fillet feature from a kind of inside out perspective. Chamfer might be able to be twisted to suit your needs with liberal application of move face and boolean prep to get the geometry flipped inside out to build a moat instead of a mound.
Derek Van Allen | Engineering Consultant | Meddler@Derek_Van_Allen_BD : i was going to check your example but got an:
"Document failed to load for workspace. Resource does not exist, or you do not have permission to access it." did you make it public?
@S1mon: Can you share your manual attempts?
Awesome feature you're working on!
I guess your regular offset distance in an extrude won't work either since the offset is measured in the extrude direction, rather than the offset direction normal to the wall, which is what you'd want.
so creating an offset surface first and extruding up to that surface may be more suitable (and efficient). (also means the offset doesn't have to be calculated each and every time).
On these steep walls, I would argue whether the chamfered approach is the best in terms of DfM in the first place. I think letting the offset face 'bottom of the moat' intact for a certain width is a better approach. It will reduce the sharpness of the mold steel the most, even though it's still sharp. in your playground example, it's even more of a knife.
Most screwboss-moat info online will also not show a chamfered one like your example although I do acknowledge that a shallow transfer from the wall thickness around towards the moat will be better than the 'sharp moats' generally depicted. In this case I achieved that with a fillet with r=wall_thickness. Benefit being that it is significant on the sharp perpendicular wall on the right, but not required and much smaller on the steep wall to the left.
kinda like this:
What I have working automatically in the feature:
In walls that are somewhat reasonable, I create a flattened reference (this is with fillets off and draft off):
I can draft the sides of the recess along the boss or normal to the flattened surface (here I've reduced the diameter of the moat, and added 60 deg draft, starting from the recess, normal to the flat):
Here I've turned on the moat fillet and the boss fillet (they're set to small values to make them distinct):
This another option where I don't draft the moat, but I go back to the initial moat diameter and use a large moat fillet:
BTW, the core pin can have a spherical end, or a flat end, or a sloped end. The flats/sloped normally have a fillet on them:
@jelte_steur_info The moat needs to handle situations like what you show. Currently it will fail miserably. I think it's rational to simplify the end reference for the core pin options, but the moat really needs to work with an offset of whatever is there.
Unfortunately, this is the kind of thing that I've usually ended up hand building per project/boss due to all the crazy things that you might run into. Loft, chamfer, fillets, etc are hard to generalize to whatever wall geometry the boss/moat might have to deal with.
I've been going through stuff I have in my portfolio and thinking about what this feature need to do to handle all those cases automatically. That's help drive some of the flexibility and automation I've put into it, but I will need more people to test this, and I will need more test cases. Anyone that's interested, please reply or DM me.
Thanks.
Simon Gatrall | Product Development, Engineering, Design, Onshape | Ex- IDEO, PCH, Unagi, Carbon | LinkedIn
It was bound to happen to me after I kept bullying @EvanReese with that same gif. Should be public now.
Derek Van Allen | Engineering Consultant | Meddler@Derek_Van_Allen_BD
If chamfer was robust enough, that approach might work. Unfortunately I've run into too many things where it just says no. It also fails miserably to understand what D1 x D2 should do.
Here's looking at the side view with the chamfer:
The two edges of the chamfer are somewhat ok on the lower side of the moat, but as it climbs the side wall, it's useless. If I switch to "offset" measurement I get this:
I've tried using Face blend in chamfer mode with limits, and that's not very robust.
Simon Gatrall | Product Development, Engineering, Design, Onshape | Ex- IDEO, PCH, Unagi, Carbon | LinkedIn
@S1mon: could you come up with a way to evaluate the wall steepness? you might choose your current moat function up to a certain angle wall angle. also because it may compute faster than more robust elaborate options.
Then for steeper angles either create a simple moat solid for the user to adapt and customize for their particular situation (perhaps with a checkbox for the boolean?) and/or create a more elaborate function for the steep walls that may requires some tuning by the user (e.g. fillet radius).
Either way because of sinkmark issues, super steep walls aren't suitable for screw bosses at all. so a limit would make complete sense.
@jelte_steur_info
I can definitely look at steepness. I currently have probes (ray casts) that find a bunch of points and then fit planes through them. That's how I can simplify the bottom of the boss and create the core pin ends so that they aren't some crazy surfacing. I could use the angle between the planes and the boss axis to make some strategic choices.
I do have some options for the user, and I probably need some really brute force but robust solution for when the wall has steps or lots of G0 connections under the boss/moat area.
Steep walls are not "suitable", but industrial design and product requirements (overall outside size vs internal packaging) drive all kinds of less than ideal mechanical engineering and moldability situations.
I generally try to avoid the complexity of putting in moats if possible (for ME and tooling simplicity). Sometimes you need them. Sometimes you especially need them because the boss needs to be on an inclined wall. These two bosses (in the section) had to be in a tight area and be connected to some ribs that couldn't be interrupted. The ID was locked a long time before this spin of the ME work. The other bosses had thin enough walls and gusset ribs to keep them more simple.
(this was done in Solidworks)
Simon Gatrall | Product Development, Engineering, Design, Onshape | Ex- IDEO, PCH, Unagi, Carbon | LinkedIn