Welcome to the Onshape forum! Ask questions and join in the discussions about everything Onshape.
First time visiting? Here are some places to start:- Looking for a certain topic? Check out the categories filter or use Search (upper right).
- Need support? Ask a question to our Community Support category.
- Please submit support tickets for bugs but you can request improvements in the Product Feedback category.
- Be respectful, on topic and if you see a problem, Flag it.
If you would like to contact our Community Manager personally, feel free to send a private message or an email.
Options
HSR 45 Manifold
 billy2
Member, OS Professional, Mentor, Developers, User Group Leader Posts: 2,099 PRO
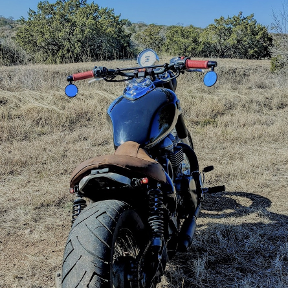
So my triumph quit running and it's my favorite commuter bike.
These had to go:

These are CV carburetors and they're not the best in the world for racing. I've been wanting to replace them for some time now.
This is a Mikuni HSR45:

Most would agree this would be an improvement.
2 intake ports and 1 carburetor now what?:

I've spent a lot of time on this little project and it's almost done. Those who follow this forum know I like customizing bikes using onshape and every additive method available on this planet. How do you connect 1 carburetor to 2 ports?
Like this:

How do I know it'll fit?
Like this:

and this:

At rustyshed.com, I've incorporated "quill" a web editor for creating reports. Let me know what you think.
http://rustyshed.com/?quill=5e0ab79fba3e293b52777548
These had to go:

These are CV carburetors and they're not the best in the world for racing. I've been wanting to replace them for some time now.
This is a Mikuni HSR45:

Most would agree this would be an improvement.
2 intake ports and 1 carburetor now what?:

I've spent a lot of time on this little project and it's almost done. Those who follow this forum know I like customizing bikes using onshape and every additive method available on this planet. How do you connect 1 carburetor to 2 ports?
Like this:

How do I know it'll fit?
Like this:

and this:

At rustyshed.com, I've incorporated "quill" a web editor for creating reports. Let me know what you think.
http://rustyshed.com/?quill=5e0ab79fba3e293b52777548
4
Comments
Christmas came a little late for me:
My good friend recommended I roll my bike outside before trying to start it for the first time. He's afraid I'll burn the garage down.
It won't start because the battery is dead. You'd think I should've hooked her up to a battery tender; that's what she gets for breaking down.
I've had plastic parts on bikes for over 2 years and they show no signs of degradation due to being outside. Theres a lot of plastic parts on motorcycles these days so I don't worry about using plastic on a motorcycle.
As far as sealing goes; I just clamp it down. The hose clamps seem to pull the plastic together and form a seal. I'm running a .2mm clearance gap. Once it's running better; I'll spray a little ether around the joints while it's running to see how good the seal really is performing. Right now I think it's pretty good.
I'm still worried about temperature on a hot day. May need a rev 2 to stop heat transferring from the head. Being an engineer; it's more of a challenge than a problem and there's gotta be a solution. I'm not going to fix it until I have the problem. I will keep an eye on it so I can always ride home. I don't want to have a droopy carburetor!
Dividing up the flow was another challenge. I did use CFD, simscale and 100's of "what if" tries before coming up with something that worked. The brief run I show in the video; my gas tank was a tiny funnel; each cylinder was popping nicely better than the individual carburetors. I don't think the carbs were balanced before. I think they're much better now. A test run around the block will prove this out.
I still need to make throttle cables, attach the choke, assemble all the hoses, design a new velocity stack and then take her out for a ride around the block. I know I'll need to re-jet everything but this is fine.
The biggest deal was getting the geometry correct. I've been working with onshape & meshes for a long time and I'm getting better at it every project.
HWM-Water Ltd
My wife has approved me buying one, but I'm not sure I want to run a print machine.
We had desktop metals in a couple of month ago. Saw a demo of markforge metal printers about 6 months ago. Turns out getting permits to run these things in California is problematic.
Yes, I want to redesign hand grips on motorcycles and I think metal is the way to go. Why do mountain bikes have such cool looking levers and motorcycles have cow horns from 1950's?
We have 5-axis at work and I'm helping these guys set that up. 5-axis machining is pretty cheap. But I'm not sure I want to run a mill either.
It's an exciting time to be an engineer.
Top view of a new velocity stack on a Triumph Bonneville:
The further out it sticks; the better the performance. The further out it sticks; I'll end up kicking it by mistake. I just want it to look right.
Side view of a new velocity stack on a Triumph Bonneville:
Iso view of new velocity stack:
Stack is 65mm ID x 75MM and is configurable.
Once I get her running and after taking her out for a couple of runs down Highway 101, I'll update Rusty Shed and include a link to a cloud configurator for motorcycle velocity stacks.