Welcome to the Onshape forum! Ask questions and join in the discussions about everything Onshape.
First time visiting? Here are some places to start:- Looking for a certain topic? Check out the categories filter or use Search (upper right).
- Need support? Ask a question to our Community Support category.
- Please submit support tickets for bugs but you can request improvements in the Product Feedback category.
- Be respectful, on topic and if you see a problem, Flag it.
If you would like to contact our Community Manager personally, feel free to send a private message or an email.
How can I create an angle cut out of a cylinder? (sort of like a needle)
 zach_morris
Member Posts: 25 ✭✭
I’m brand new to Onshape. I’ve used 2D animation apps before, and have gone through a few tutorials to make pretty basic shapes.
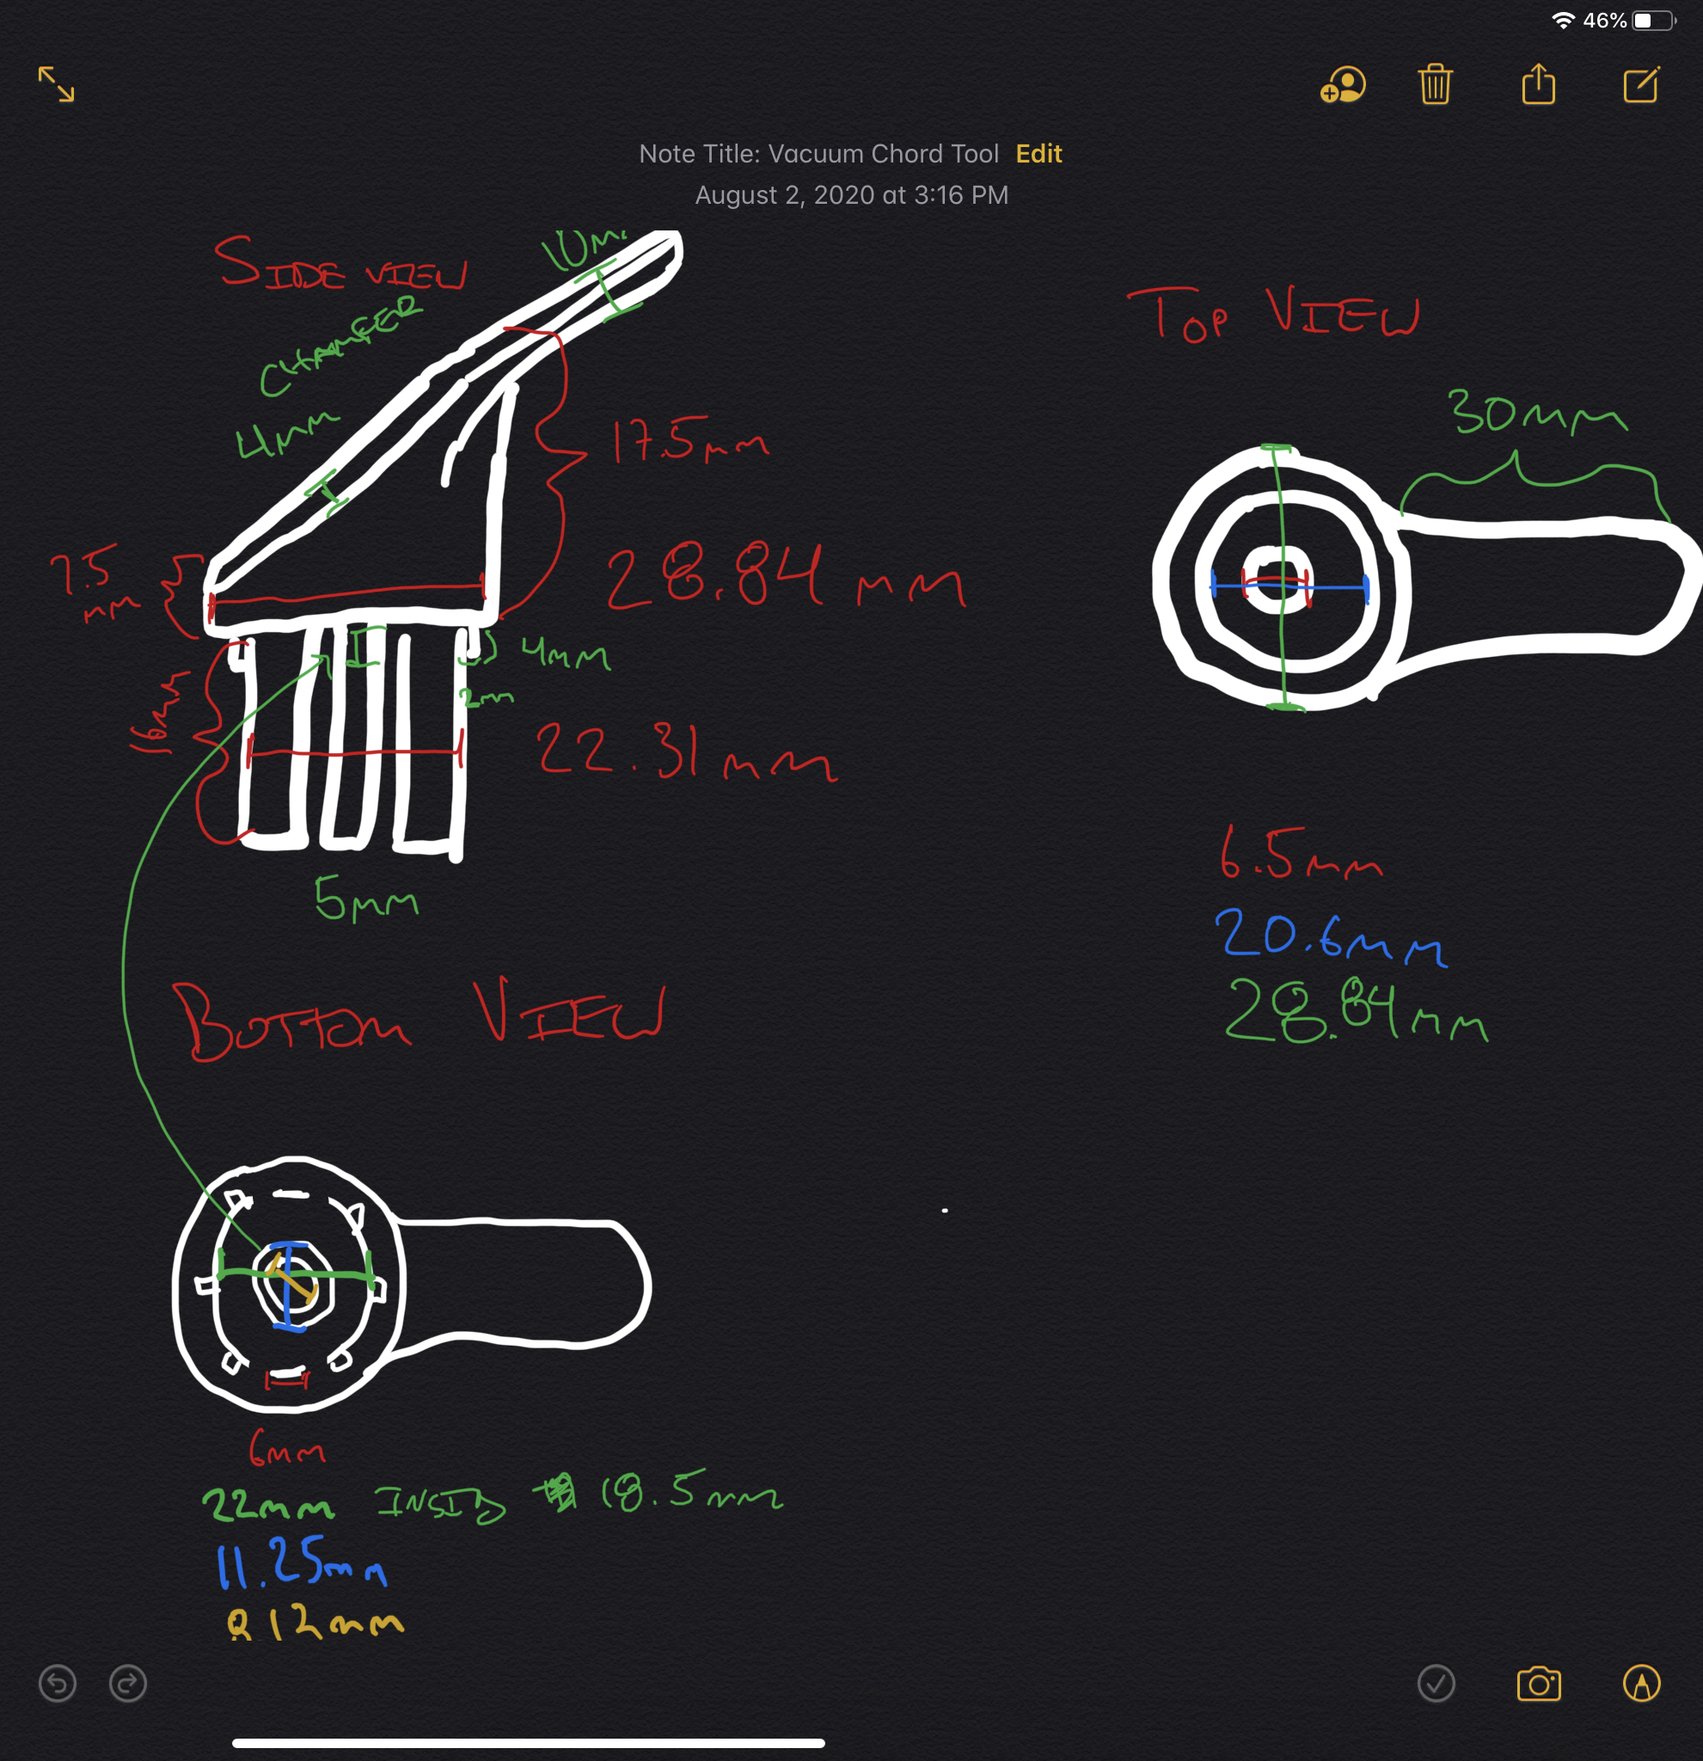
I’m curious how I would make the device below. It’s a hallowed out cylinder that needs an angled slice (sort of like a needle), and has an arm protruding out of it at an angle.
I started by my making a 2d version of the “Top View” and bottom view and extruded it out, but I couldn’t figure out how to modify that in any way to resemble the shape of the side view. I included a snapshot of my failed attempt below.
thanks!


Tagged:
0
Best Answer
-
 steve_shubin
Member Posts: 1,118 ✭✭✭✭
@zach_morris
Is this along the lines of what you are looking for ?
https://cad.onshape.com/documents/da774c074805ea26c2363e8e/w/7f9ba21648ea066dd3f02fc7/e/a7299be335fa072ad5ece077 5
5
Answers
Is this along the lines of what you are looking for ?
https://cad.onshape.com/documents/da774c074805ea26c2363e8e/w/7f9ba21648ea066dd3f02fc7/e/a7299be335fa072ad5ece077
@steve_shubin I just realized you finished my part for me. You sir, are a true friend of Narnia. I’m going to follow the history and see if I can learn how to do what you did.
Glad to hear it helped.
Originally I tried 10 mm on the offset, but it looked too thick compared to what you sketched in your notes. So that’s why I made the offset 7 mm. But yeah you got it figured out
To get the so-called chamfer, I tried using the chamfer tool, draft angle, sweep. But nothing gave the results I believe you were looking for. So I used loft. It took 9 steps in the features list to accomplish this so called ‘loft’. If somebody knows a more economical way to do it, let me know. It hasn’t come to my mind yet
TYPO CORRECTION
It took 9 steps in the features list to accomplish this so called ‘CHAMFER’