Welcome to the Onshape forum! Ask questions and join in the discussions about everything Onshape.
First time visiting? Here are some places to start:- Looking for a certain topic? Check out the categories filter or use Search (upper right).
- Need support? Ask a question to our Community Support category.
- Please submit support tickets for bugs but you can request improvements in the Product Feedback category.
- Be respectful, on topic and if you see a problem, Flag it.
If you would like to contact our Community Manager personally, feel free to send a private message or an email.
How to concave a flat surface?
 tj_thorniley
Member Posts: 65 ✭
tj_thorniley
Member Posts: 65 ✭
I'm trying to create a model of a microscope objective lens assembly. This is the first element in the series. It's a bit of an unusual shape, but essentially it's a cylinder with a 45° bevelled edge (the chamfer tool worked really nice, by the way).
It's basically done, but I need to make a shallow indent/depression (concave) in the highlighted surfaces. Kind of like the inverse of a dome, hemisphere, dimple, or parabolic dish (imagine scooping it out with a spoon). If I could invert the chamfer tool (and round off the hard inside edge/corner so that it's a smooth arc/curve - like in the diagrams below) that would be perfect.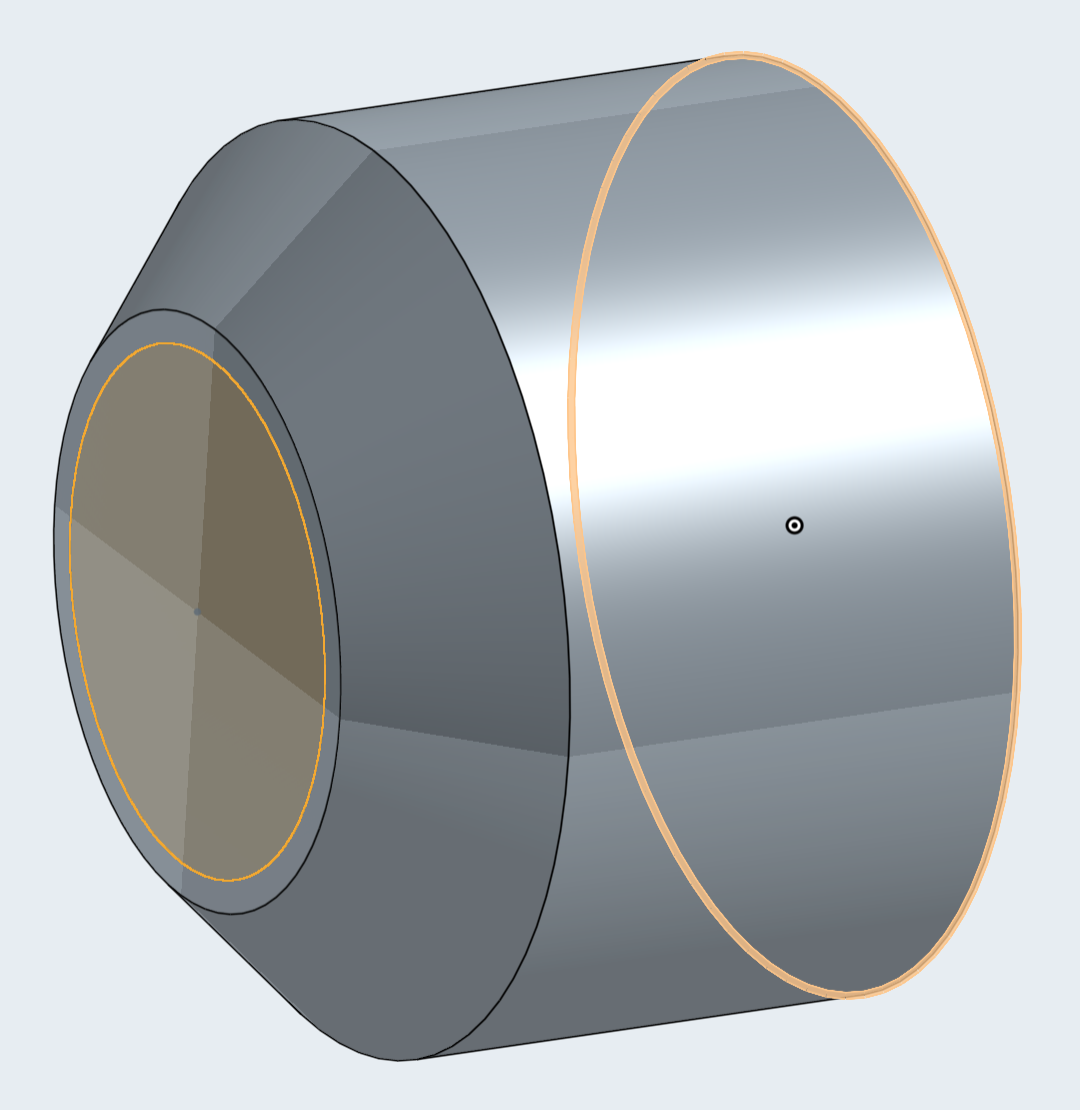
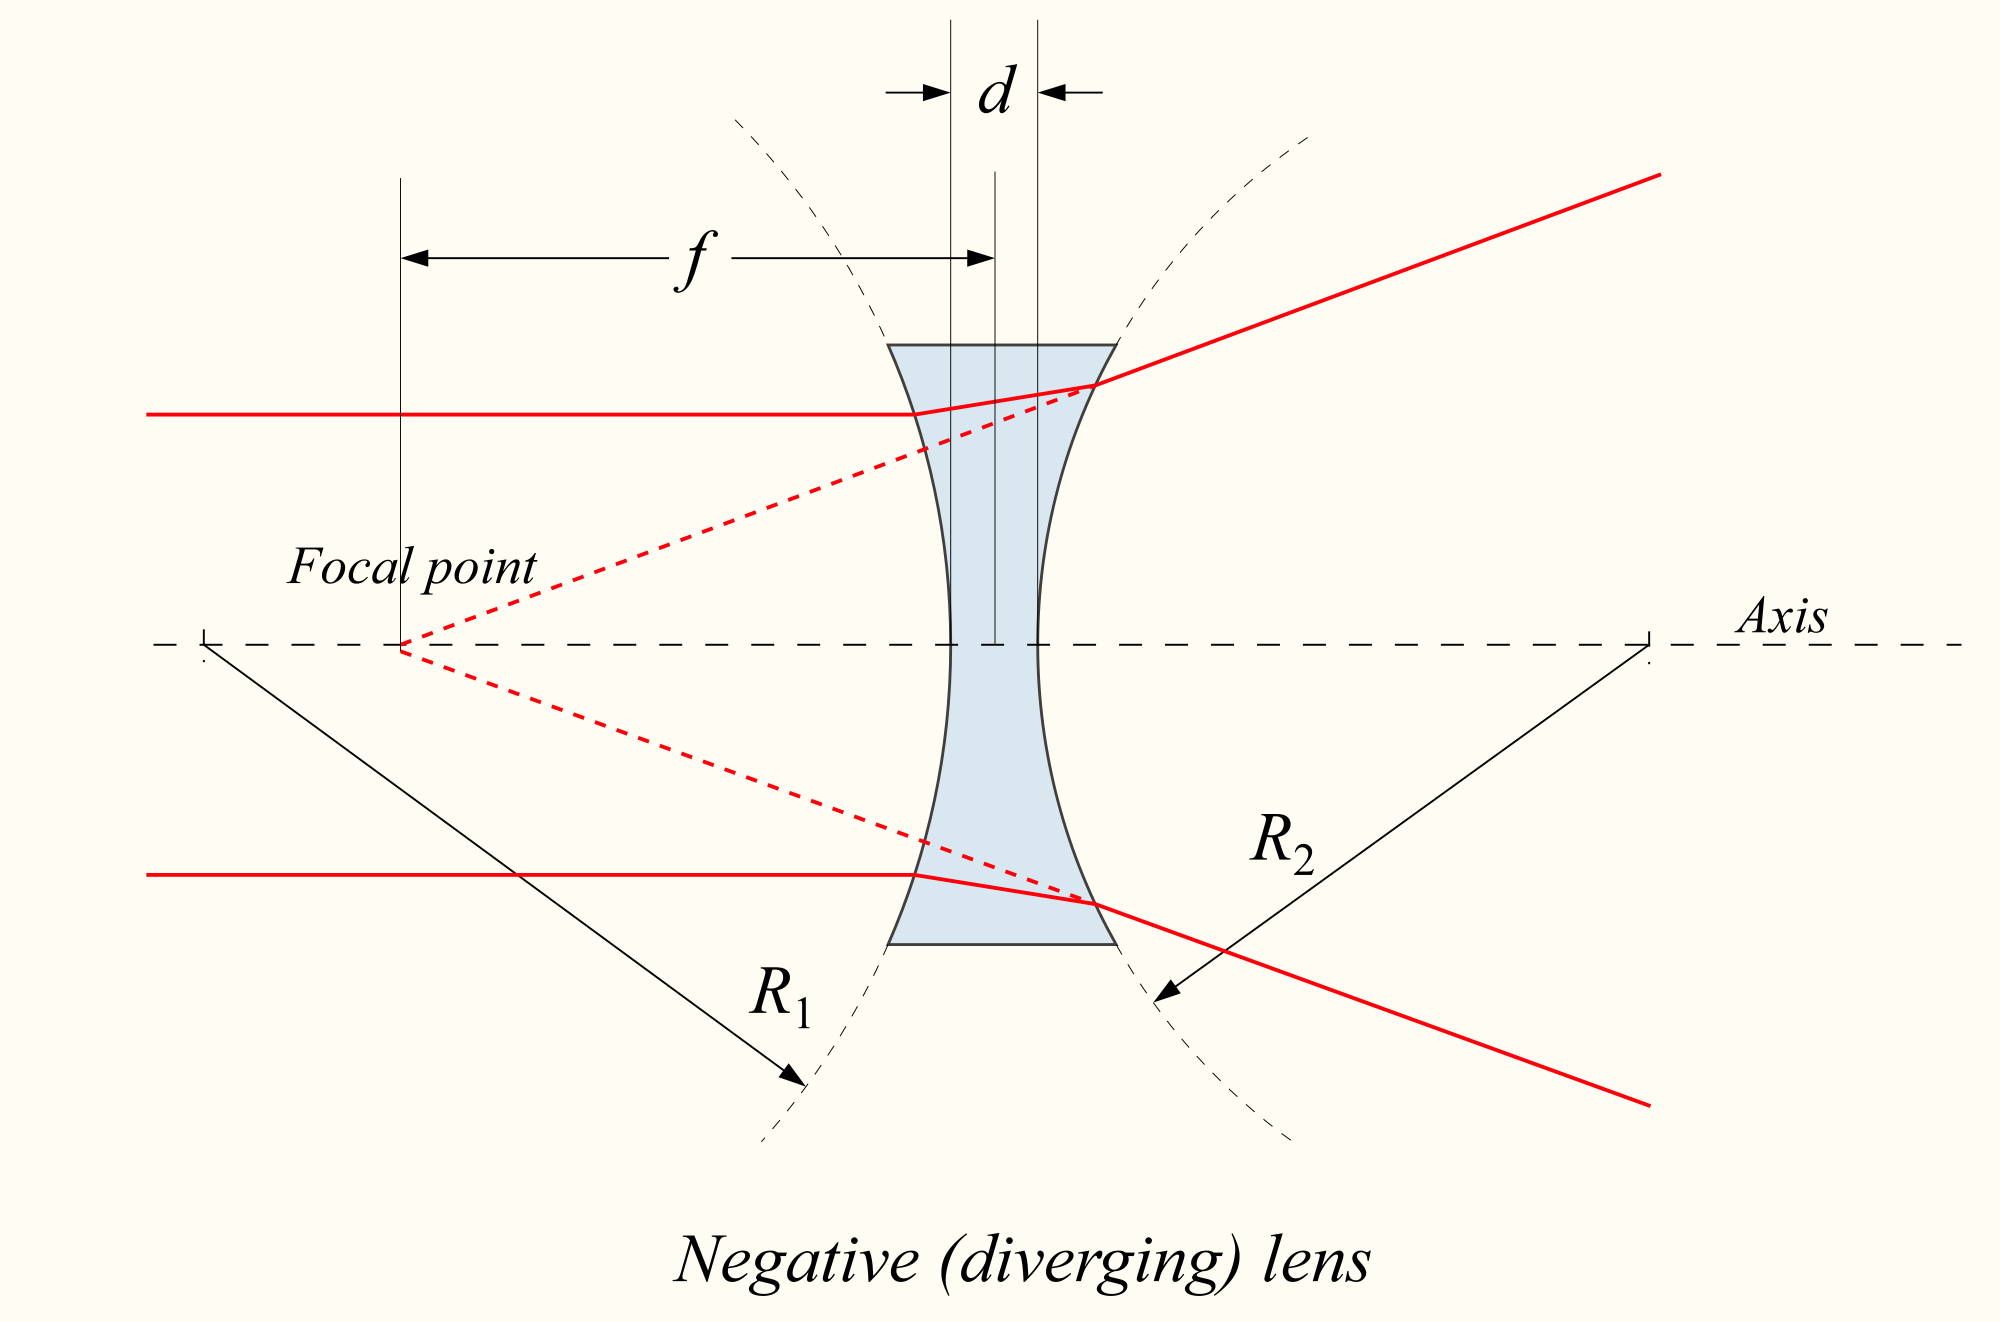
It's basically done, but I need to make a shallow indent/depression (concave) in the highlighted surfaces. Kind of like the inverse of a dome, hemisphere, dimple, or parabolic dish (imagine scooping it out with a spoon). If I could invert the chamfer tool (and round off the hard inside edge/corner so that it's a smooth arc/curve - like in the diagrams below) that would be perfect.
0
Answers
But for more complicated models that's going to be a major hassle. Rather than drawing the whole thing in a single sketch, I usually start with a basic sketch of a single shape, extrude, then sketch from a surface of the new solid, then extrude, and so on.
But if you really like to trim away at a solid you can use boolean operations and making your cuts that way
Option 1 Revolve remove the bits you want to cut away from your existing part.
Option 2 New Revolve to create whole part in one go. Note:- Easier than option 1
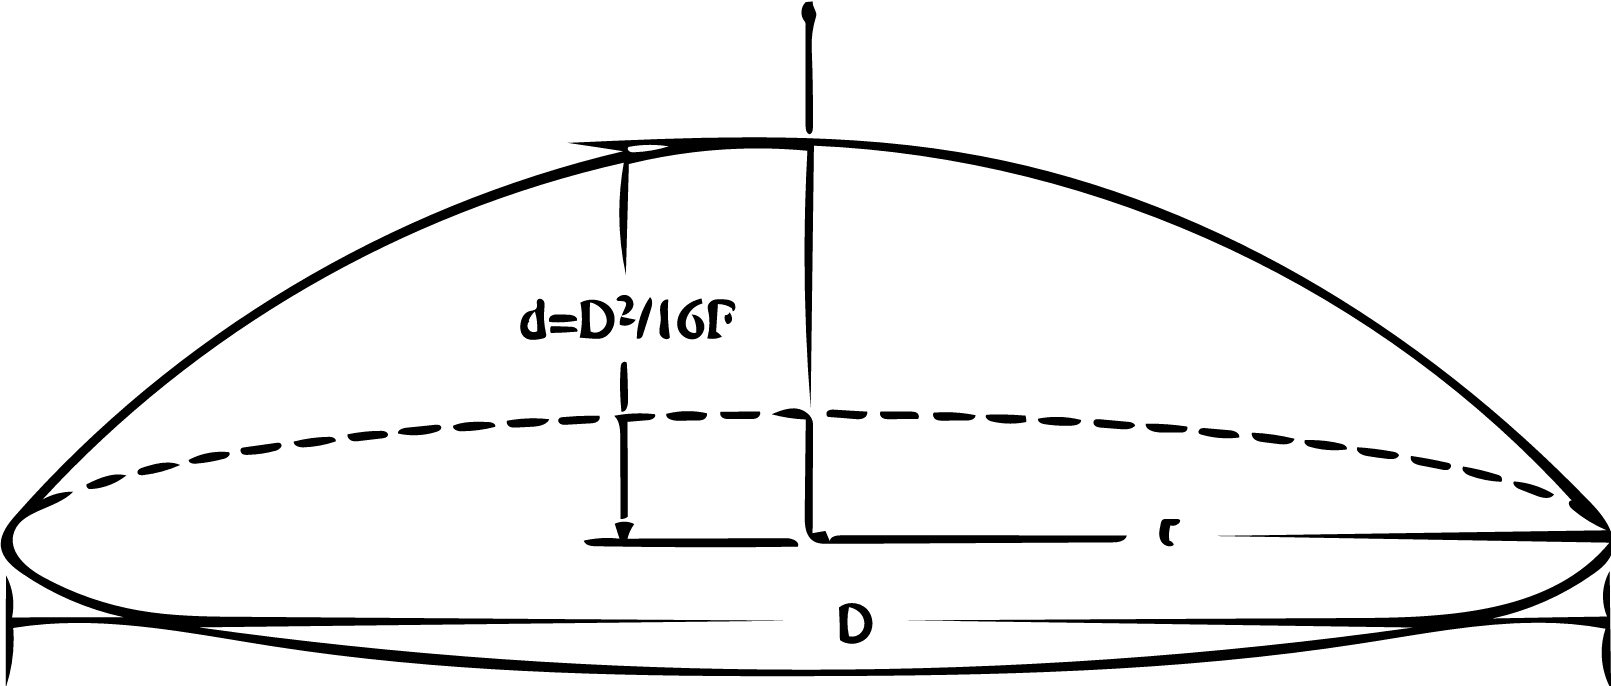
You can even use the equations you've posted above to drive the sketch for the revolve if you wish.
Owen S.
HWM-Water Ltd
Then bevelled the edge with the chamfer tool.
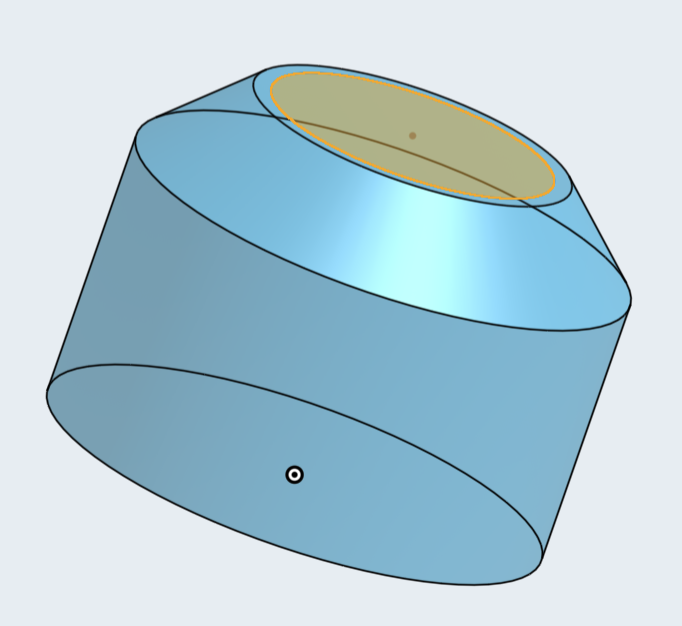
Changed the material to glass, edited the appearance to a translucent blue, and hid the intersecting planes.
But I still haven't managed to scoop the concave out of an existing object. This shape is relatively simple, but I anticipate having to do this kind of operation on more complex solids in the future. Having to redraw a completed part from scratch every time I want to make a minor adjustment is very quickly going to become a major headache. Especially if the dimensions are already specified.
I've tried to be detailed and include diagrams depicting every step of the procedure (not unlike a tutorial). If someone could do the same for me, I would really appreciate it. Thanks in advance.
Removing from an existing part is exactly the same but instead of selecting the "new" option on the revolve you select "remove" and then which part you want to remove it from. Termed the merge scope, shown below.
The highlighted area is the new sketch used to make the cut away. (The actual grey part was created earlier from an extrude of a circle.)
Note shown with cross section turned on as it shows the concave nature better, the part is of course whole with that view turned off.
File here:-
https://cad.onshape.com/documents/b6a887c3cdcfbf681b9c9373/w/f16831af92b9443420026b87/e/2b158c9b00f1666108d2bff7
Owen S
HWM-Water Ltd
@owen_sparks beat me too it,
but yea, what he said. above is another example drawing
Owen S.
HWM-Water Ltd
HWM-Water Ltd
For more info you should check out the OnShape youtube channel. All kinds of stuff to look at there, including a complete run down of this
It will be easier to help out if you post a link to your document (see instructions here https://forum.onshape.com/discussion/9107/forum-post-checklist-read-this-first#latest)
and some additional context on what you have now and what you would like to achieve.
All you need to get a section started is at least 1 flat surface or plane.
Once you have a flat surface selected, you can move/rotate the manipulator wherever you need.
If you grab the circle at the base of the arrow, then you change the start point of the section and you can snap it to any other vertex, including the origin.
https://cad.onshape.com/documents/d2a86f2a038bac6976d055a0/w/aafeaeea2f5793f490b24e03/e/a11571ff46247090ae374903
I tried lofting and ended up with more creases that just extruding circles then boolean subracting.
I'm imagining a soap bubble shape is more what you're looking for right?
Which is a bit out of my wheelhouse
https://cad.onshape.com/documents/7049d342b4e7ee052d899f27/w/3de4a12eb3cc3680b0e6edf9/e/09a515e631373149c6cfca54
This document has a relatively quick and dirty way to do it:
Simon Gatrall | Product Development, Engineering, Design, Onshape | Ex- IDEO, PCH, Unagi, Carbon | LinkedIn